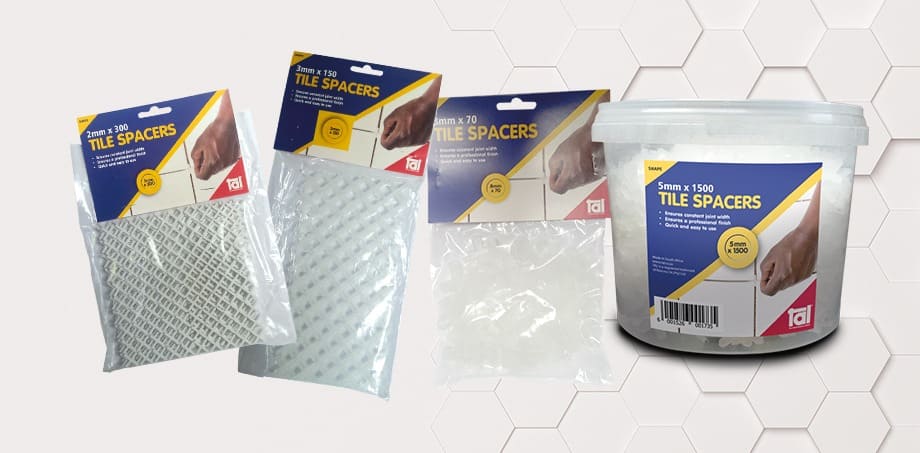
Tips for using tile spacers
PROFESSIONAL FINISH
Tile spacers give a tile installation a symmetrical and consistent finish, ensuring that all tiles are laid in an equal distance from each other

Choosing a spacer
Selecting the size of spacer required for a job comes down to personal preference.
-
Keep in mind that spacers dictate the width of the grout lines, and grout lines are a strong feature of the overall design.
-
If you’re a professional contractor, consider discussing the grout joint width with your client before commencing with the tile installation. It’s important to note that grout joints not only serve as “vents” for air circulation to assist with drying of the adhesive, but tile grout is also slightly compressible, and allow for small amounts of movement between tiles and avoid a compressive stress build-up.
-
It is also essential that the joints are not only wide enough to allow removal of adhesive residues from between the tiles so that the grout joint extends to a minimum depth equal to the tile thickness, but also to allow proper filling and compaction of the grout into the joint.
Consistent spacing
For a polished and visually appealing finish, the general rule is:
-
Ceramic wall tile installation: use tile spacers of 2 - 3mm
-
Ceramic floor tile installation: use tile spacers of 5mm
-
Porcelain, granite and marble tiles: are generally installed with a 3mm spacer
THERE ARE NUMEROUS FACTORS THAT CAN INFLUENCE THE SIZE OF THE TILE SPACERS YOU USE, INCLUDING:
-
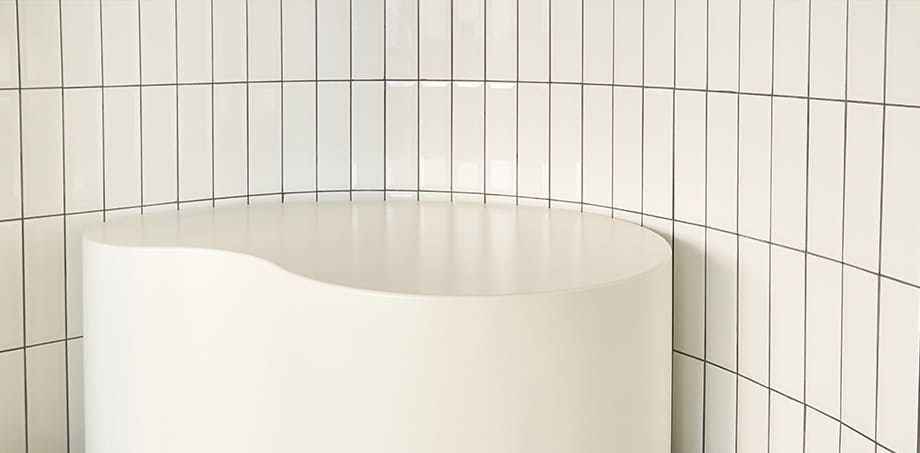
Unusual contours
The curvature around the shower, toilet base and basin pedestal will affect the overall design.
-
Odd-shaped rooms
Not all rooms are the same size, are square, or have walls that are equally distanced from each other. The solution is to use larger grout spacing to reduce the impact of the inconsistency on the overall tile installation.
-
Large format tiles
Due to their size and weight these tiles can be more challenging to install. Large format tiles may have permissible surface flatness irregularities, i.e. the tile surface may be ‘curved’ or ‘bowed’.
-
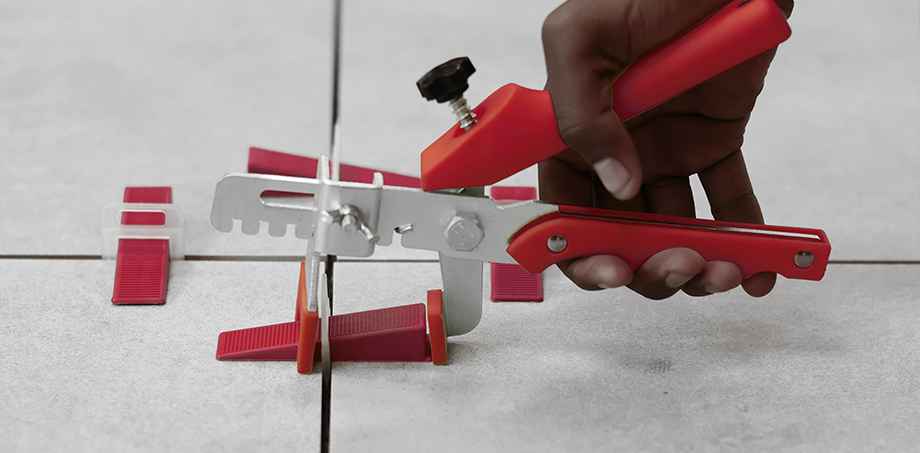
The use of self-levelling spacer or clip systems will assist with reducing ”lippage”.
-
A levelling system has three chief components: clamps (spacers), wedges, and pliers.
-
These elements work in unison to level the tiles and avoid the movement of tiles while the adhesive cures.
-
All levelling installation systems combine the use of spacers (to provide a consistent grout joint gap) with a method of applying constant pressure over two or more tile edges to keep them as even/level as possible.
-
-
Cut tiles
Wider tile spacers can help you to use fewer cut tiles across the length of a wall or floor, which will save you time and money.
-
Straight lines
Use a chalk line or laser level when laying tiles and spacers to maintain a straight line and achieve a professional finish.
-
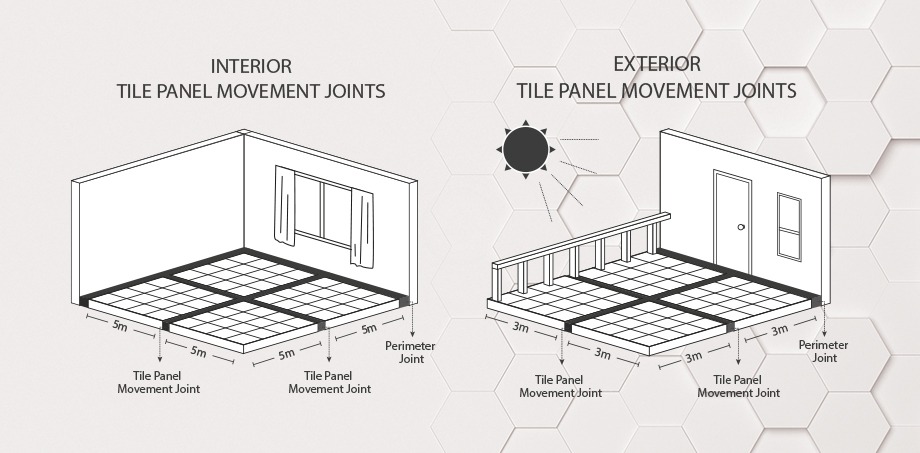
Tile panel movement joints and perimeter joints:
-
These joints must be a minimum of 5mm wide, and must extend through the tile and adhesive layers down to the substrate.
-
This is to allow for the anticipated movement in the installation.
-
Provide movement joints around the perimeter of all floors, in all horizontal and vertical corners and in large tiled areas at maximum 5m centres in both directions for interior surface bed applications, and at 3m centres for suspended slab and external applications.
-
Movement joints should be created at closer centres in installations where increased movement is expected.
-
To fit a tile panel movement joint, rake out joints and leave ungrouted. Fill and seal with a backing cord and good quality flexible joint sealant, such as TAL Sealmaster Cord and TAL Goldstar Sealmaster 1000 polyurethane joint sealant, in accordance with the manufacturer’s instructions.
-
Planning is key
Pre-test tile spacers by laying a trial run of your tile design in the centre of the room. This will help you to visualise the finished design from various points. Test a couple of different placements and decide which one suits the room the best.
For technical advice please contact our experts on 0860 000 TAL (825) or email: [email protected]
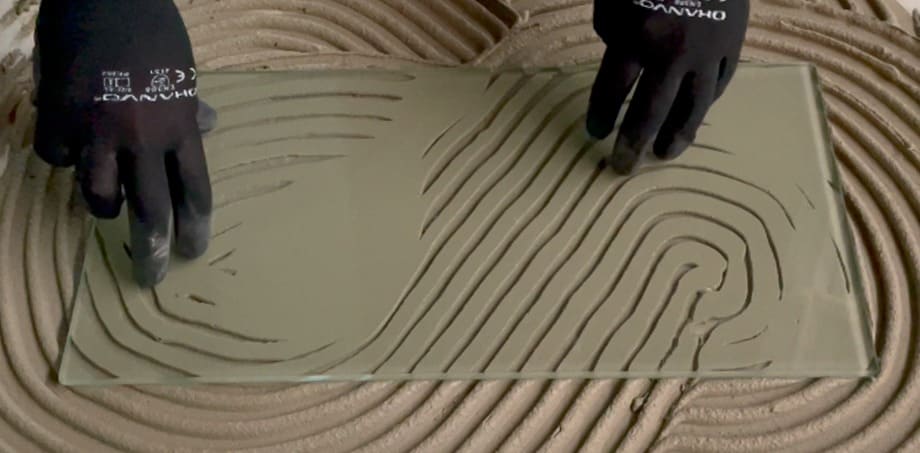
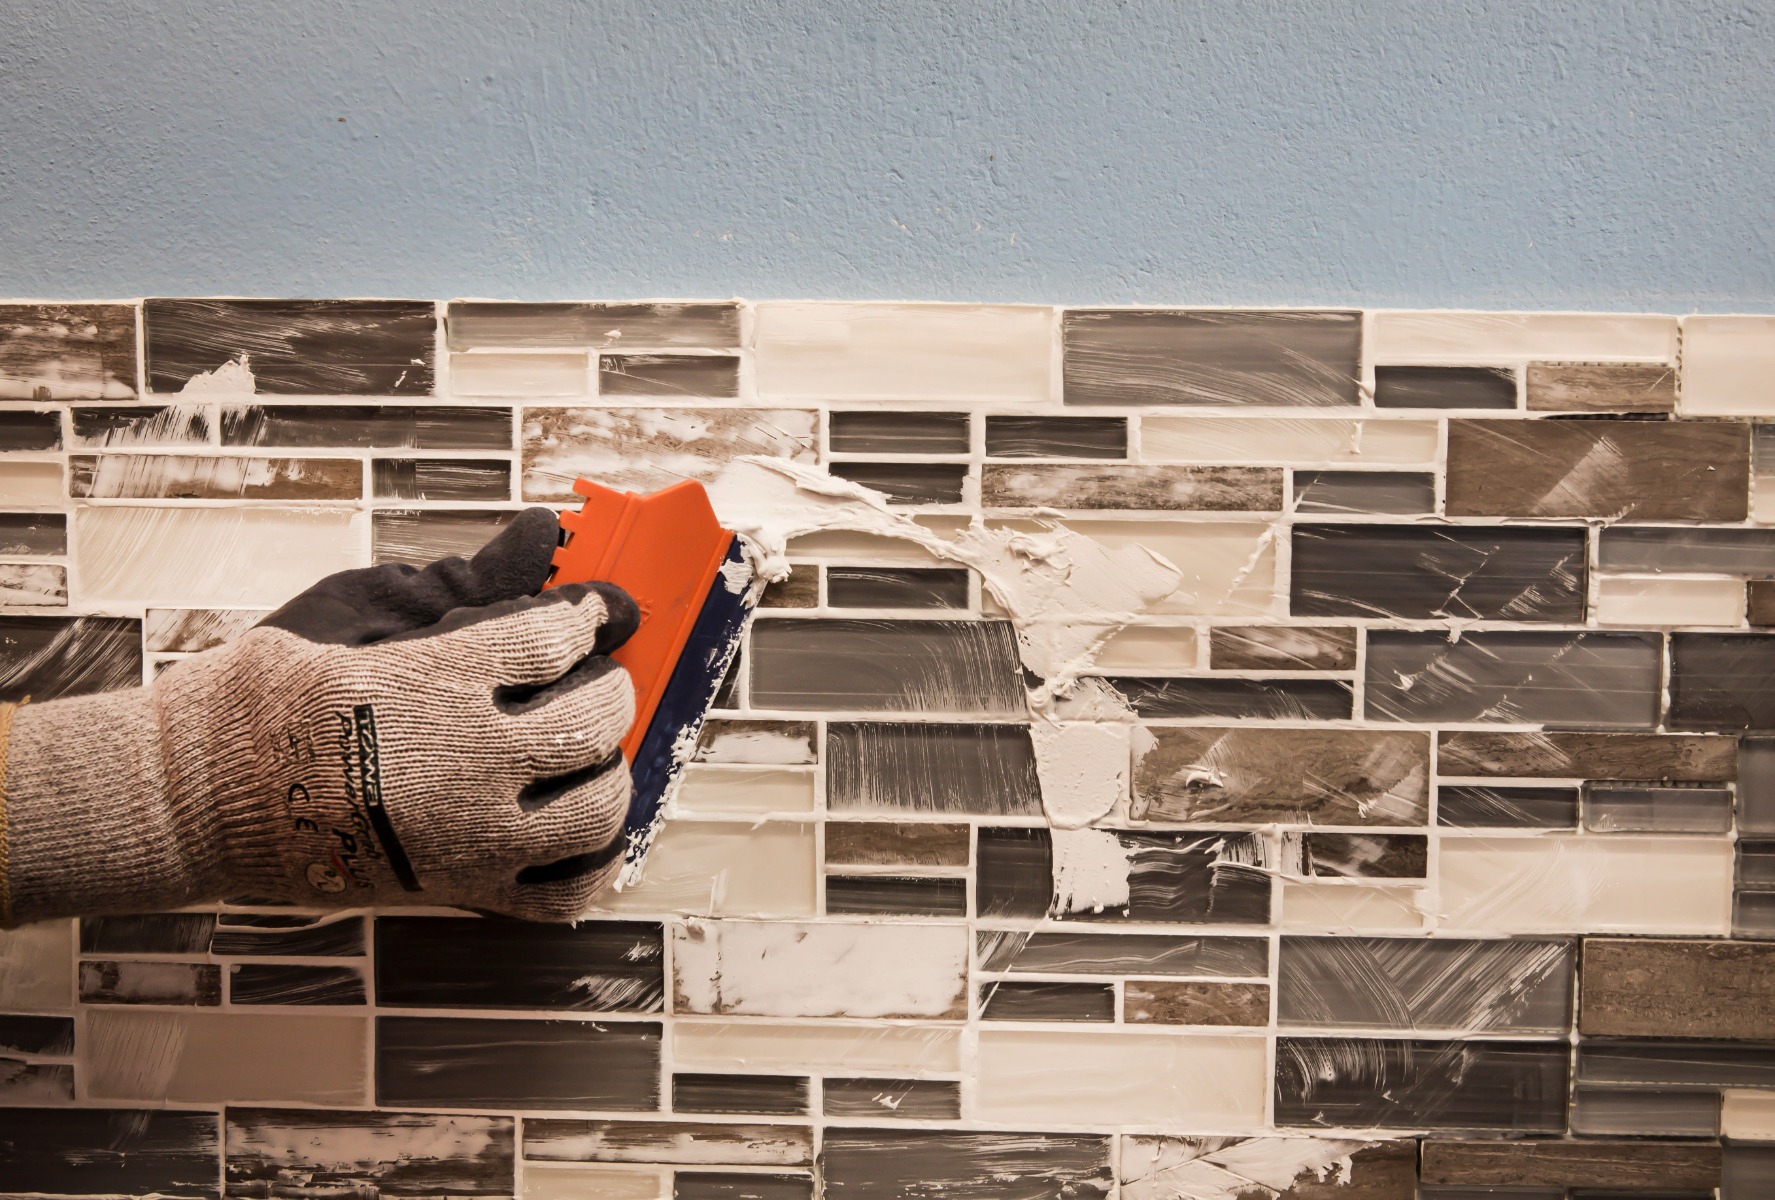
Allow the adhesive to squeeze through the joints between the mosaics, to ensure a good bond between adhesive and mosaics, and to form the grout. Place a tile spacer between the countertop and mosaic, as well as between the mosaic sheets, to keep them evenly spaced.
Wait 20 minutes, then, where necessary, fill in any low areas in the grout joints with extra adhesive. TAL Mosaicfix is available in super white and light grey, so choose the colour that will best suit the aesthetic you want to achieve. Work carefully to avoid scratching the tile surface, especially when installing metallic tiles.
Wait 20 minutes, then, where necessary, fill in any low areas in the grout joints with extra adhesive. TAL Mosaicfix is available in super white and light grey, so choose the colour that will best suit the aesthetic you want to achieve. Work carefully to avoid scratching the tile surface, especially when installing metallic tiles.
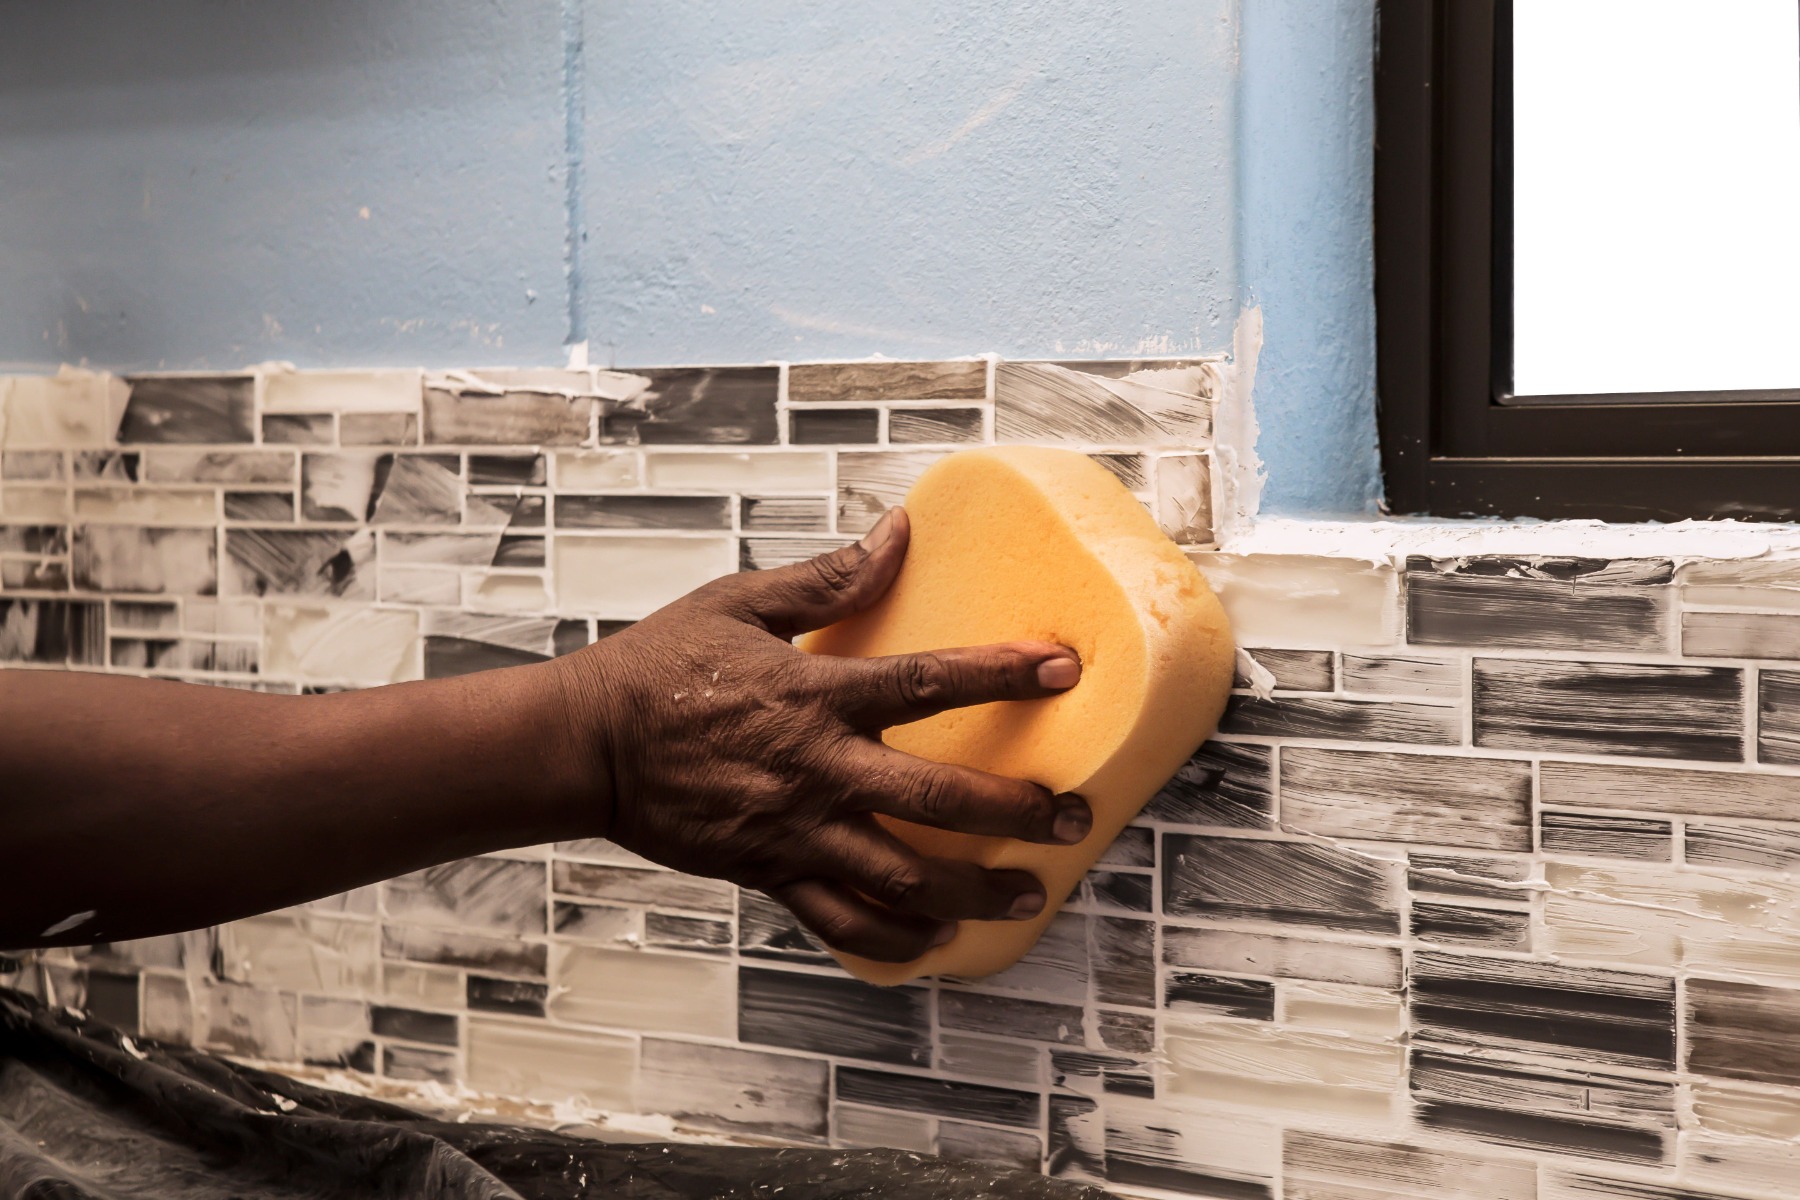
Once fully set, gently polish the face of the mosaics with a dry cloth

Apply a silicone sealant into the perimeter joint between the mosaics and countertop, and in any corners.
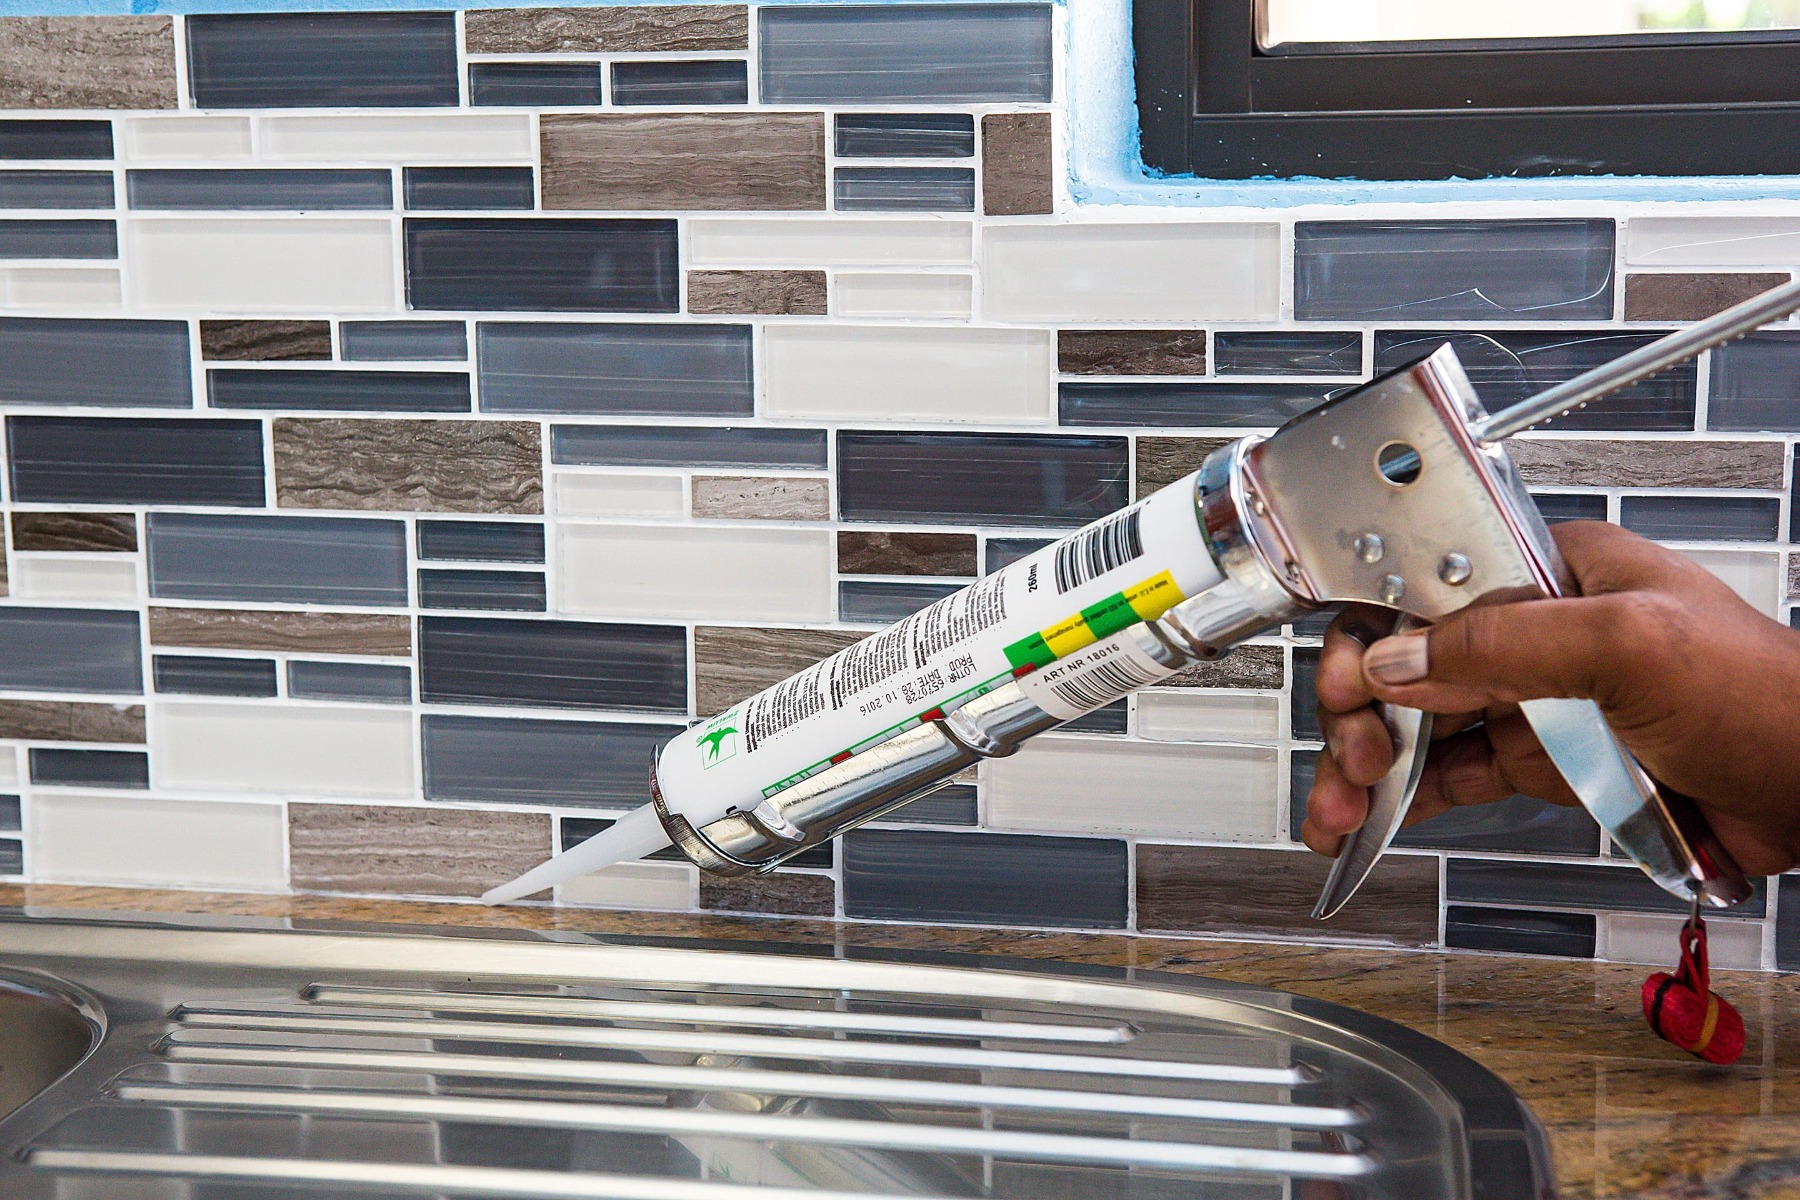
By choosing a kitchen splashback, not only have you managed to successfully upgrade your kitchen into a beautifully modern space, you’ve also ensured that your wall is protected against moisture and food stains. For more information on tile installation, contact the TAL Technical Advisory Service during office hours, visit our website, or send us an email.