Tools for large format tiles
MUST HAVE TOOLS FOR INSTALLATIONS
When it comes to installing large format tiles, having the right tools is essential for achieving a professional and flawless finish. In this blog post, we'll explore some must-have tools that can make the installation process smoother and more efficient. From lifting and moving heavy tiles into place, to ensuring precise cuts, uniform spacing and a long lasting bond - these tools will help you tackle the challenges of working with large format tiles.
WHAT IS A LARGE FORMAT TILE?
|
Installing 600 x 600mm tiles is fairly straightforward, however when it comes to installing larger format tiles, ie 600 x 1200mm, 1000 x 1000mm, 1000 x 1500mm, etc the installation becomes more intricate and labour intensive. This is when the correct tools become a necessity.
There are permissible manufacturing tolerances for ceramic and porcelain tiles, and large format tiles may have permissible surface flatness irregularities, ie the tile surface may be ‘curved’ or ‘bowed’.
A flat and level surface is a key factor in reducing the risk of “lipping” of tiles and achieving a successful large format tile installation. The installation of self-levelling underlayment compounds, such as TAL Screedmaster or TAL Superscreed SL, are ideal for correcting variations in floor levels to achieve the required flat, level surface.
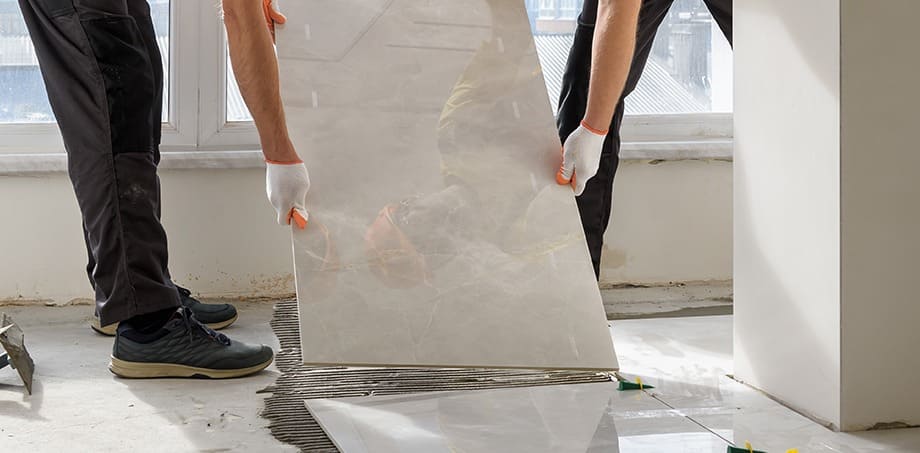
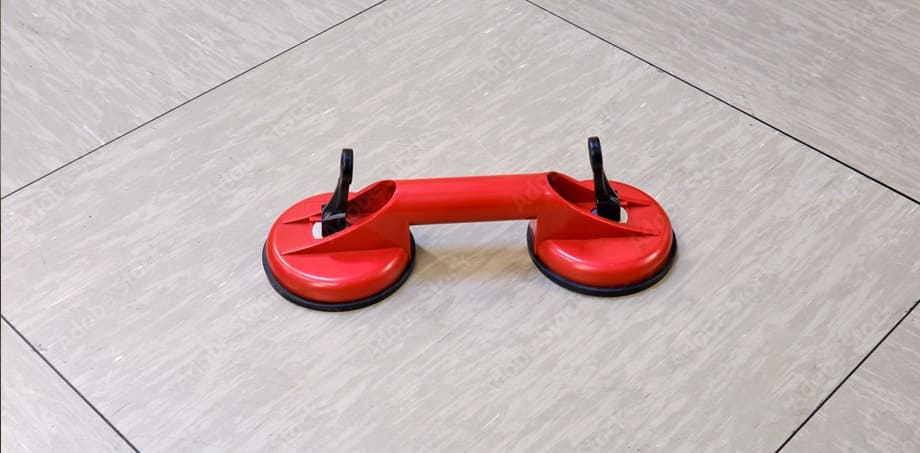
1. Suction Cup Holders: are indispensable when dealing with large and heavy tiles. Designed to create a vacuum seal with the tile's surface, suction cup holders allow you to lift and move tiles safely and efficiently and drastically reduce the chance of breakage of tiles.
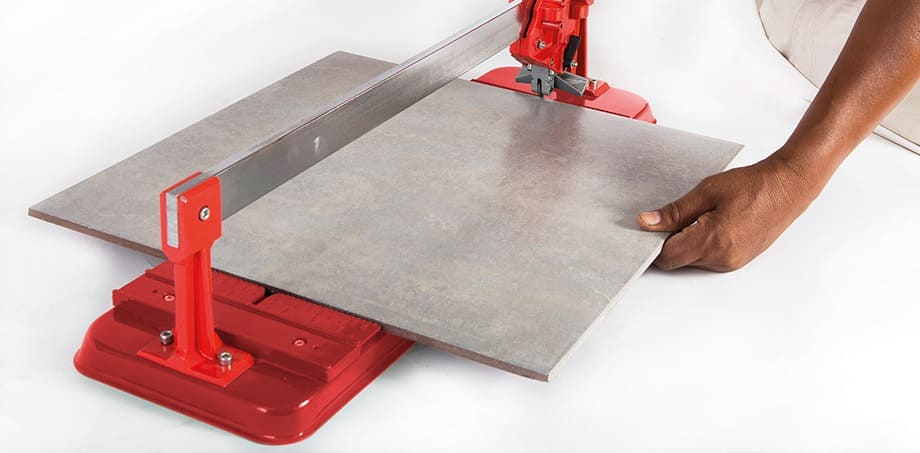
2. Tile Cutter: investing in a quality tile cutter that can accommodate the tile size can significantly streamline the installation process. For precision work on large format tiles, a wet tile saw, or tile bridge saw is the go-to cutting tool. These tile cutters provide the accuracy needed for larger tiles, ensuring clean and professional cuts.
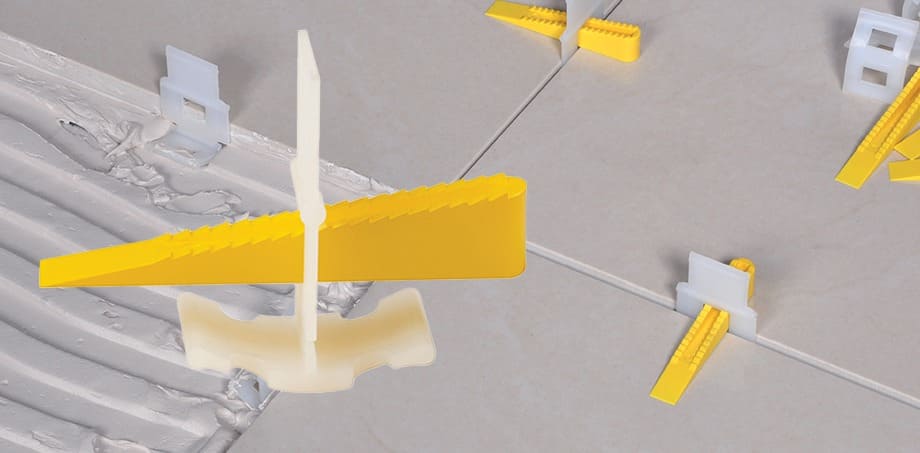
3. Levelling Spacers(also known as wedges or tile levelling spacers): are used to maintain an even and consistent gap between tiles. They help prevent tile lippage where one tile is higher or lower that its neighbouring tiles. Lipping spacers maintain a uniform alignment during installation.
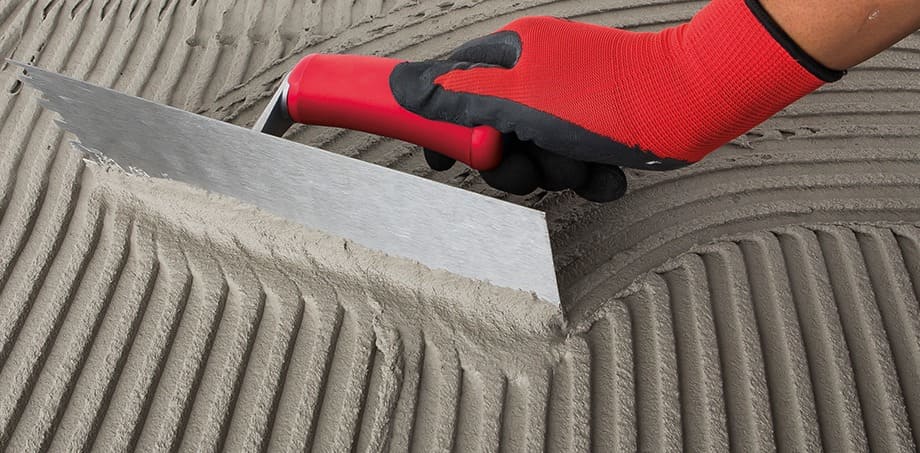
4. Suitable Adhesive Trowels: When installing large format tiles, the adhesive should be applied using the “double trowelling” technique. This means the adhesive should be applied on both the substrate and back of tile using suitable trowels to ensure full contact between the substrate, adhesive and tile. This is essential to avoid voids and air pockets in the adhesive bed beneath the tiles. A 20mm, or “thick bed” adhesive trowel is ideal for applying the adhesive onto the substrate. A smaller trowel can be used to apply the adhesive onto the back of the tile.
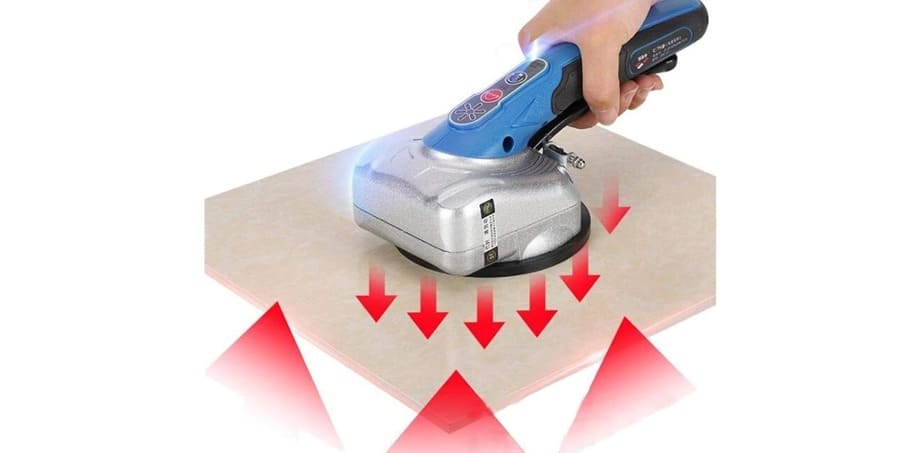
5. Small Compact Vibrator: Instead of a traditional rubber mallet, when undertaking large area installations, consider using a small compact vibrator to seat tiles in the adhesive. This tool vibrates or agitates the tile, eliminating air pockets and ensuring a solid bond. Particularly useful for large format tiles, the compact vibrator aids in achieving a level and well-seated installation.
Investing in these must-have tools for installing large format tiles will make a significant difference in the efficiency and workmanship of your tile installation projects. From handling heavy tiles with suction cup holders to achieving precise cuts with a wet tile saw, these tools are essential for any professional or DIY enthusiast looking to achieve stunning results in large format tile installations.
Equip yourself with these tools to make your next project a success, and ensure you get a professional finish with Goldstar XL Tile Adhesive - designed for large format tiles. With a 4-hour pot life and 30-minute open time, it gives you more working time to lay your tiles before the adhesive skins.
For technical advice please contact our experts on 0860 000 TAL (825) or email: [email protected]
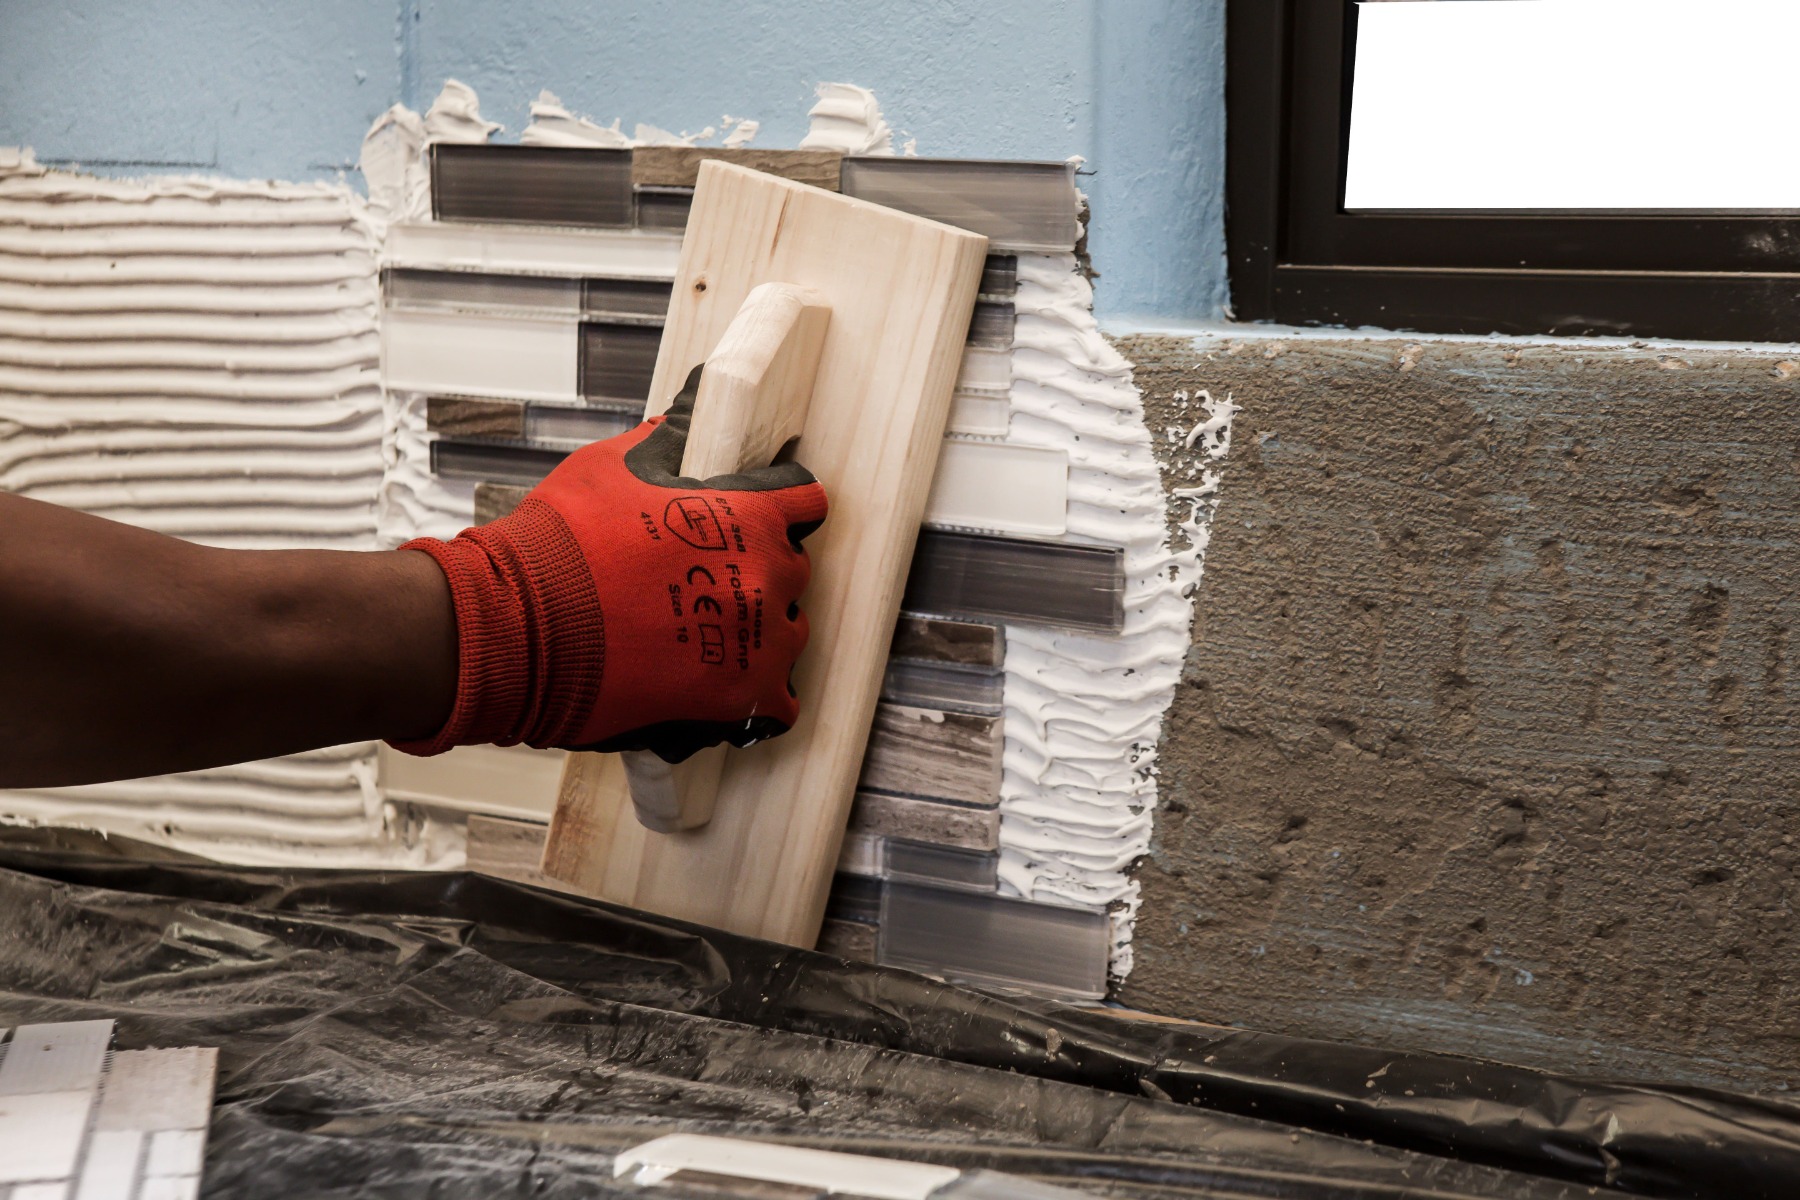
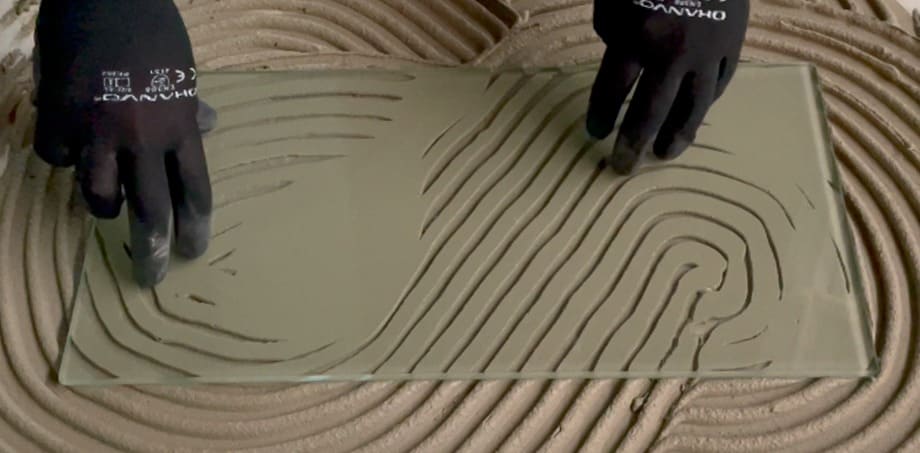
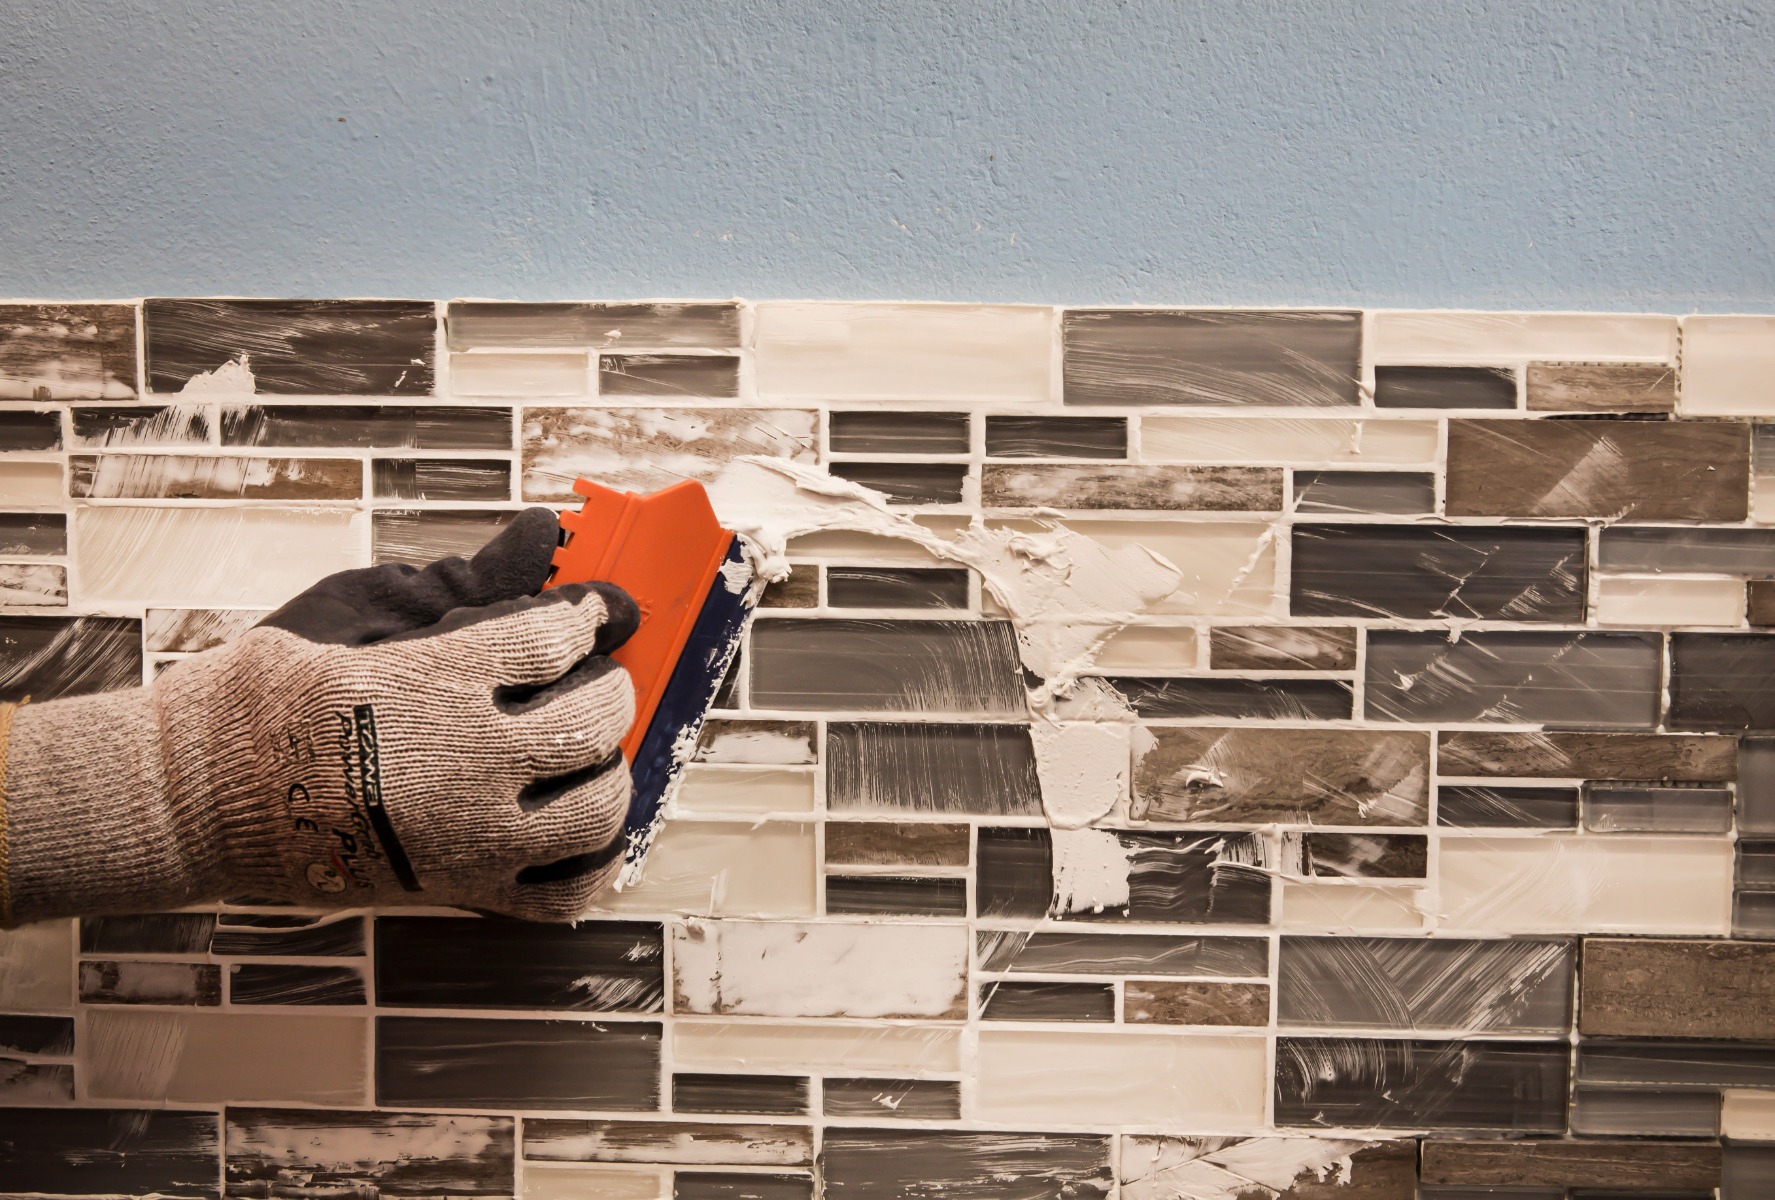
Allow the adhesive to squeeze through the joints between the mosaics, to ensure a good bond between adhesive and mosaics, and to form the grout. Place a tile spacer between the countertop and mosaic, as well as between the mosaic sheets, to keep them evenly spaced.
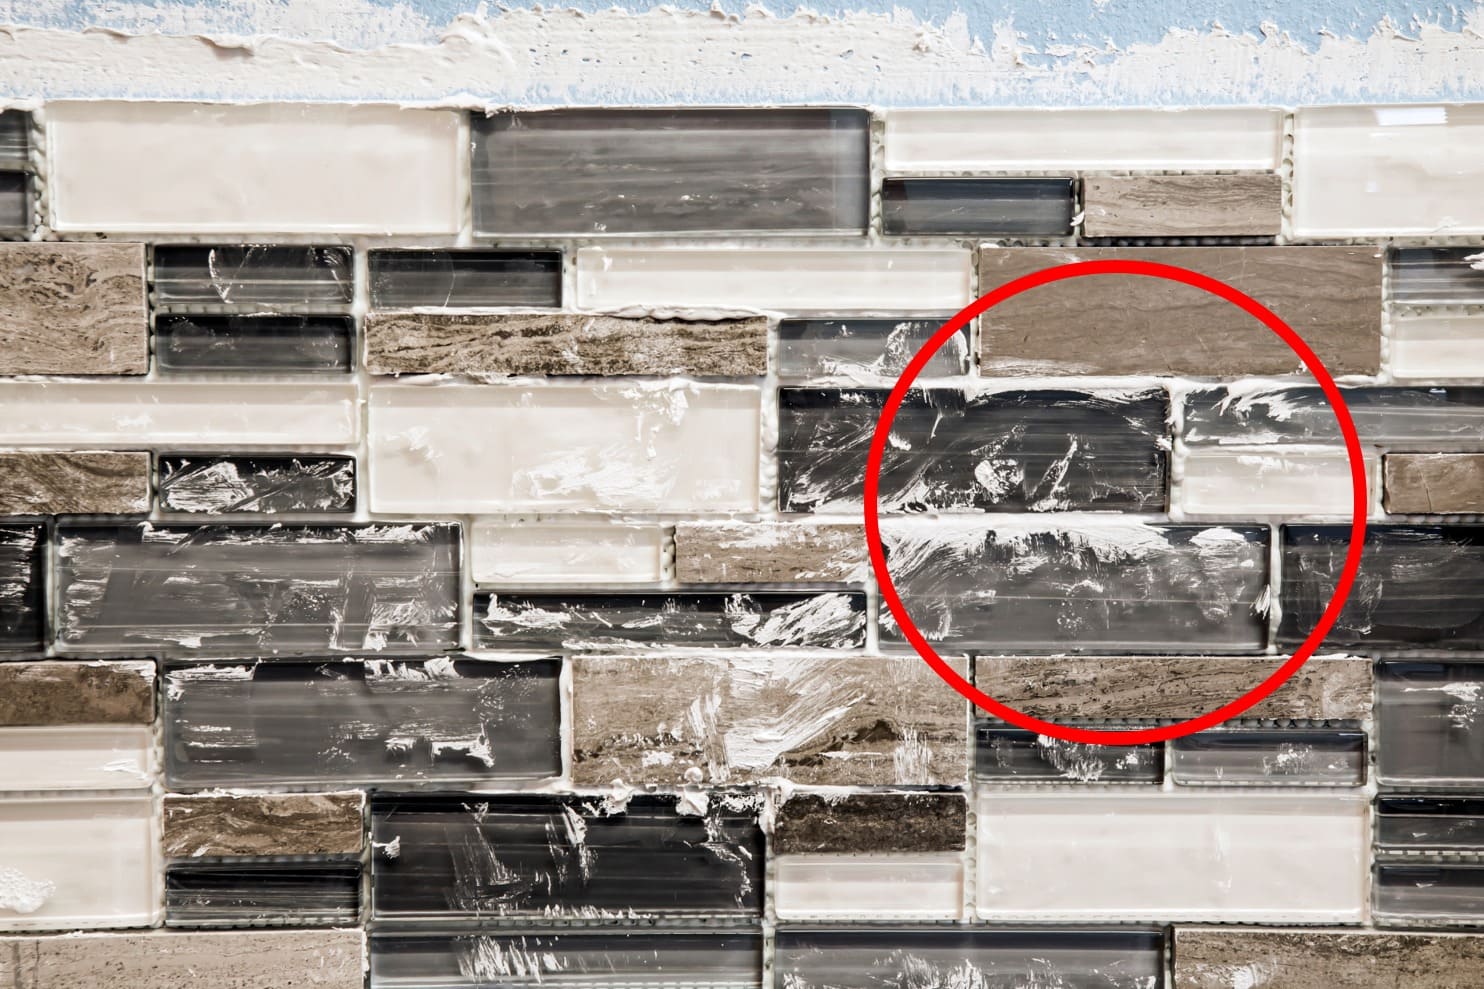
Wait 20 minutes, then, where necessary, fill in any low areas in the grout joints with extra adhesive. TAL Mosaicfix is available in super white and light grey, so choose the colour that will best suit the aesthetic you want to achieve. Work carefully to avoid scratching the tile surface, especially when installing metallic tiles.
Wait 20 minutes, then, where necessary, fill in any low areas in the grout joints with extra adhesive. TAL Mosaicfix is available in super white and light grey, so choose the colour that will best suit the aesthetic you want to achieve. Work carefully to avoid scratching the tile surface, especially when installing metallic tiles.
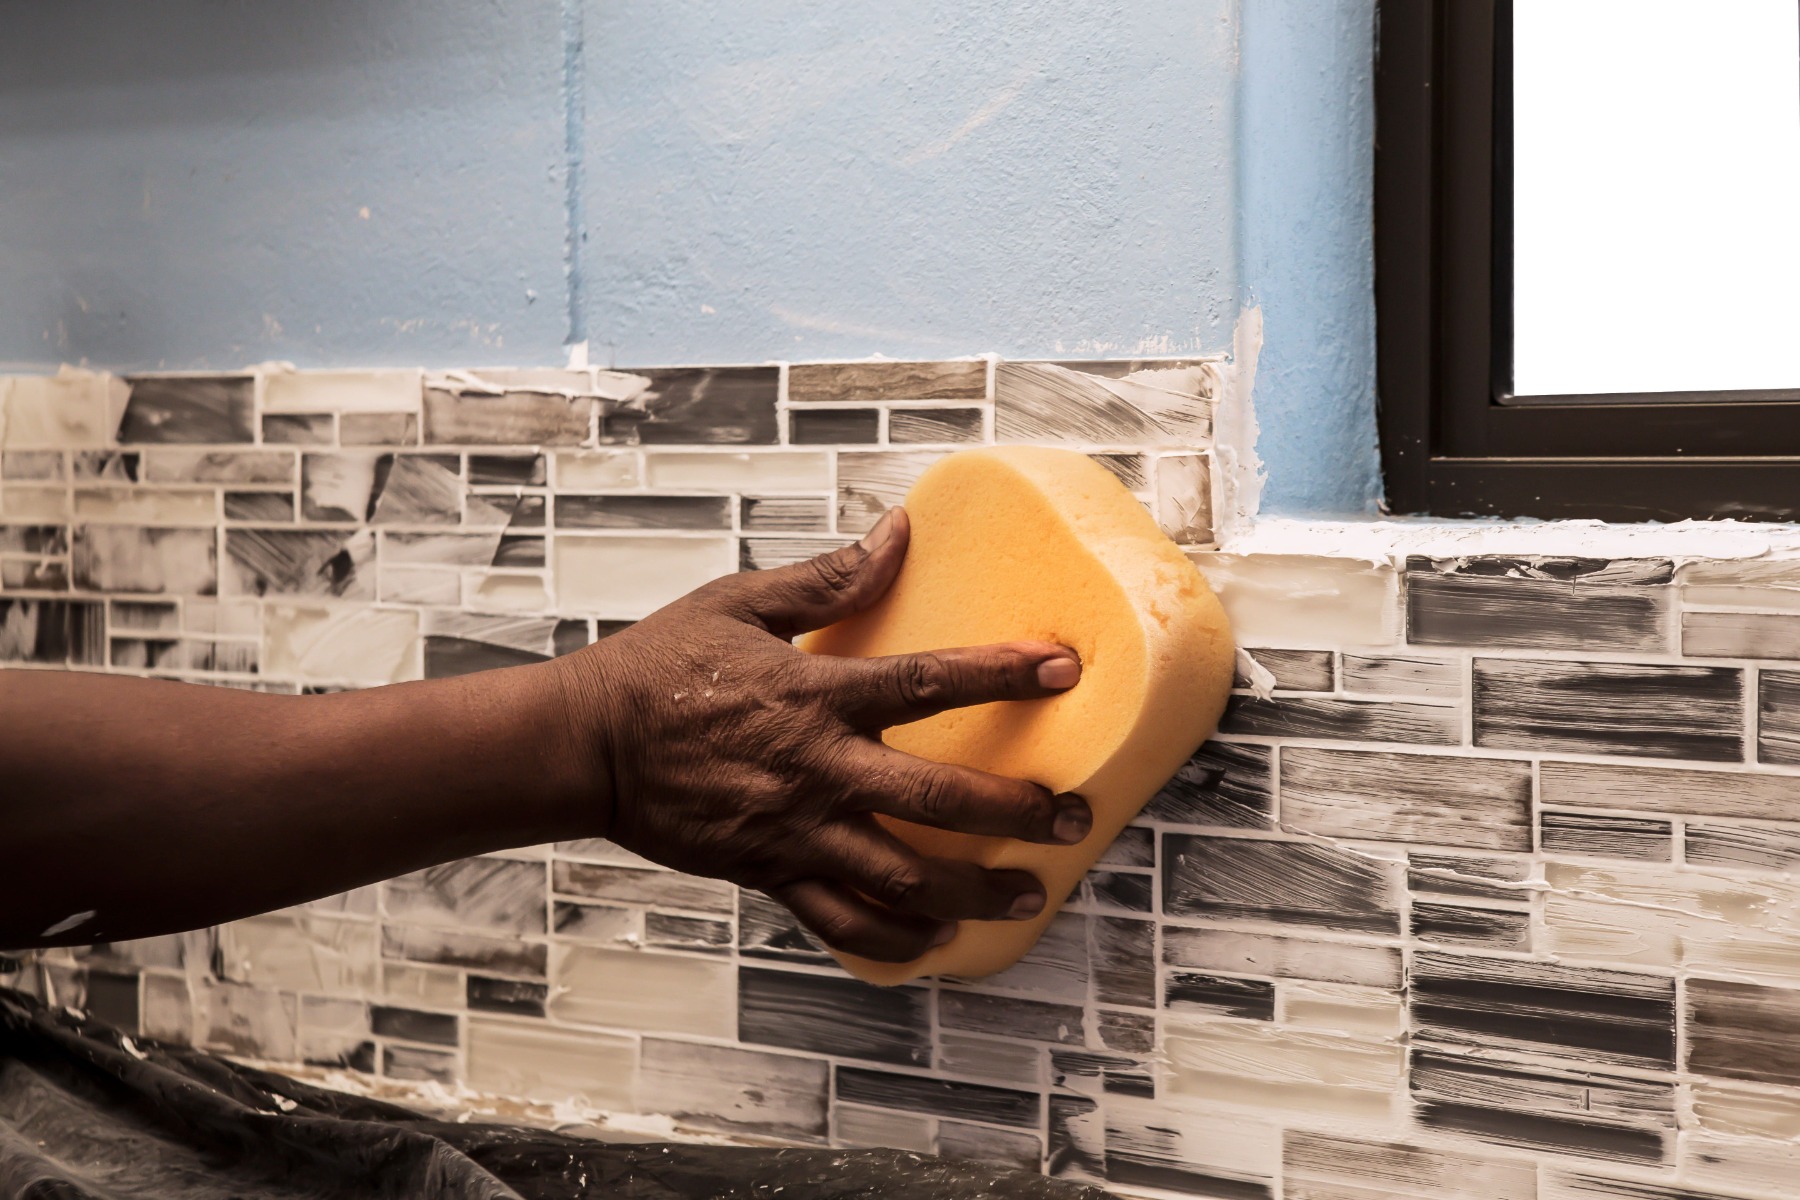
Once fully set, gently polish the face of the mosaics with a dry cloth

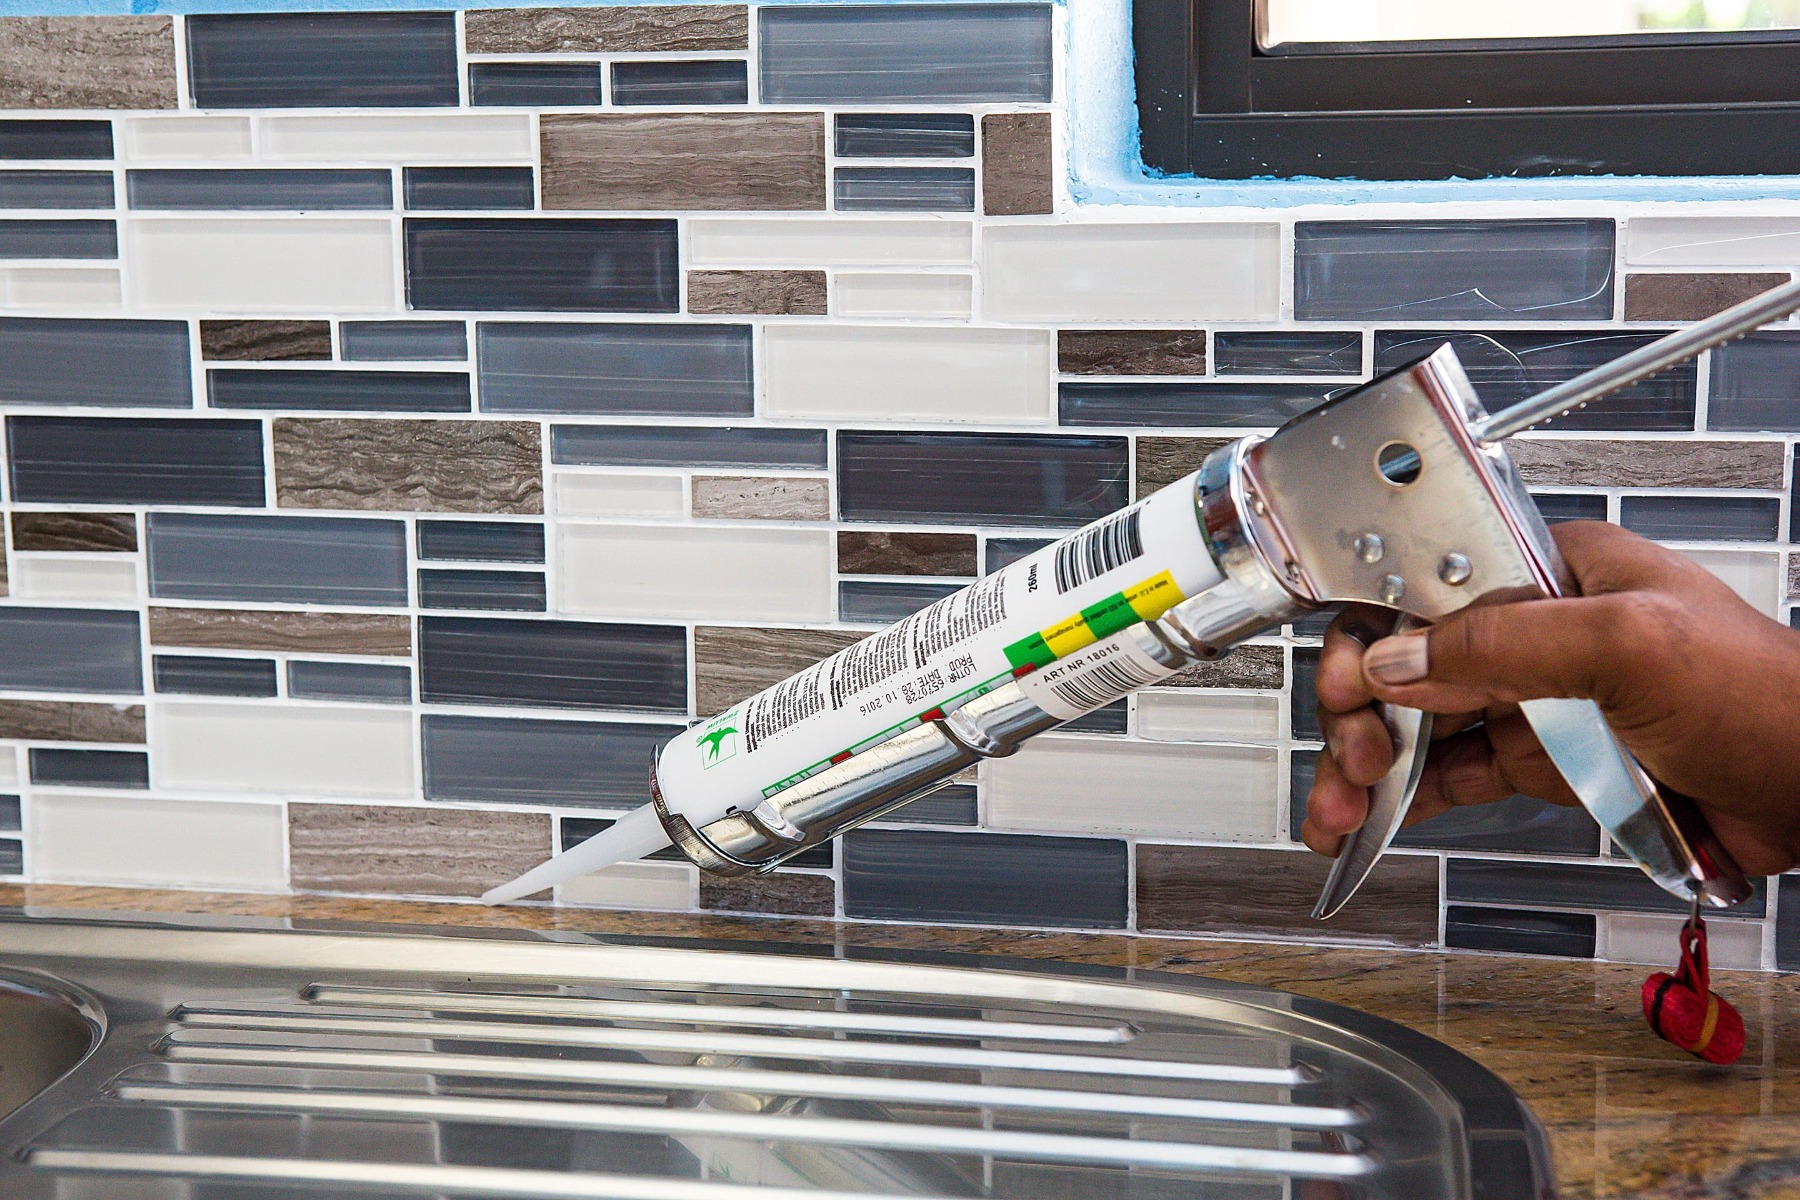
Apply a silicone sealant into the perimeter joint between the mosaics and countertop, and in any corners.
By choosing a kitchen splashback, not only have you managed to successfully upgrade your kitchen into a beautifully modern space, you’ve also ensured that your wall is protected against moisture and food stains. For more information on tile installation, contact the TAL Technical Advisory Service during office hours, visit our website, or send us an email.