Building a modern braai area?
Get fired up by new ideas and installation tips from TAL!
The great South African braai area has come a long way. We love the lure of a firepit, the crackle of wood – our love of entertainment, good food and ‘kuier’ means that the modern braai area is an extension of our homes - and our personalities!
Modern living
Great for a party or relaxing on a summer’s day.
Whatever your taste or style, if you are tiling your braai area, upgrading your patio, building a firepit, or designing an indoor braai room, consider these tips and trends to achieve a perfect look, that will last!
GET THE LOOK!
“Braai rooms” are becoming ever popular, especially in modern open-plan interiors. As South Africans, braai areas are simply part of our lifestyle, extending on to patios and balconies, often with their own separate entertainment space in outside lapa areas. Whatever your style, make sure you use the correct adhesive system for your new tiles before you begin your project. A quality installation will see you through every season, and every occasion! And if you are unsure, our technical team is a phone call away on 0860 000 825 or email us at [email protected].
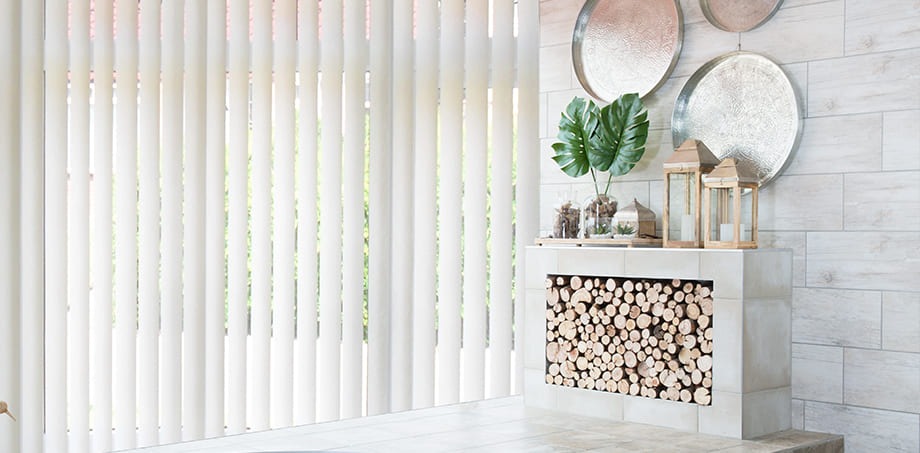
Wood-look tiles
Create a warm, naturally beautiful space with clean lines.
By removing the sanding and sealing process required for maintaining wooden products,
these tiles deliver a low maintenance, high quality installation.
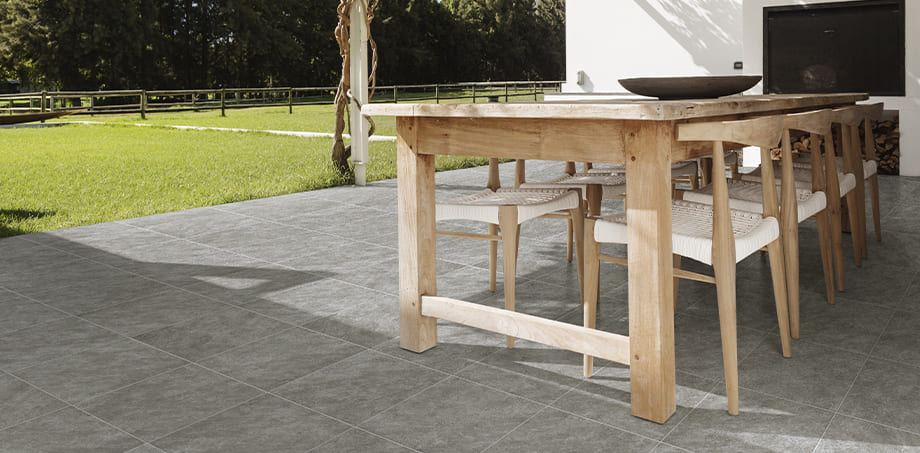
Concrete-look tiles
For a minimalist, modern industrial look with an urban twist, Concrete-look tiles come in a range of hues to suit your taste.
Offset the strong lines with wood-look or natural stone tiles and
lush planting for a stunning contrast.

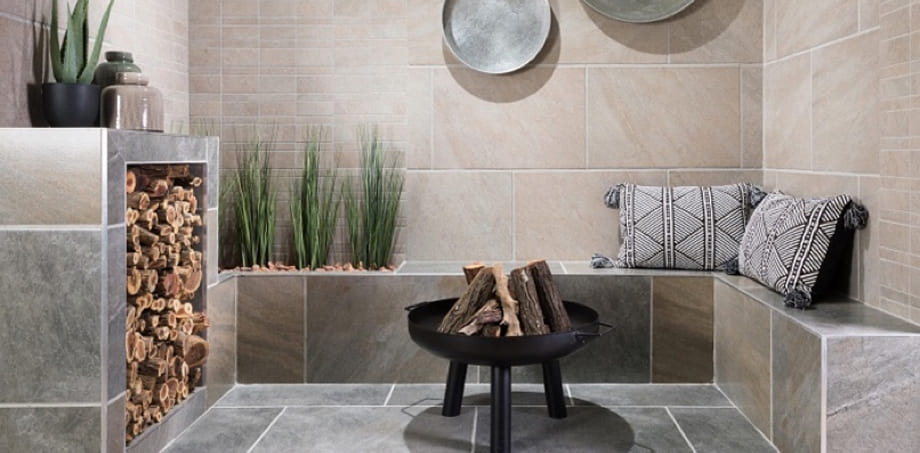
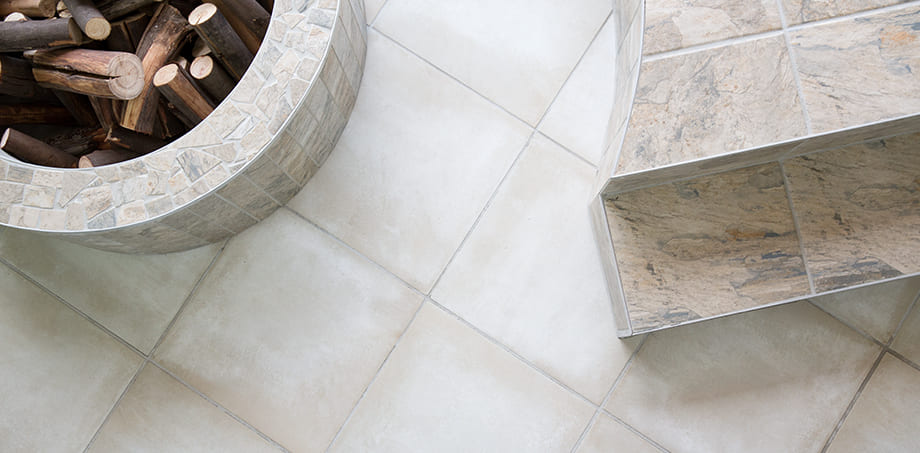
Timeless natural stone tiles
Earthy and textured, these tiles bring a luxurious
touch of the bushveld to your leisure space.
Natural stone tiles are a good choice for the braai area. Unique in appearance these tiles are a lifetime purchase, providing you with a one-of-a-kind floor or wall area because of their distinctive colours, patterns and character. They can withstand harsh weather conditions, don’t fade when exposed to the sun for long periods, and are able to combat food, oil and beverage spills – if sealed after installation.
Because they are natural, they show varying mineralogy depending on the source and changing conditions of the particular environment and must be installed with a specialised tile adhesive:
-
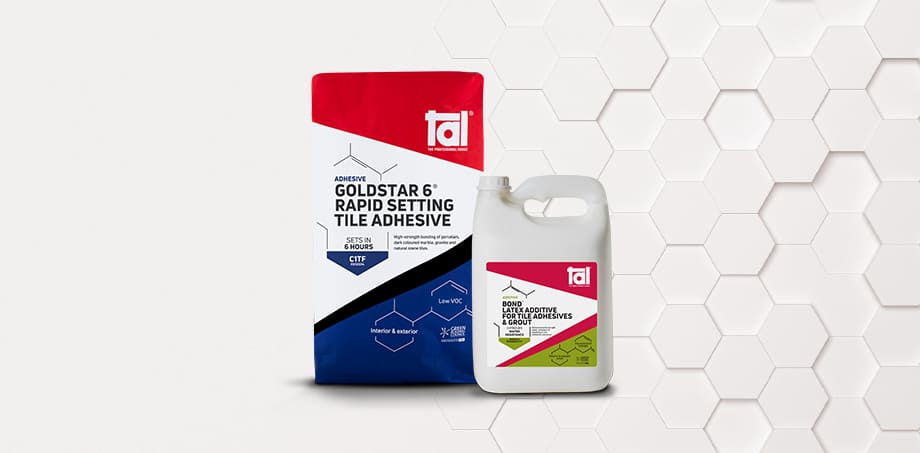
Use a high-strength, shrinkage-compensated rapid or quick setting adhesive when fixing natural stone tiles.
-
For dark coloured natural stone tiles, such as slate, sandstone, dark marble and granite we recommend TAL Goldstar 6 or Goldflex
-
For light coloured marble or natural stone tiles, we recommend a light coloured adhesive such as TAL Marblefix or TAL Marbleflex
-
This is especially important in instances where tiles of varying thicknesses are used, as the adhesive system will have to be built up behind some of the tiles to ensure a level finish. This build must be no more than 20mm in isolated areas
-
For installation tips, read our blog “Tiling with natural stone - the basics”
TIPS FOR BUILDING A BRAAI AREA!
-
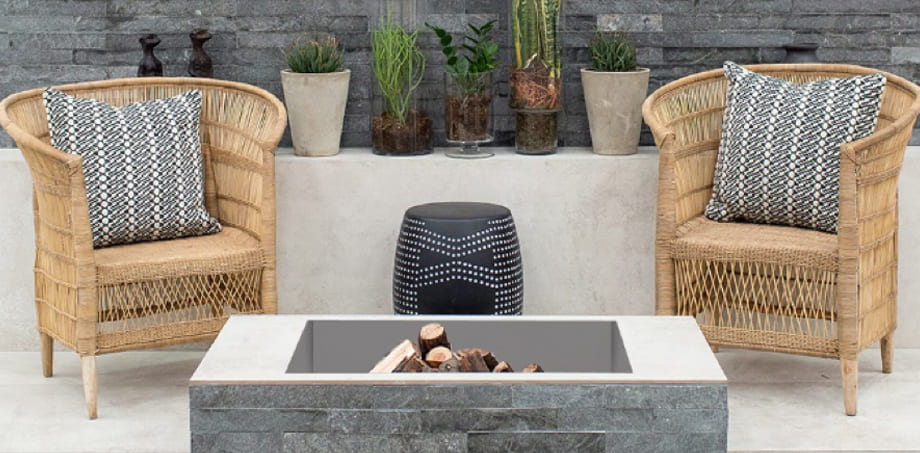
Firepits should be placed away from trees, boundary walls, thatch and of course, the house itself.
-
Consider the size of the braai or fire pit in relation to the garden; a well-proportioned design is as important as the choice of style when creating the perfect outdoor entertainment area.
-
Before moving forward with your project, check with the tile manufacturer/supplier that the tile you have chosen is suitable for this type of installation.
Inside outside
These Kariba slip-resistant ceramic tiles from Johnson Tiles are perfect for a covered braai area.
Tiling braai’s and firepits
-
The background surface must be firm, clean, dry, and free from dust and contaminants to ensure a strong bond between the tile adhesive and tiles onto the substrate:
-
Prime your surface before tiling:
-
-
If the surface is wood floated (a rough finish), priming isn’t necessary.
-
If the surface is steel floated (a smooth, dense finish), prime with a slurry consisting of 1 part TAL Keycoat https://tal.co.za/keycoat mixed with 2 parts TAL Keymix powder https://tal.co.za/keycoat and apply the slurry solution with a block brush.
-
-
Allow the slurry coat to dry before you install the tiles.
Use an adhesive system that can handle the heat!
-
DON’T tile inside a braai or fire pit as the heat will result in degradation of the adhesive and damage the tiles over time.
-
DO tile the outside, and around the fire pit, or braai area. Tile the exterior ONLY.
-
Your choice of tile adhesive is important for the longevity of your braai or firepit. When in doubt, ask for advice!
-
RULE OF THUMB! If the installation area is too hot to touch, it is too hot to tile with tile adhesives!
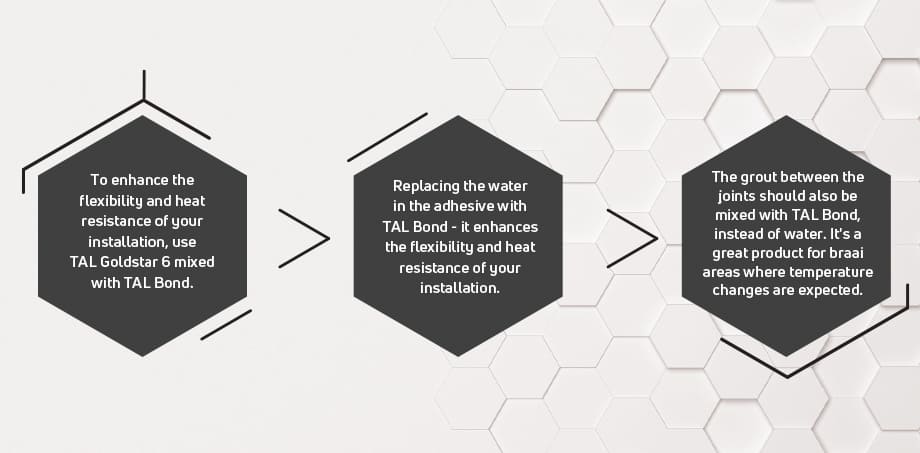
This adhesive system of TAL Goldstar 6 mixed with TAL Bond
will withstand temperatures
of up to 65°C – 70°C for prolonged periods.
-
Depending on the size of the braai or firepit area being tiled, tile panel movement joints must be incorporated at 2 meter breaks in both directions, as well as in all internal corners and interfaces.
-
The installation should be allowed to dry for a minimum of 7 days before you light that first welcoming fire.
Maintenance!
Replacing any cracked and damaged tiles in will ensure that your braai room
looks fresh and welcoming for your guests to kick back and enjoy spending
braai-time together. Check out the video for step-by-step help.
The choices of braai areas are limitless and the possibilities endless. Enjoy planning your braai area, and have fun watching your project unfold!
_________________________
For a link to TAL’s adhesive range
Contact TAL’s Technical Advice Line as your go-to resource for advice.
Call us for support on 0860 000 825 or email us at [email protected].
_________________________
![]()
TAL
“The science behind beautiful spaces”