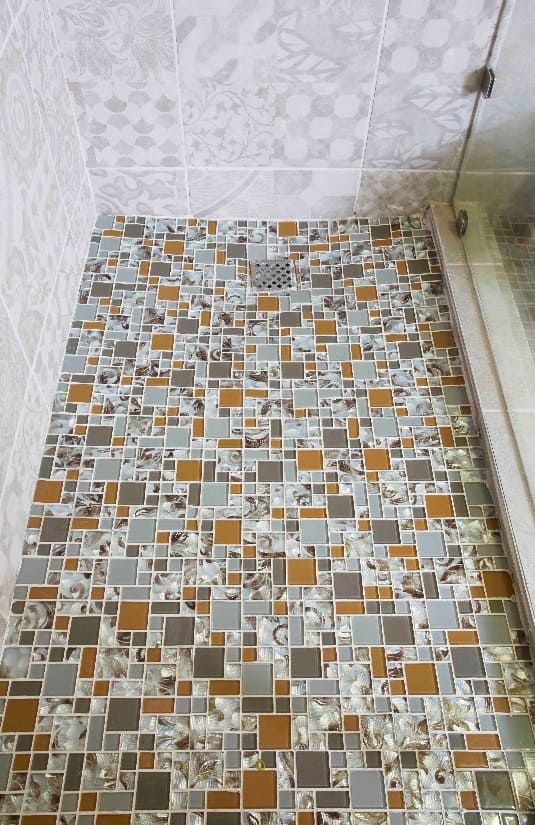
Tips on selecting the perfect grout colour
Click here to download TAL’s Guide to Selecting the Perfect Grout Colour
When tiling, many people spend days over the choice of tiles: What kind of tile, what shape and what colour? Selecting the grout, which fills the space between the tiles, is often a mere afterthought. TAL believes that grout deserves more attention and respect as it adds to the overall look of the installation. As a result, we have developed a guide of some of the key considerations when selecting a grout colour.
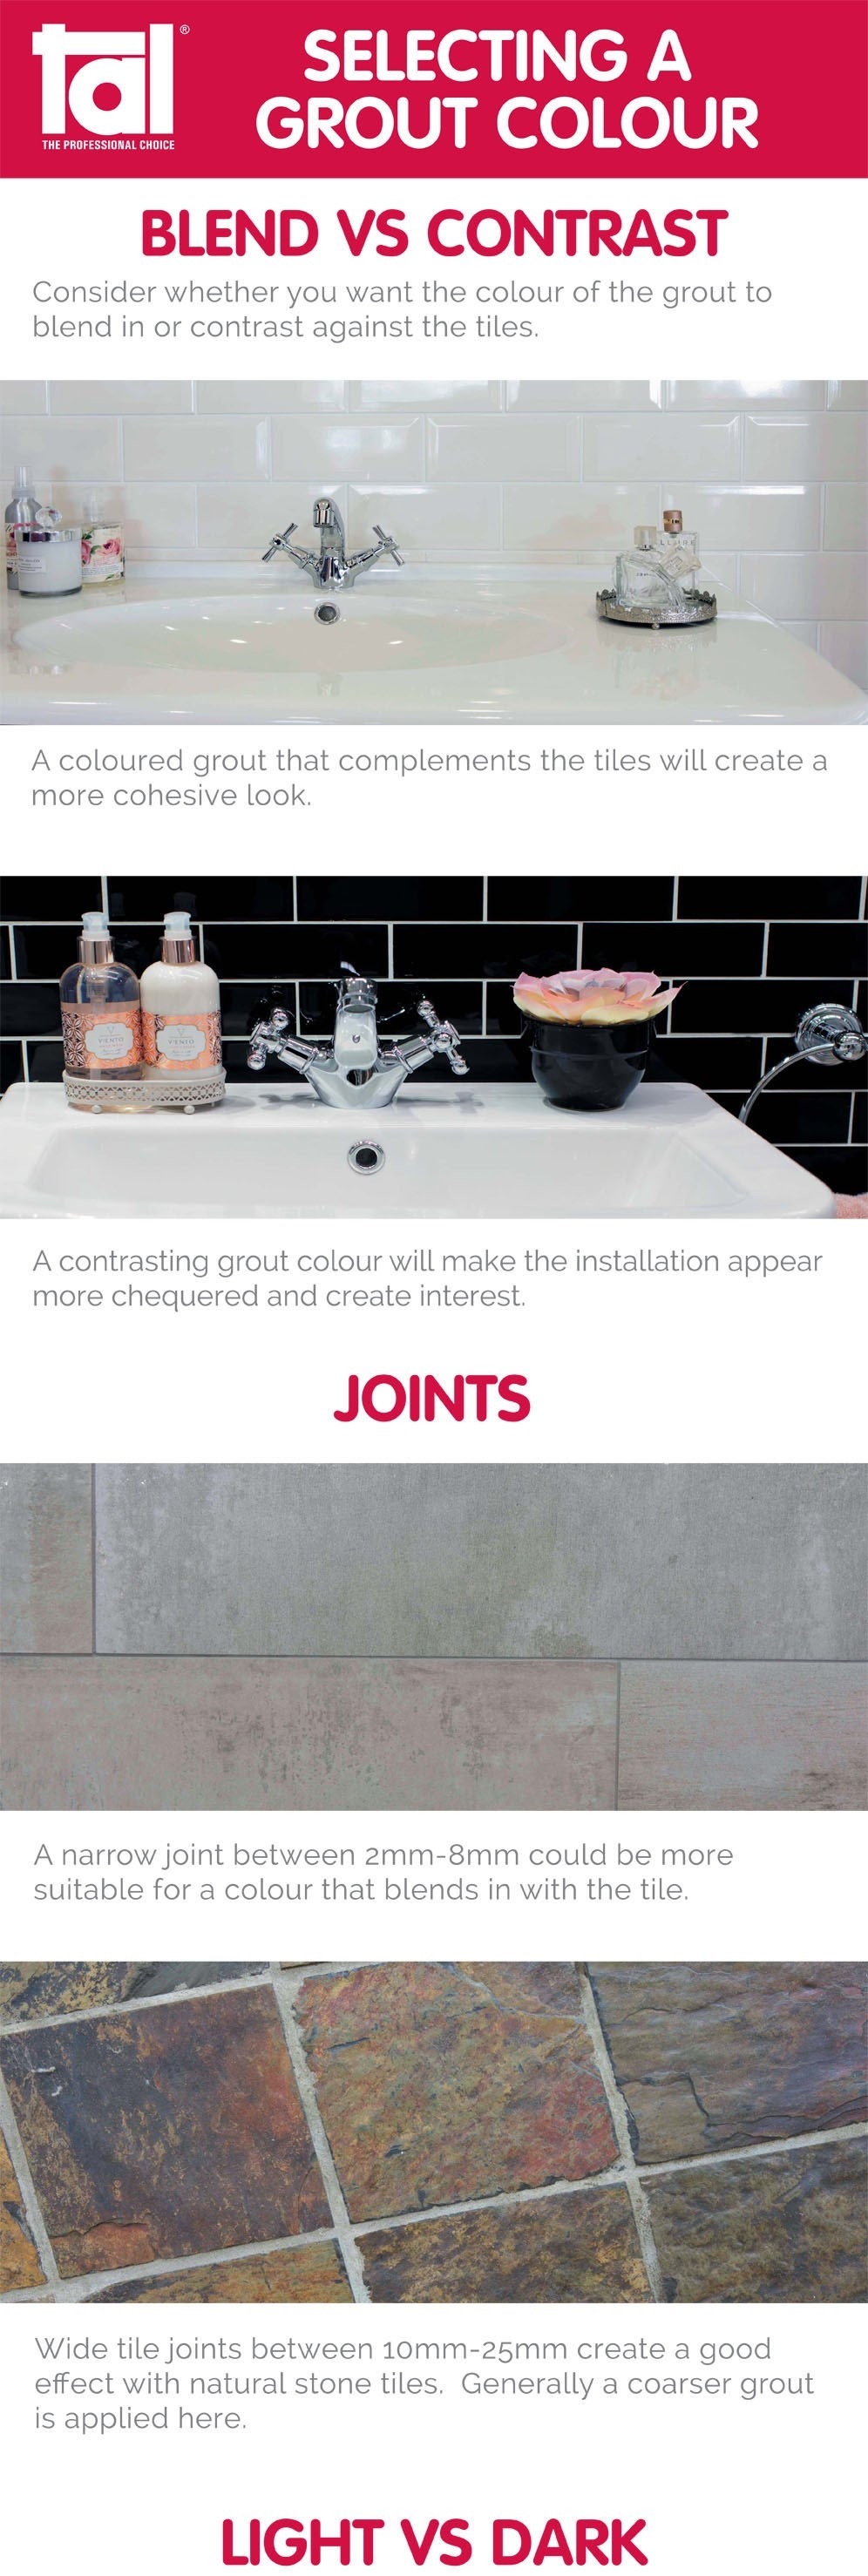
Blend vs. Contrast
Consider whether you want the colour of the grout to blend in or contrast against the tiles. A coloured grout that complements the tiles will create a more cohesive look; while a contrasting grout colour will make the installation appear more chequered and create interest.
Narrow Joints vs. wide Joints
Another area which is often overlooked is the width of the tile joint space in an installation. You can have a narrow tile joint of between 2mm and 8mm which could be more suitable for a colour that blends in with the tile colour. Alternatively, a wide grout joint of between 10mm and 25mm – usually seen in natural stone tile installations – creates an interesting visual effect. However generally speaking wider grout joints require a coarser grout.
Light vs. Dark Grout
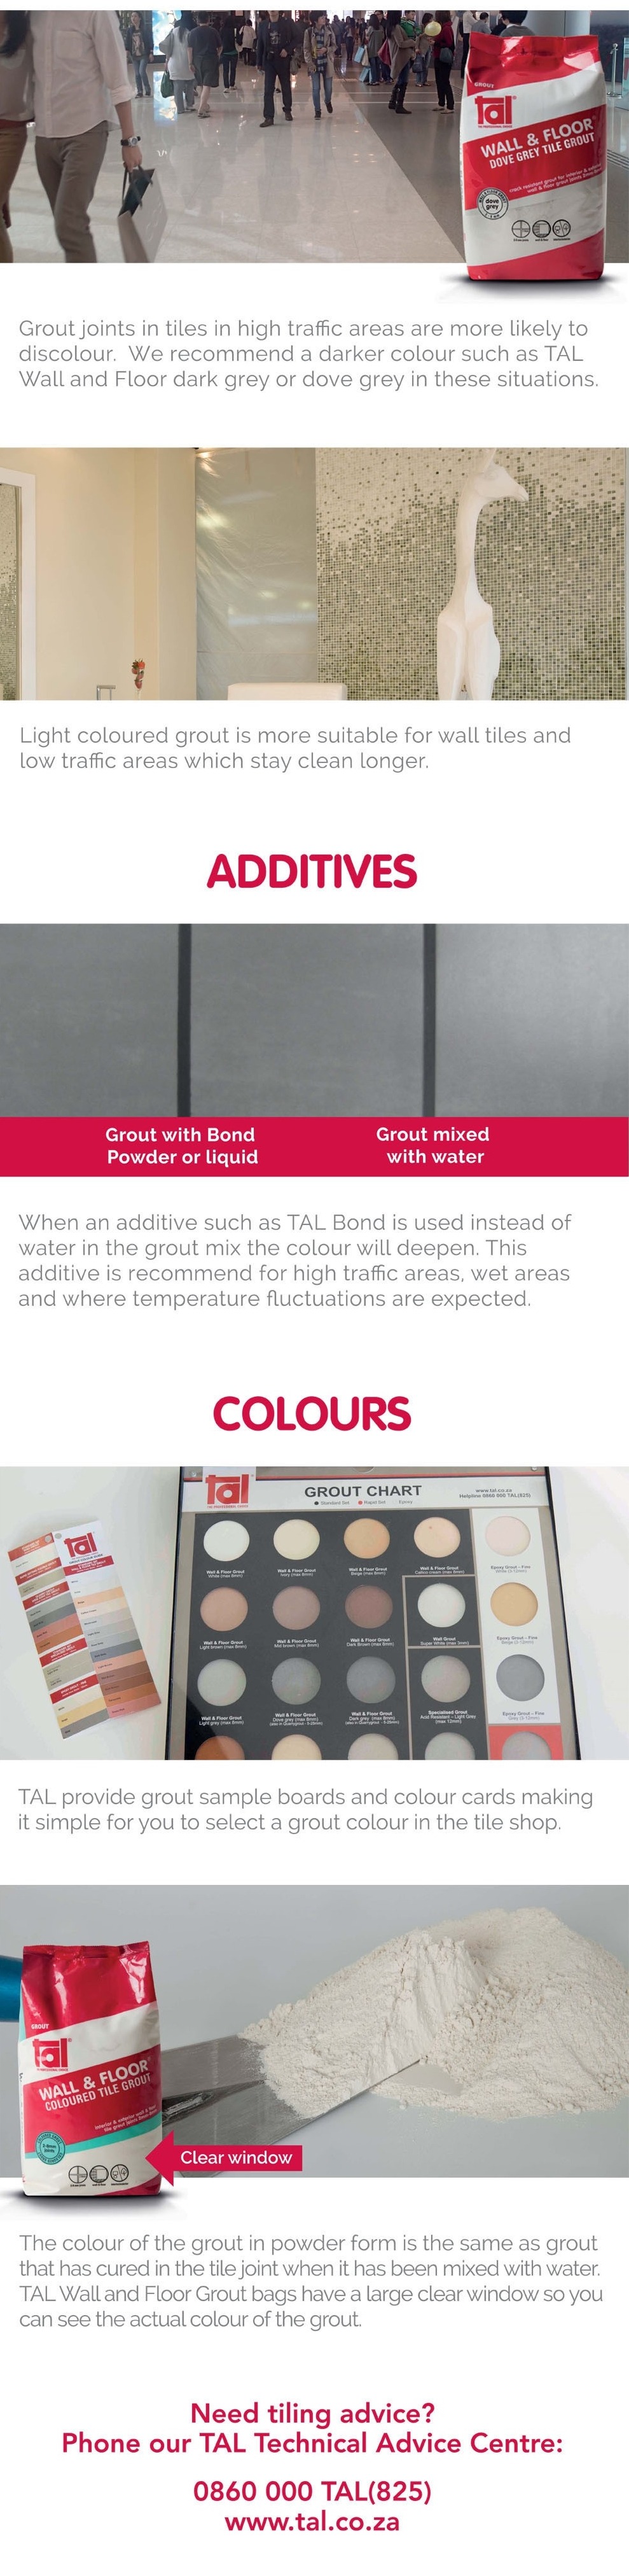
Grout in high-traffic areas, such as entrance halls, walkways and commercial installations, is more likely to discolour. In this circumstance, we would recommend using TAL’s Wall and Floor grout in dark grey or dove grey for best results in the long term. Light coloured grout is more suitable for wall tiles and low traffic areas which tend to stay clean for longer.
Colours
TAL provides grout colour sample boards in-store and colour cards you can take home – both of which make it easier for you to select the ideal grout colour. If in doubt, remember that the colour of the grout in powder form is the same colour as grout that has been cured in the tile joint once it has been mixed with water. This is why TAL Wall and Floor grout bags have a clear window so that you can see the actual colour of the grout.
Additives and Sealers
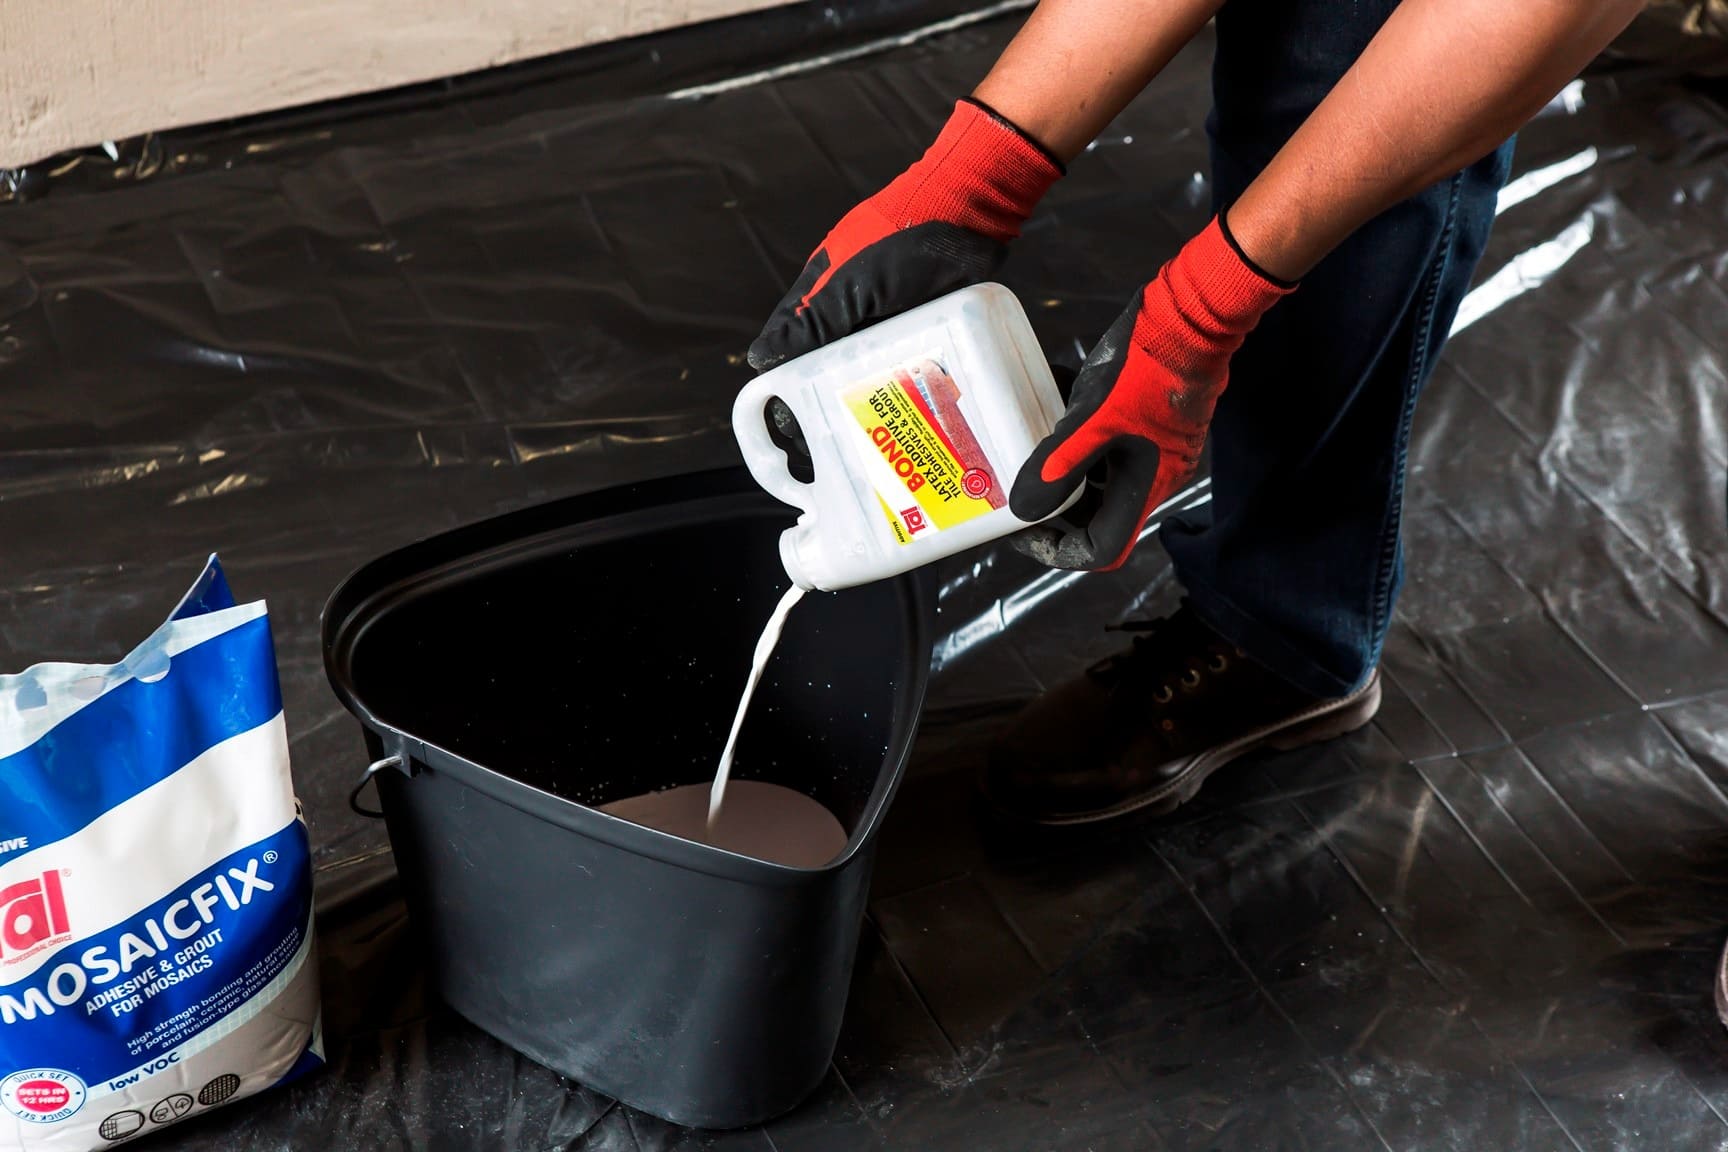
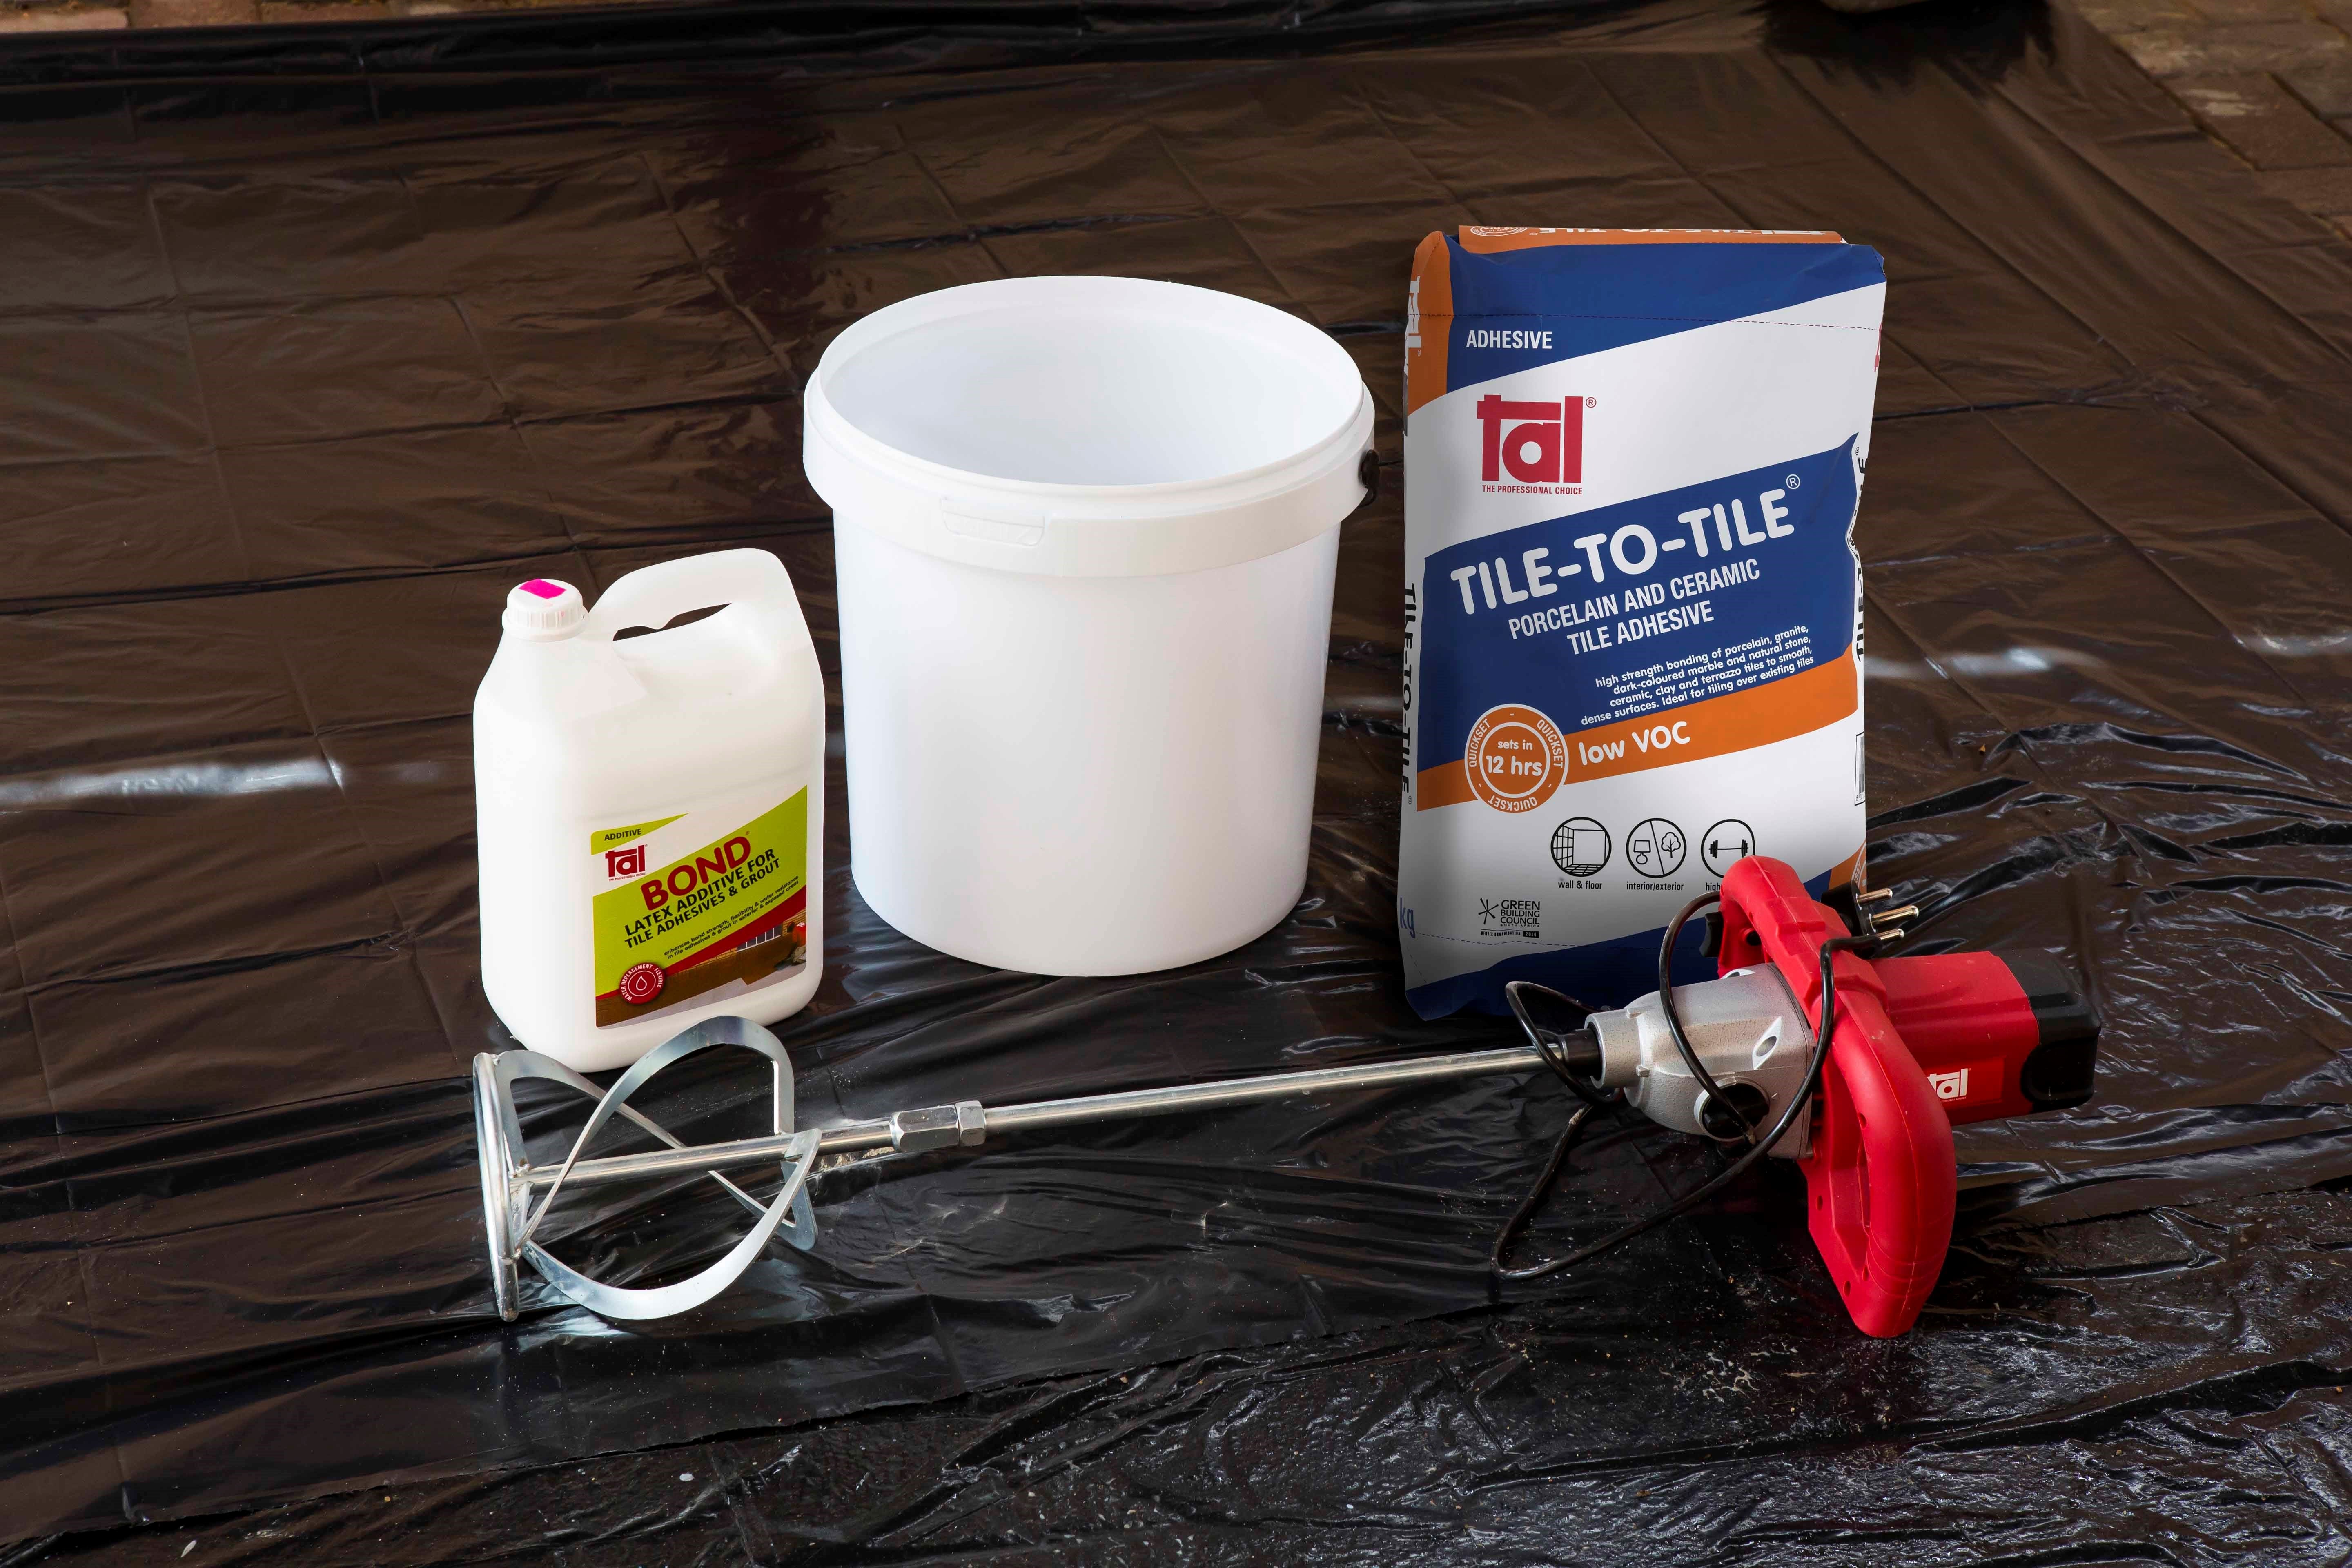
Once you have selected the type and colour of the grout, you now need to think about additives and sealers. A latex additive such as TAL Bond is recommended as a total water replacement in the grout mix to improve the water resistance, flexibility and bond strength of the grout. Bear in mind that when an additive such as TAL Bond is used instead of water in the grout mix, the colour of the grout will deepen. Alternatively, TAL Bond Powder may be added to the adhesive mixing water, at a ratio of 1 x 1kg satchet per 20kg tile adhesive.
For more grout related tips and tricks, use the following resources:
- TAL Grout Calculator: Allows you to work out exactly how much grout is needed for a tiling installation
- TAL Grout Selection Guide: Matches products from within the TAL grout range to whichever tile is being used, as well as the area (wet, high-traffic etc)
- TAL Grout Catalogue: Each of TAL’s grouting products are summarised in this catalogue, along with Material Data Safety Sheets (MSDS) and Technical Data Sheets on each product
If this TAL Talk post interested you, you may want to take a look at another TAL Talk blog post: What to do about soft crumbling grout?
Grout installation tips
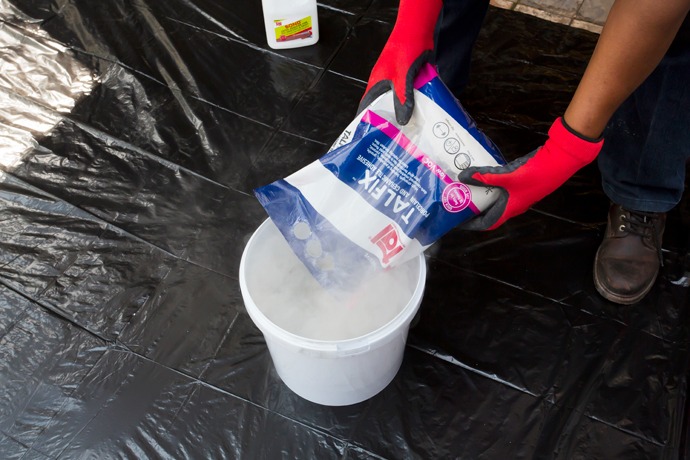
- Follow the instructions on the grout packaging for the correct mix ratio.
- Add the grout to the stipulated amount
of clean, cool water whilst mixing. Too much water in the mix can
cause colour variations in the grout
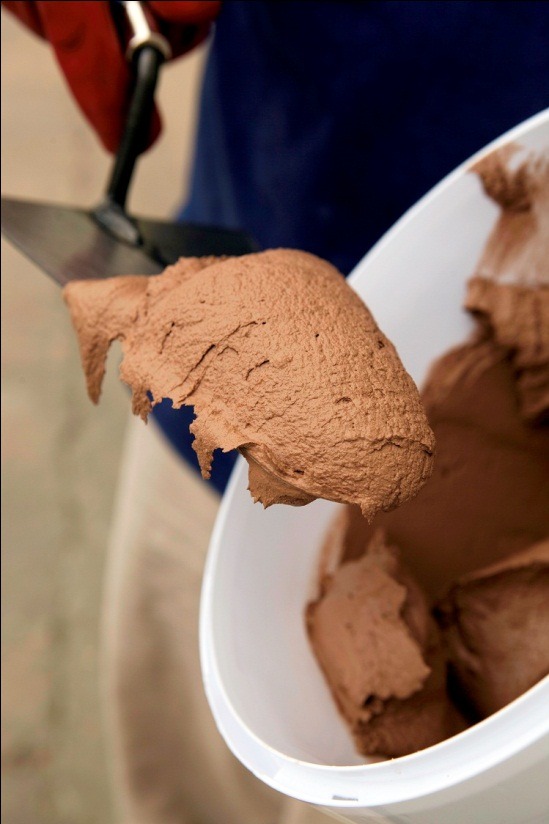
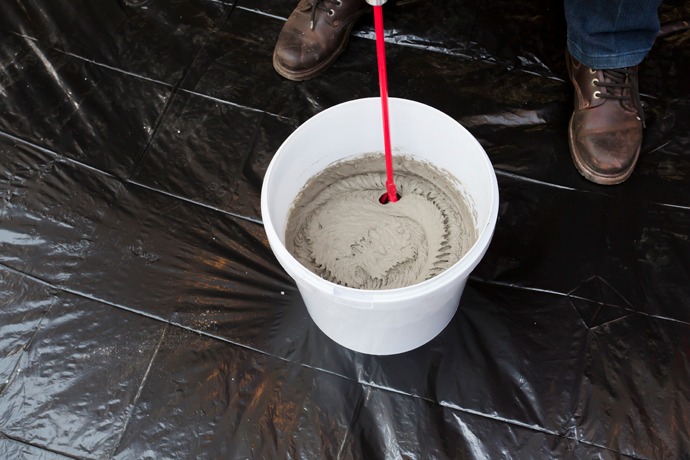
joints (patching of colour) and can also result in a soft, powdery finish. - Mix it well to form a creamy, lump-free consistency.
- If using TAL Wall & Floor Grout, add 5kg of grout to 1.5 litres of
clean, cool water. - Note that all exterior/exposed and ‘wet’ applications require the water
in the mix to be replaced with TAL Bond,
a latex additive that improves the water resistance,
flexibility and bond strength of the grout. Alternatively, TAL Bond Powder may be added to the adhesive mixing water, at a ratio of 1 x 1kg sachet per 20kg tile adhesive. - When applying the grout, ensure that the tiles are dry and free of dust.
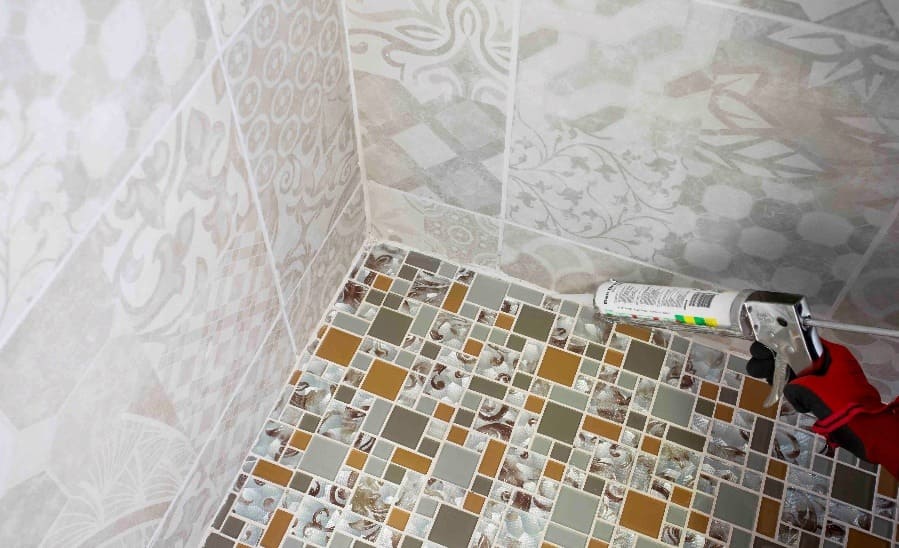
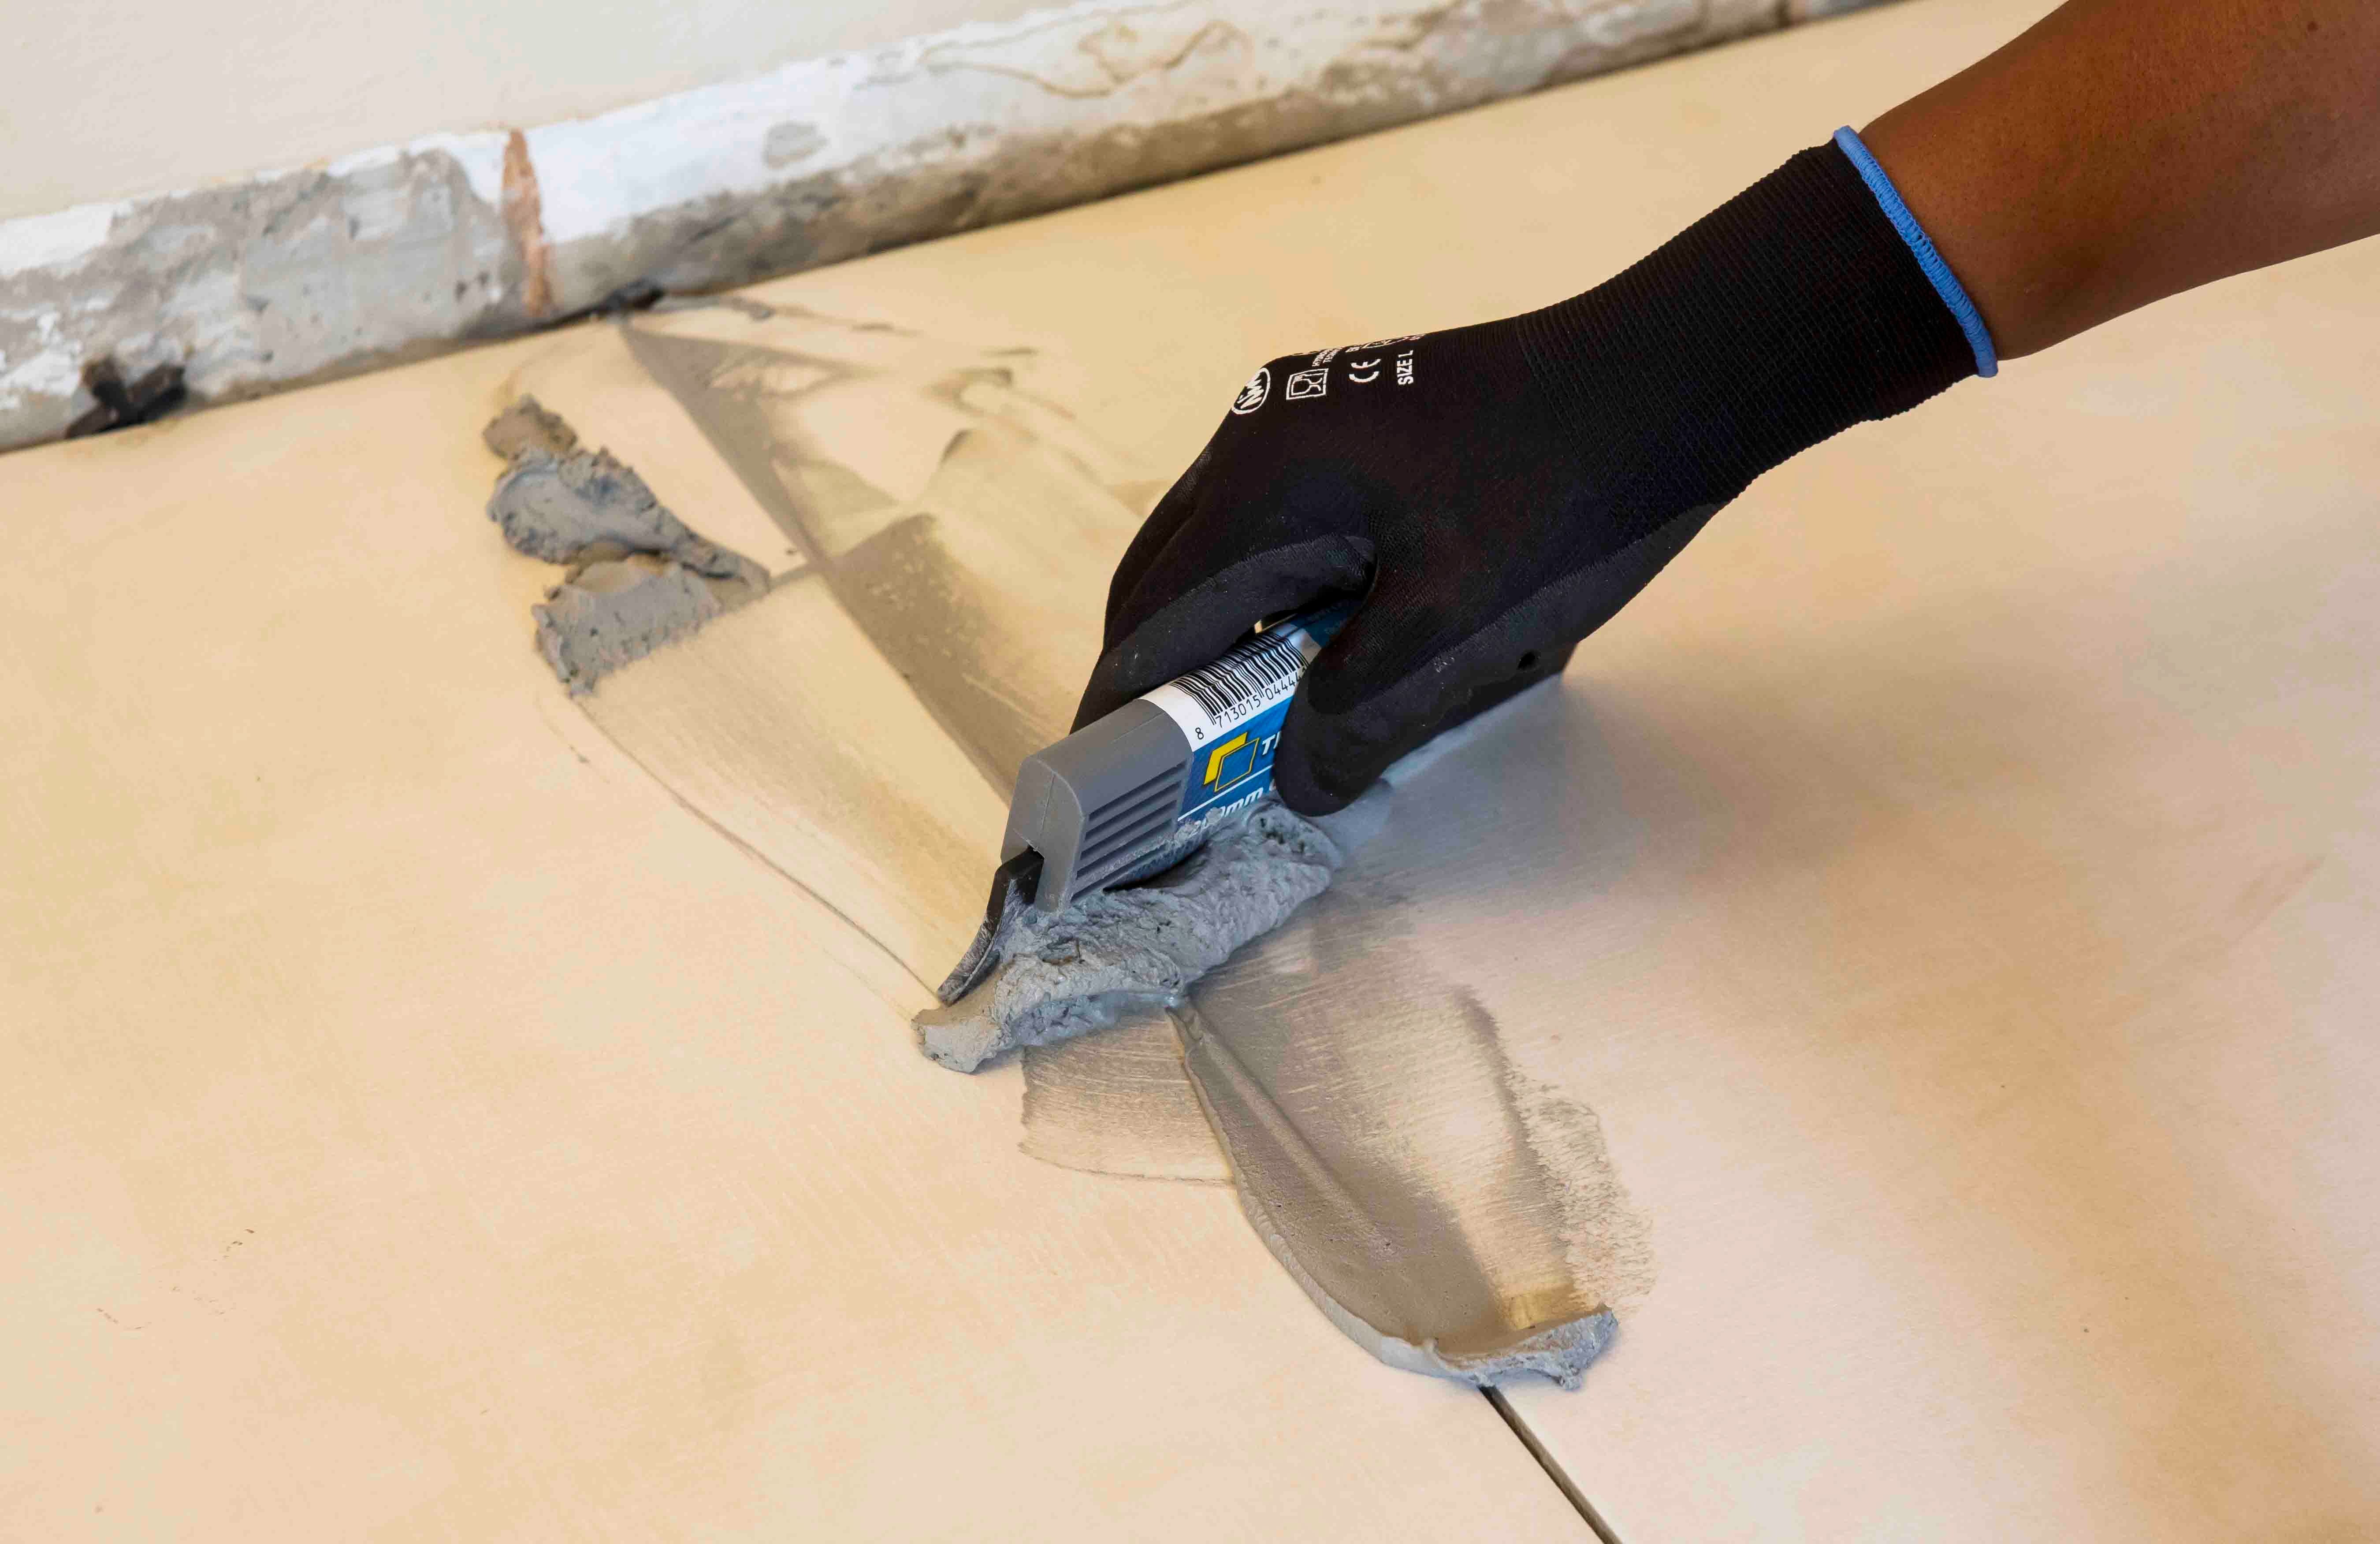
- The joints must be raked out and
cleaned before grouting. - Apply the grout with a grout squeegee, one square metre at a time.
- Work the grout into the tile joints. Note that it is important to fill
the joints completely and to compact the grout into the joints so
that there are no voids (air pockets). - Wipe off excess grout from the face of the tiles and smooth the
surface of the grout with the squeegee.
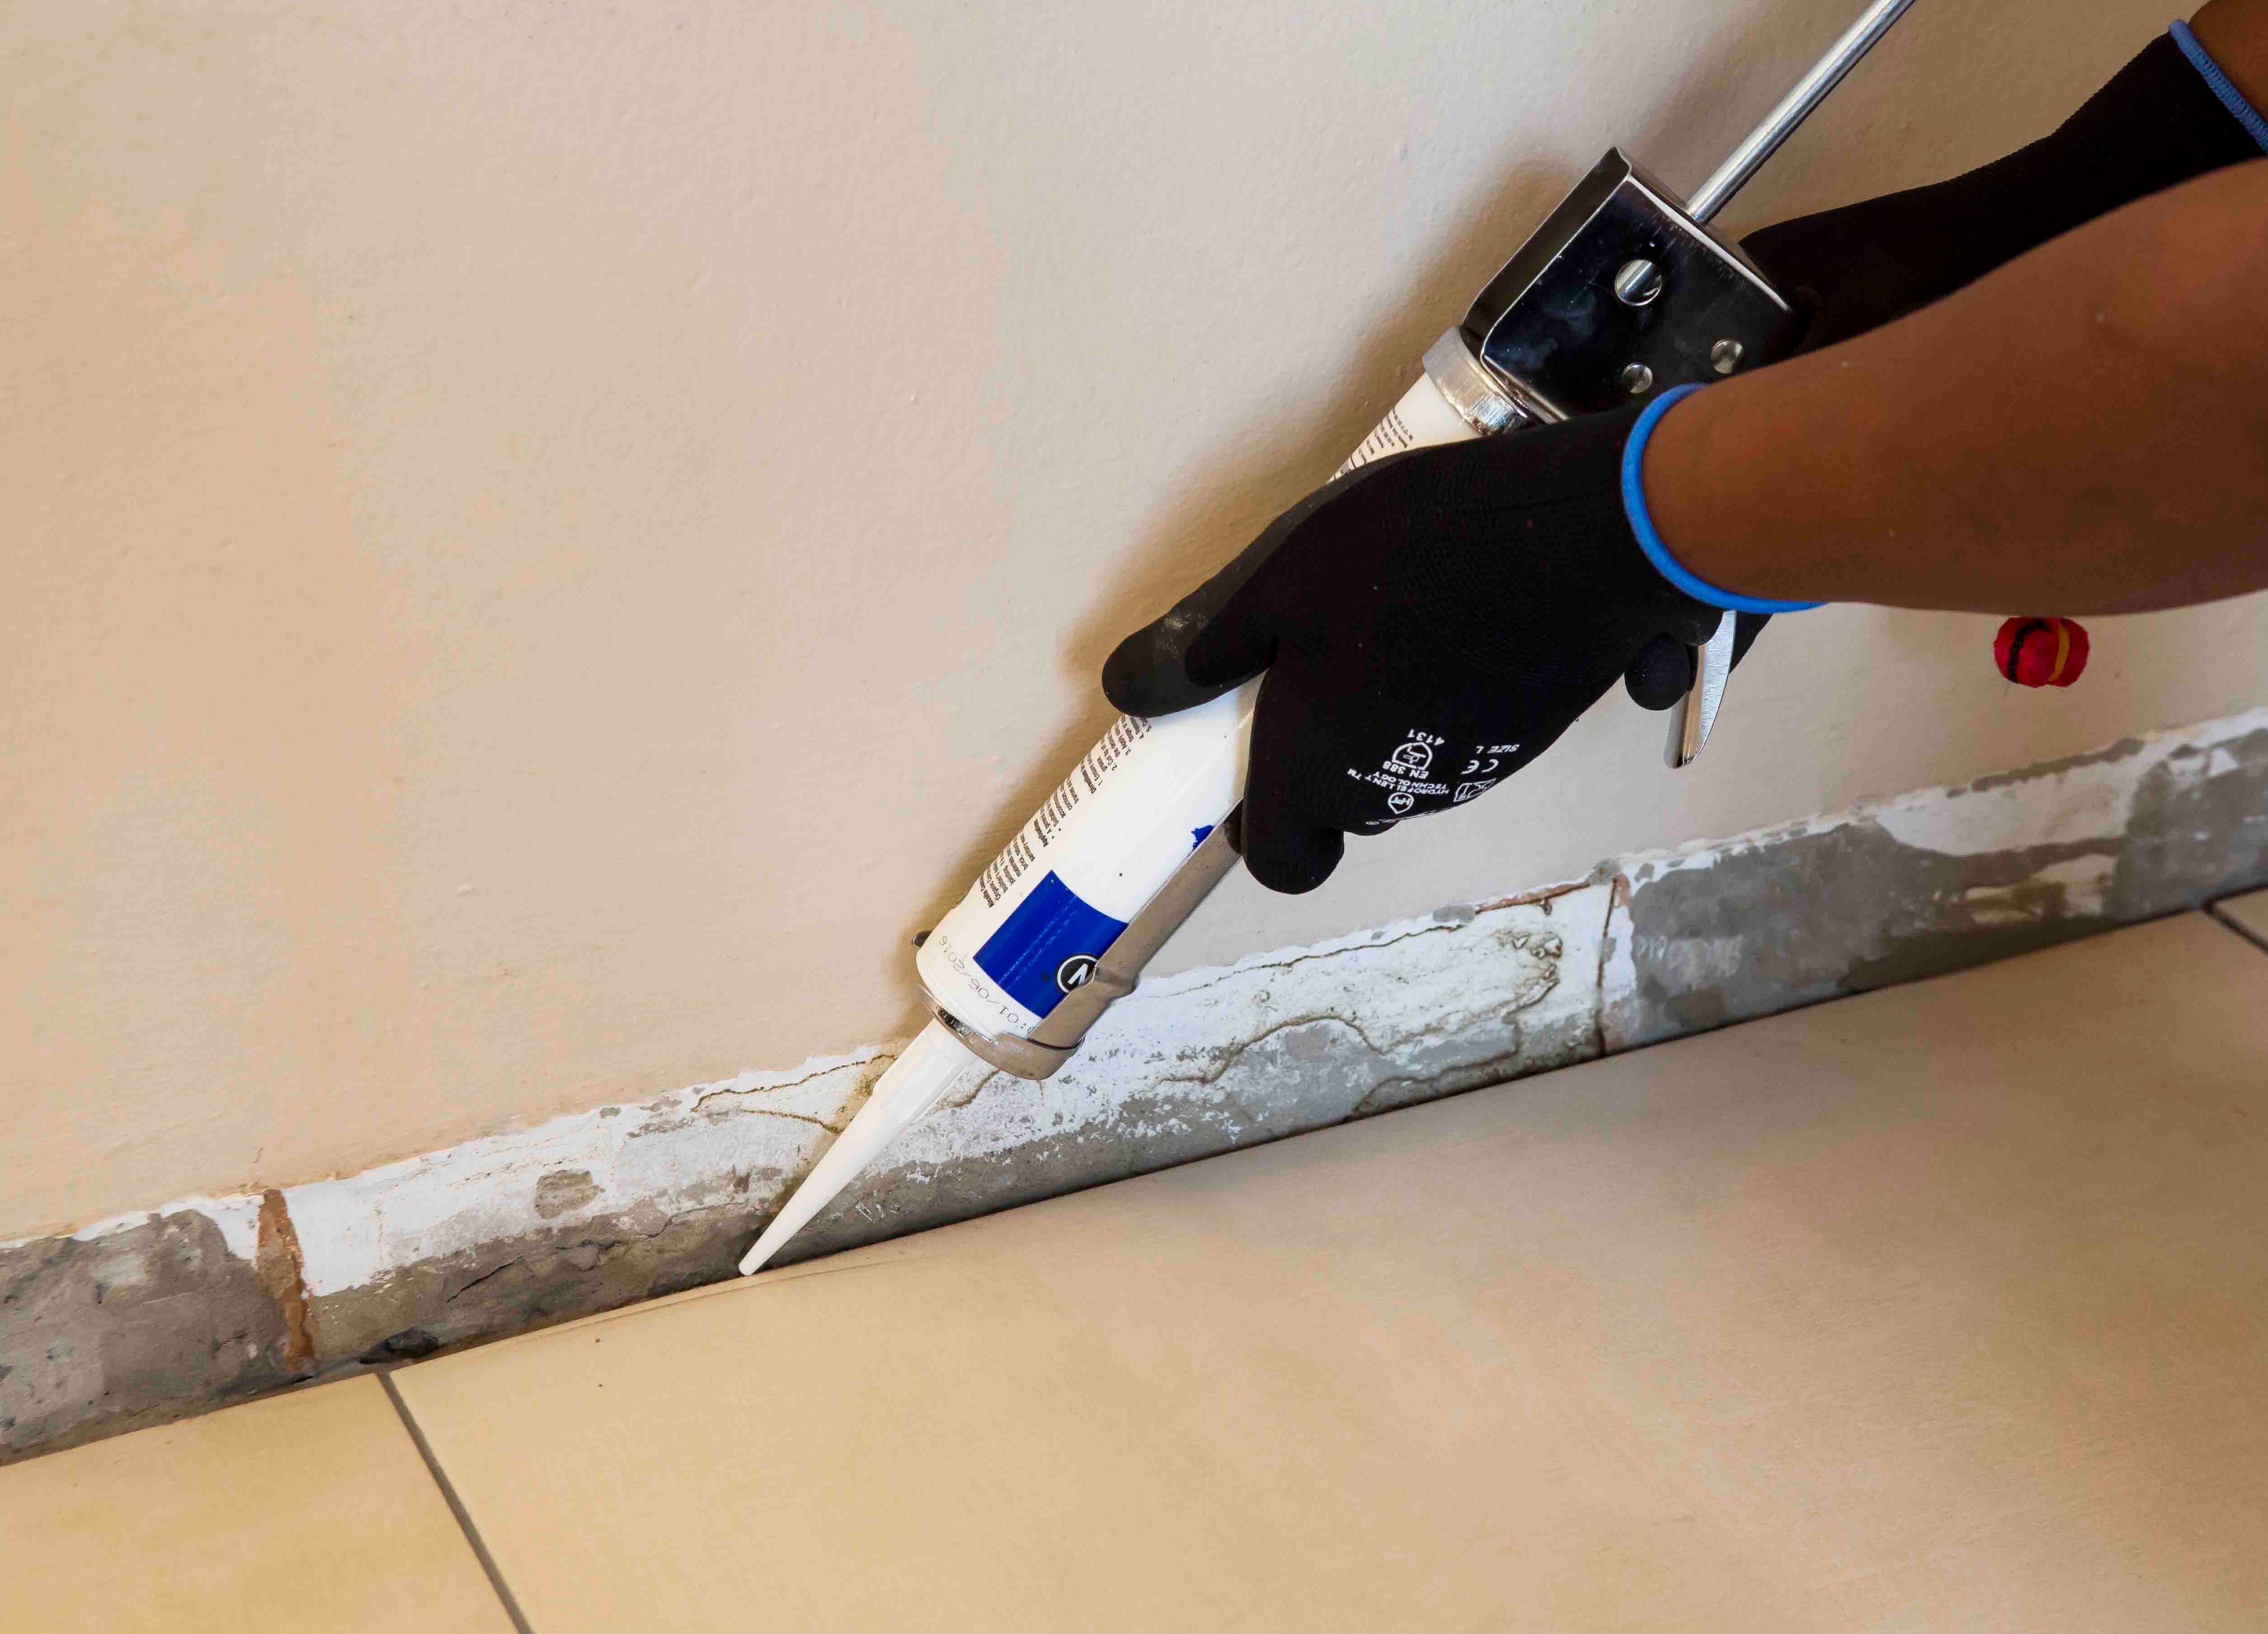
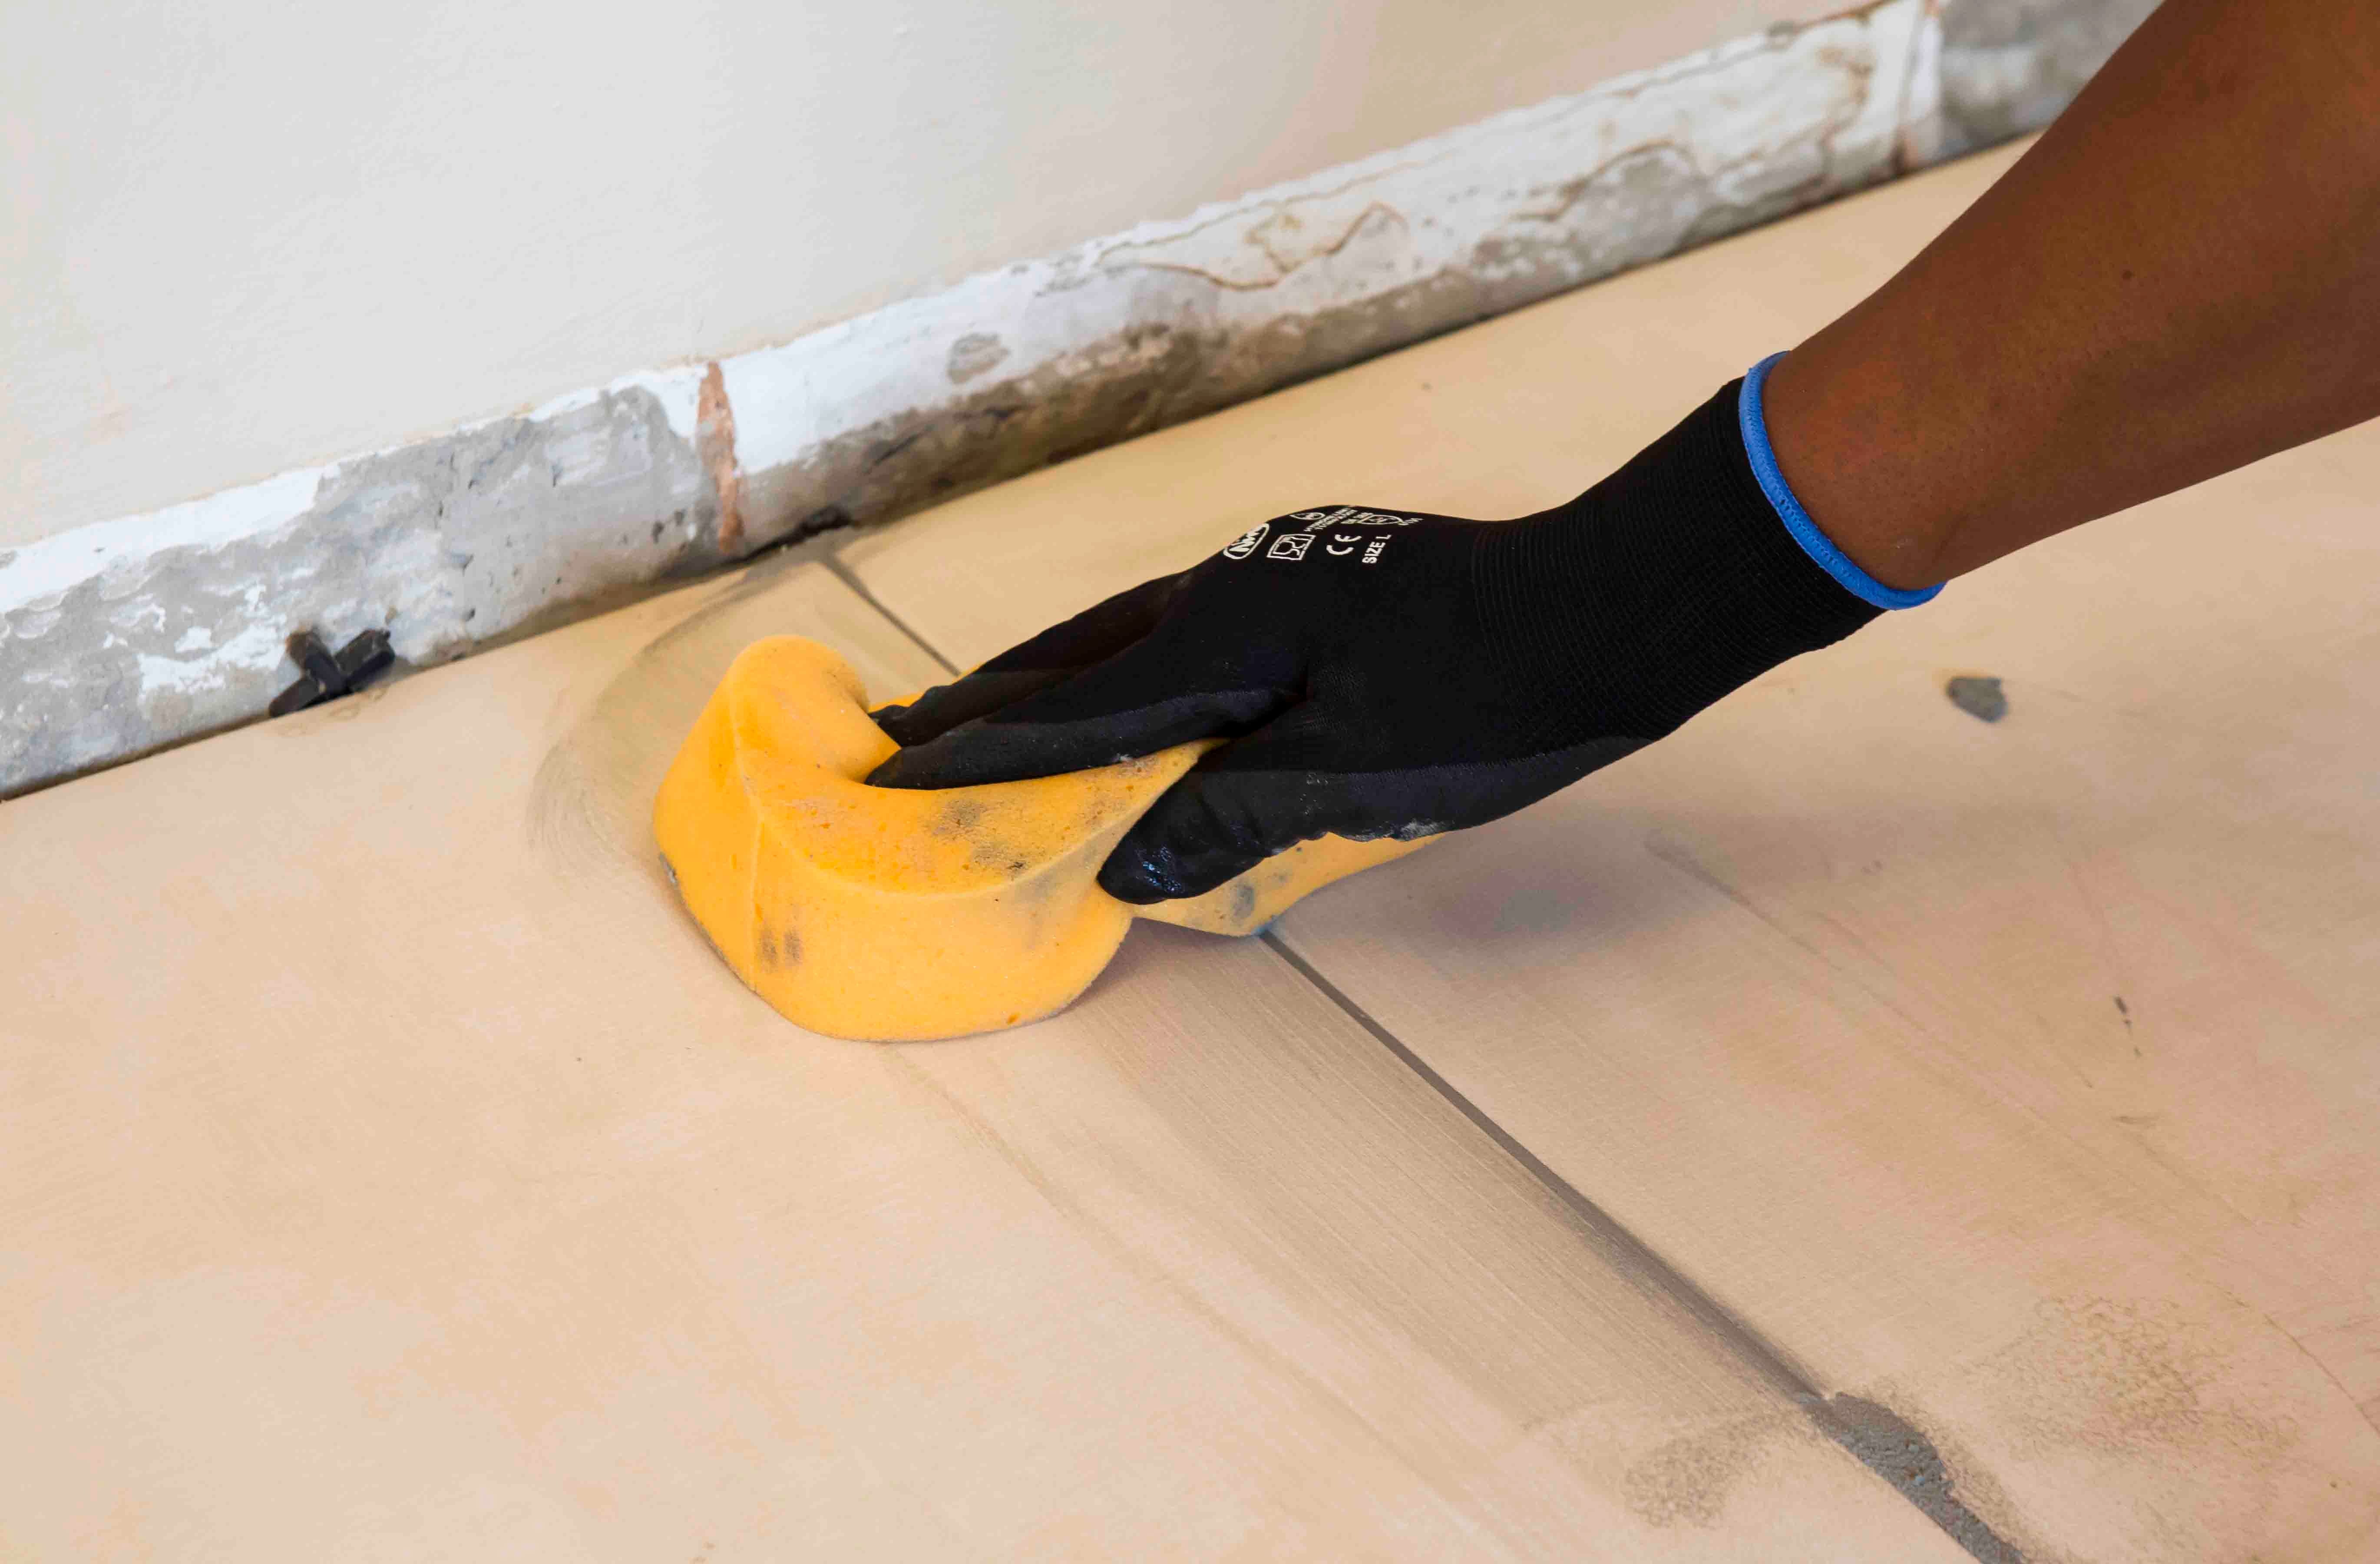
It is important to clean off excess grout from the face of the tiles with a damp grouting sponge before it hardens completely. Rinse the sponge frequently in clean water to get rid of the grout, but remember to use a damp, not wet, sponge. If the sponge is too wet during this phase the mix will become overhydrated and become soft and crumbly when cured. Subjecting the freshly applied grout to mopping and washing before it has cured/dried properly will also cause this problem. Wait for at least 24 hours.
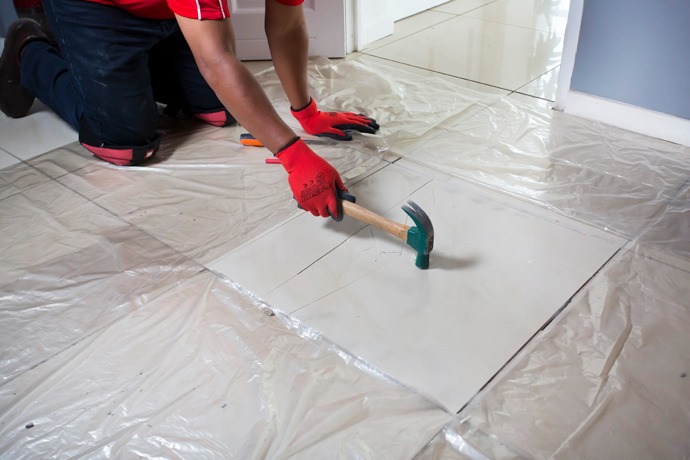
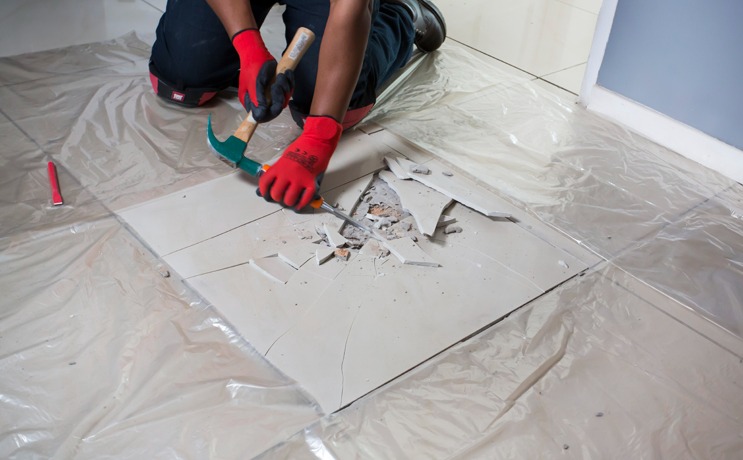
What can be done if the grout application failed?
The only way to rectify this problem is to scrape out the grout and to completely replace it – which can be done by using a grout rake or remover. Once the joints are clean, apply the correctly-mixed grout.
If you are refreshing your tile grout, we recommend using TAL Bond as an additive in the mix. This enhances the grout to make it more flexible, more impervious and easier to clean than standard mixed grout.
-
WHAT CAN I DO?
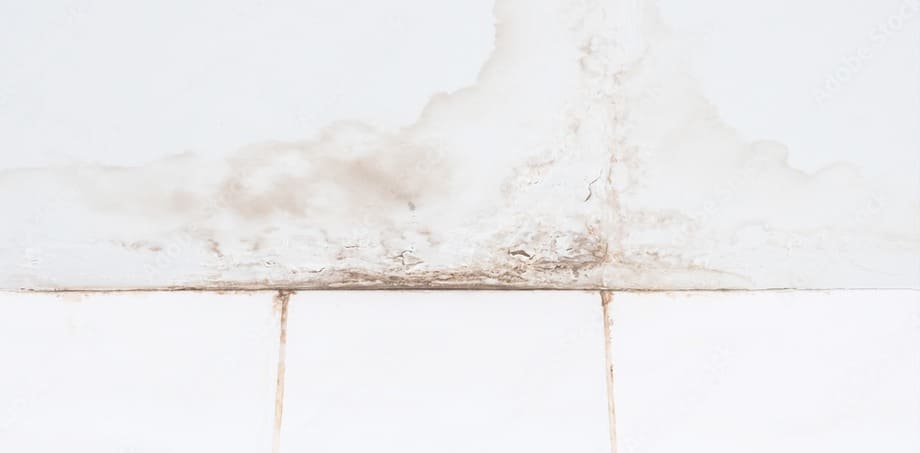
Attend to the water damage as soon as a problem is detected!
Water permeating through the grout and adhesive into the substrate can cause damp patches on adjacent walls or on the ceilings of rooms below the installation. There is also a risk of mould growth.
Follow these steps:1. Get a plumber in to determine if there is a leak in the pipe-work or taps:
- leakages must be repaired as soon as possible.
2. Consult a professional tiling contractor to determine if the problem is caused by:
- a lack of waterproofing
- failed waterproofing
- cracks in tile glaze
- cracked or soft grout
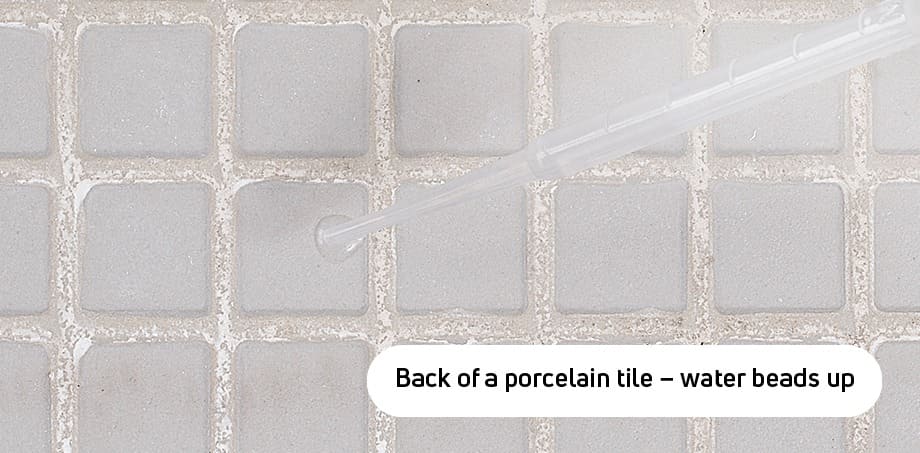
3. Should the wet area be tiled with porous tiles such as unglazed ceramics, or natural stones (travertine, slate, or marble), consider sealing the tiles with a suitable tile sealer.
4. Once the problems are rectified and the tiles are allowed to dry out, the dark shading will disappear.
- Porous tiles should be allowed to dry completely before being sealed.
- If you seal the tiles while they are still saturated with water, moisture could get trapped beneath the sealant, or prolong the drying-out process.
5. In extreme cases, especially if waterproofing has failed, the tiles will have to be removed and reinstalled. (See our article on How to waterproof a shower)
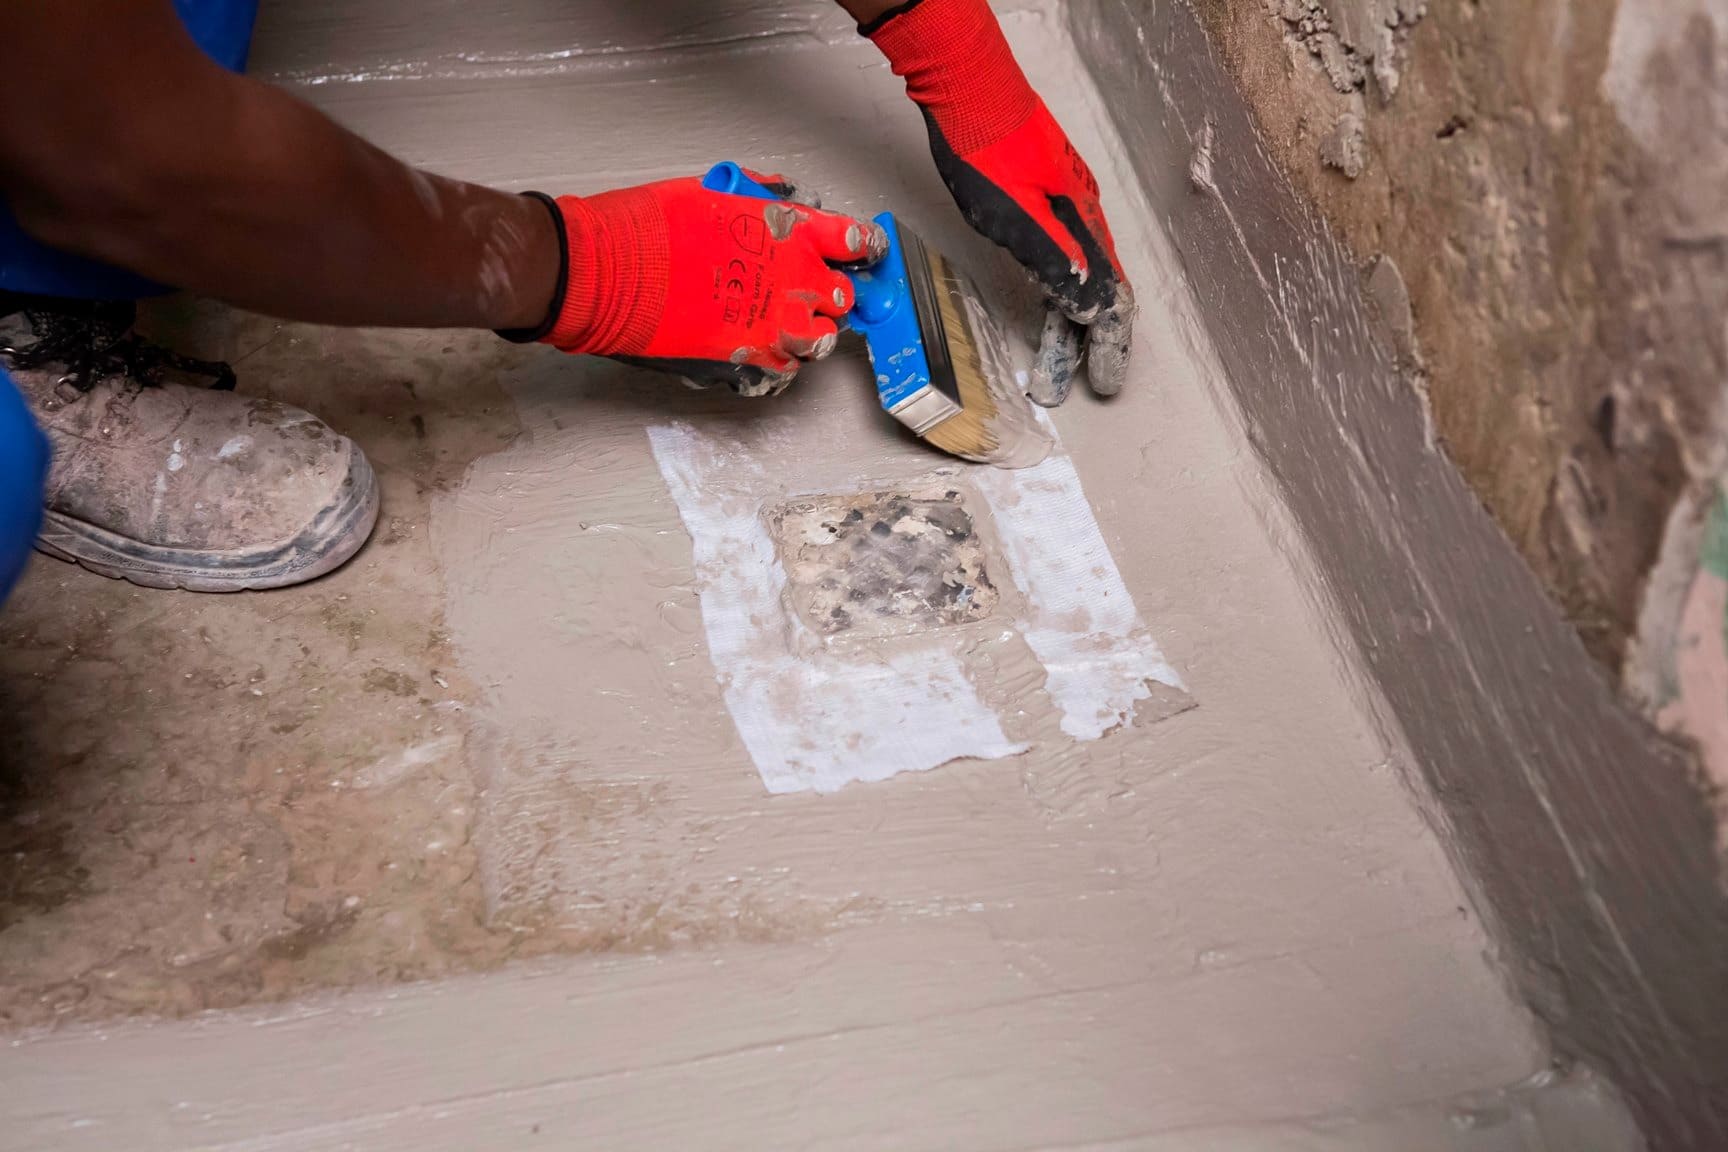
The waterproofing system needs to be applied to above the height of the shower rose and, where the wastes are flush with the floor, down into the shower waste.
Where necessary, use a grout squeegee to apply additional adhesive to fill in any voids in the grout joints.
Complete the waterproofing system by replacing the water in the grout mix with TAL Bond, a latex additive, as this further increases the water resistance and flexibility of the installation.
Get the job right the first time and avoid future headaches from water seeping through and damaging the walls and floors of your home. The additional cost and effort of properly waterproofing your shower is an investment in your property and will ensure a beautiful and functional bathroom for years to come.
For more information on multi-level waterproofing systems, contact a TAL Expert on 0860 000 TAL (825), email us or watch our how-to video on YouTube for step-by-step advice on how to waterproof a shower.
STEP 8
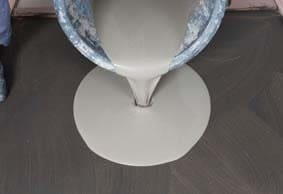
Roll the area using a TAL Spiked Roller to facilitate the release of any trapped air to produce a smooth surface, and to allow it to dry.
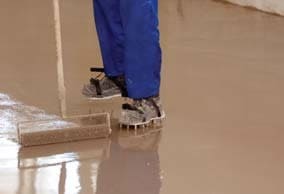
Allow the screed installation to dry for 24 hours before subjecting to foot traffic (or other trades) or installing floor coverings.
TAL MOSAICFIX is available in 20 kg and 5 kg bags from leading retail outlets.
Designed to be 100% compatible, using the TAL range of products ensures fully guaranteed multi-level tiling systems from a single source. TAL products are manufactured in South Africa to suit local climatic conditions.
If you are in any doubt, contact the TAL Technical Advisory Service on 0860 000 TAL (825), email [email protected]. Alternatively, employ the services of an experienced and skilled mosaic tiling contractor.
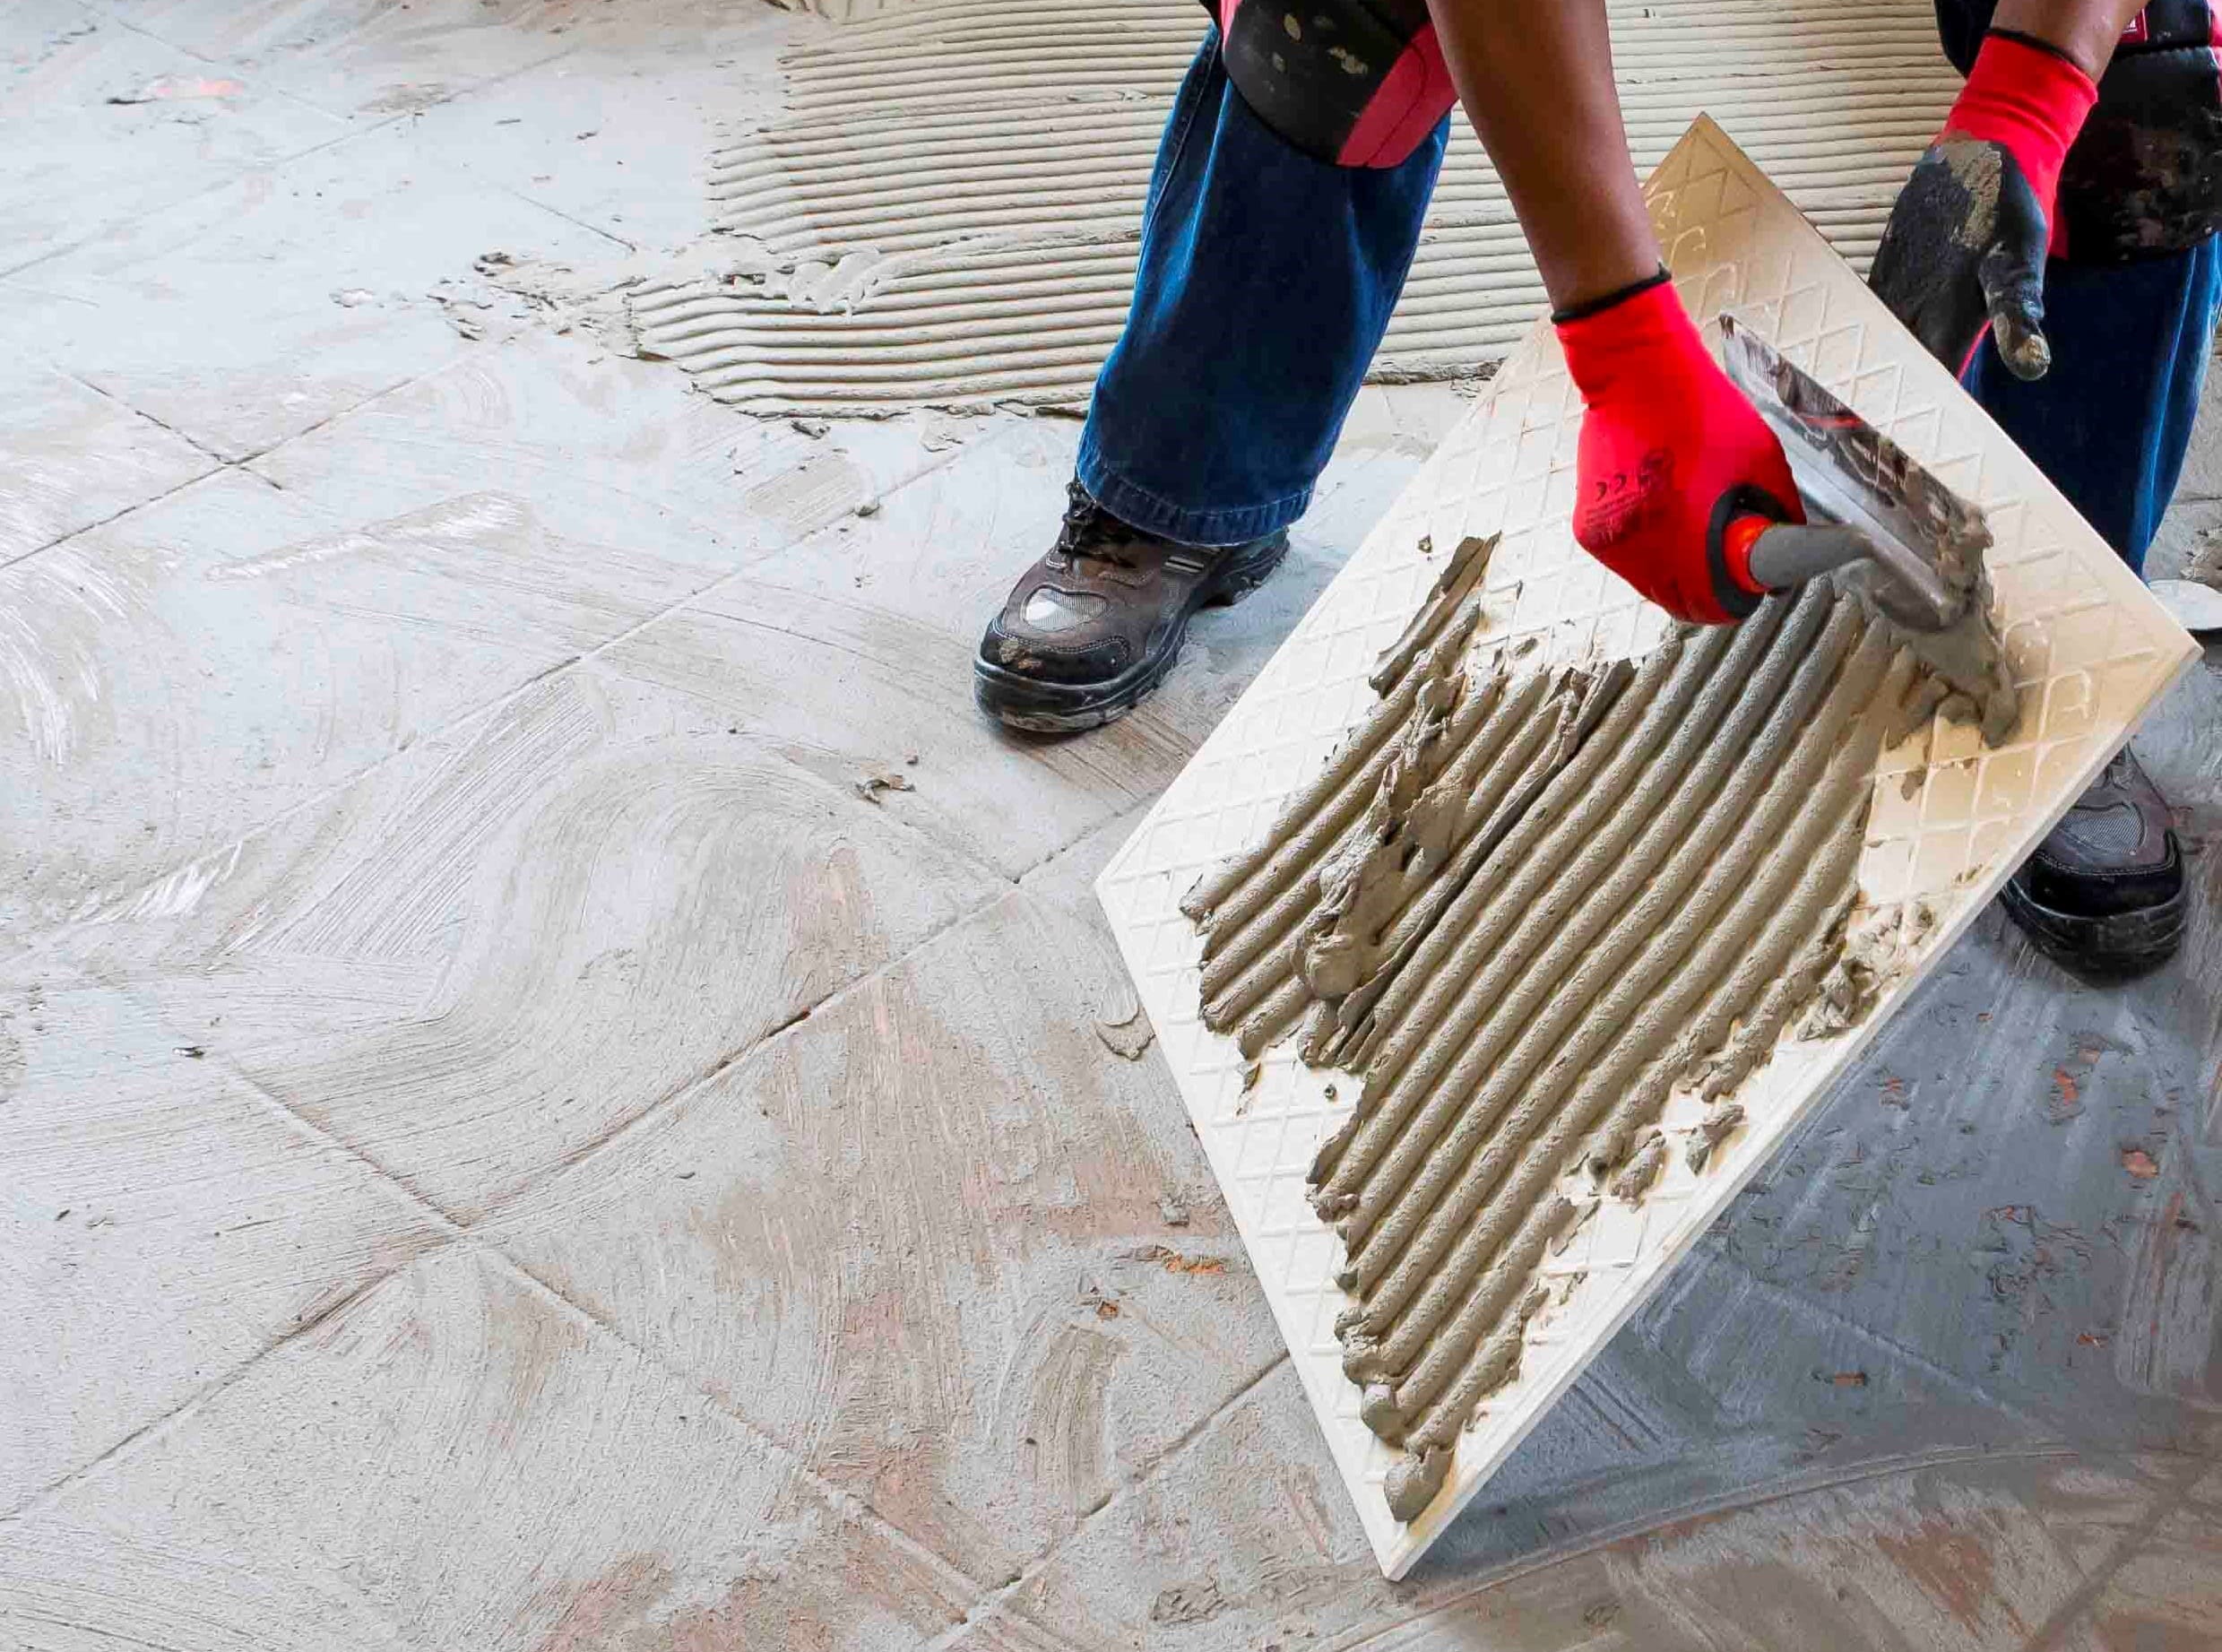
When replacing tiles, it is not always possible to apply the TALFIX directly to the floor, in which case apply the adhesive in a solid bed onto the back of the tile, ensuring complete coverage. Gently trace the notched side of a floor trowel through the adhesive to create ‘ridges’.
Adhesive system
When tiling onto existing tiles, it is important to only use a quick- or rapid-setting adhesive, as the existing tiles will present a dense, impervious surface, and standard-setting adhesives will take longer to dry. Too early trafficking of newly-installed tiles before the adhesive has set sufficiently can result in hollow-sounding or loose tiles.
Use TAL Tile-To-Tile quick-setting adhesive for tiling onto interior surface beds. When tiling onto suspended slabs and for external installations mix the TAL Tile-To-Tile with TAL Bond, replacing the water in the mix. Alternatively, TAL Bond Powder can be added to the adhesive mixing water.
Ensure that there is a solid bed of adhesive at least 6 mm thick beneath each tile.
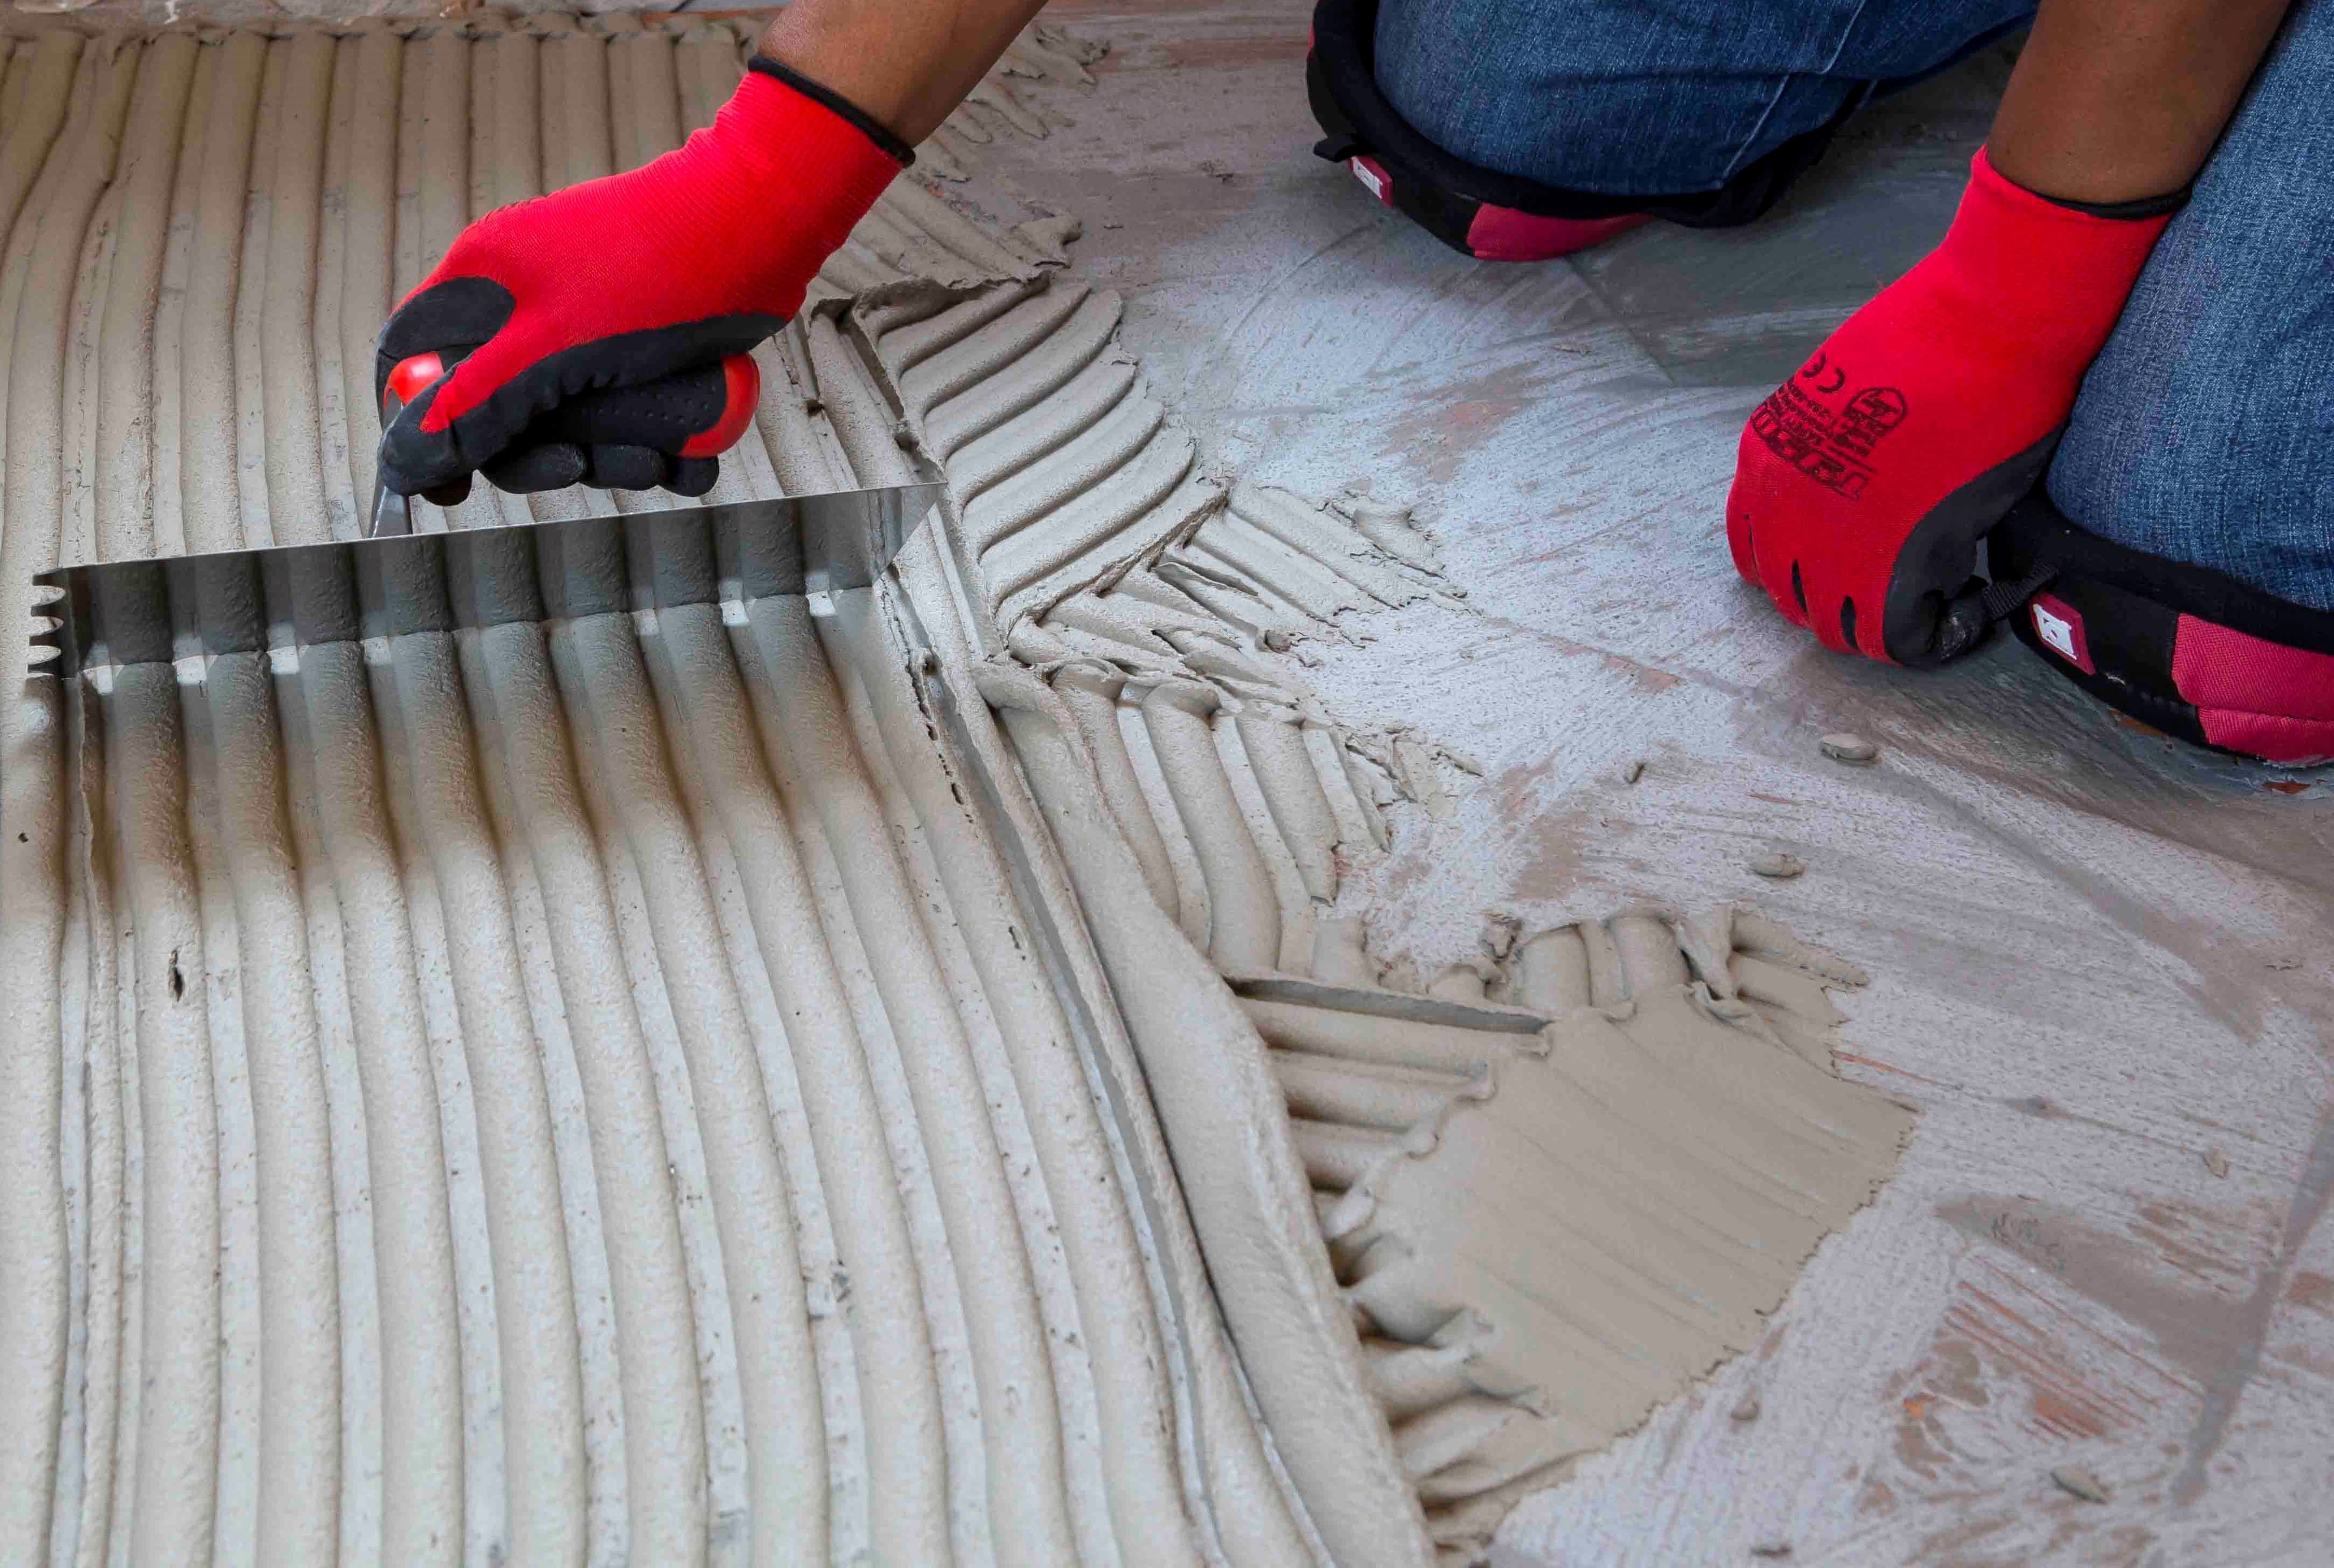
Back buttering with a thin coat of adhesive may also be required when using large-format tiles to ensure full contact with the adhesive bed.
Grouting
Grouting should not be carried out until the adhesive has set sufficiently to prevent the tile installation from being disturbed during the grouting operation (always refer to the adhesive packaging for setting times). When using TAL TAL Tile-To-Tile, allow a minimum of six hours before grouting.
For interior surface beds, use TAL Wall & Floor Grout for filling tile joints up to 8 mm wide. TAL Quarry Grout can be used in wider joints up to 25 mm wide. On suspended slabs and for external installations, replace the water in the grout mix with TAL Bond, or add TAL Bond Powder to the grout mixing water.
Particular care must be taken to clean the grout off the tile face before it hardens completely. This is especially important when an additive such as TAL Bond or TAL Bond Powder has been used. A tile sample should be tested beforehand to ensure that no grout is absorbed through the glaze or into the tile body, thereby staining the tiles permanently.
Movement joints
The lack of movement joints in tile installations is a major cause of tile failure. When tiling over existing tiles, the existing structural and movement joints must be maintained in the new tile installation. The movement joints should be at least 5 mm wide and extend through the adhesive and both tile layers.