
How to revive your grout in 9 easy steps
Update 2018-10-08
Click here to download TAL’s Guide to revive your grout in 9 easy steps.
If you have started to notice cracks in your grout or if it is looking a little grubby and no amount of scrubbing helps, it may be time to replace the grout. We know what you’re thinking – easier said than done. With the right advice, product and tools, replacing grout doesn’t have to turn into your next big project – armed with these nine steps on how to revive grout – any experienced DIYer can tackle this project with ease.
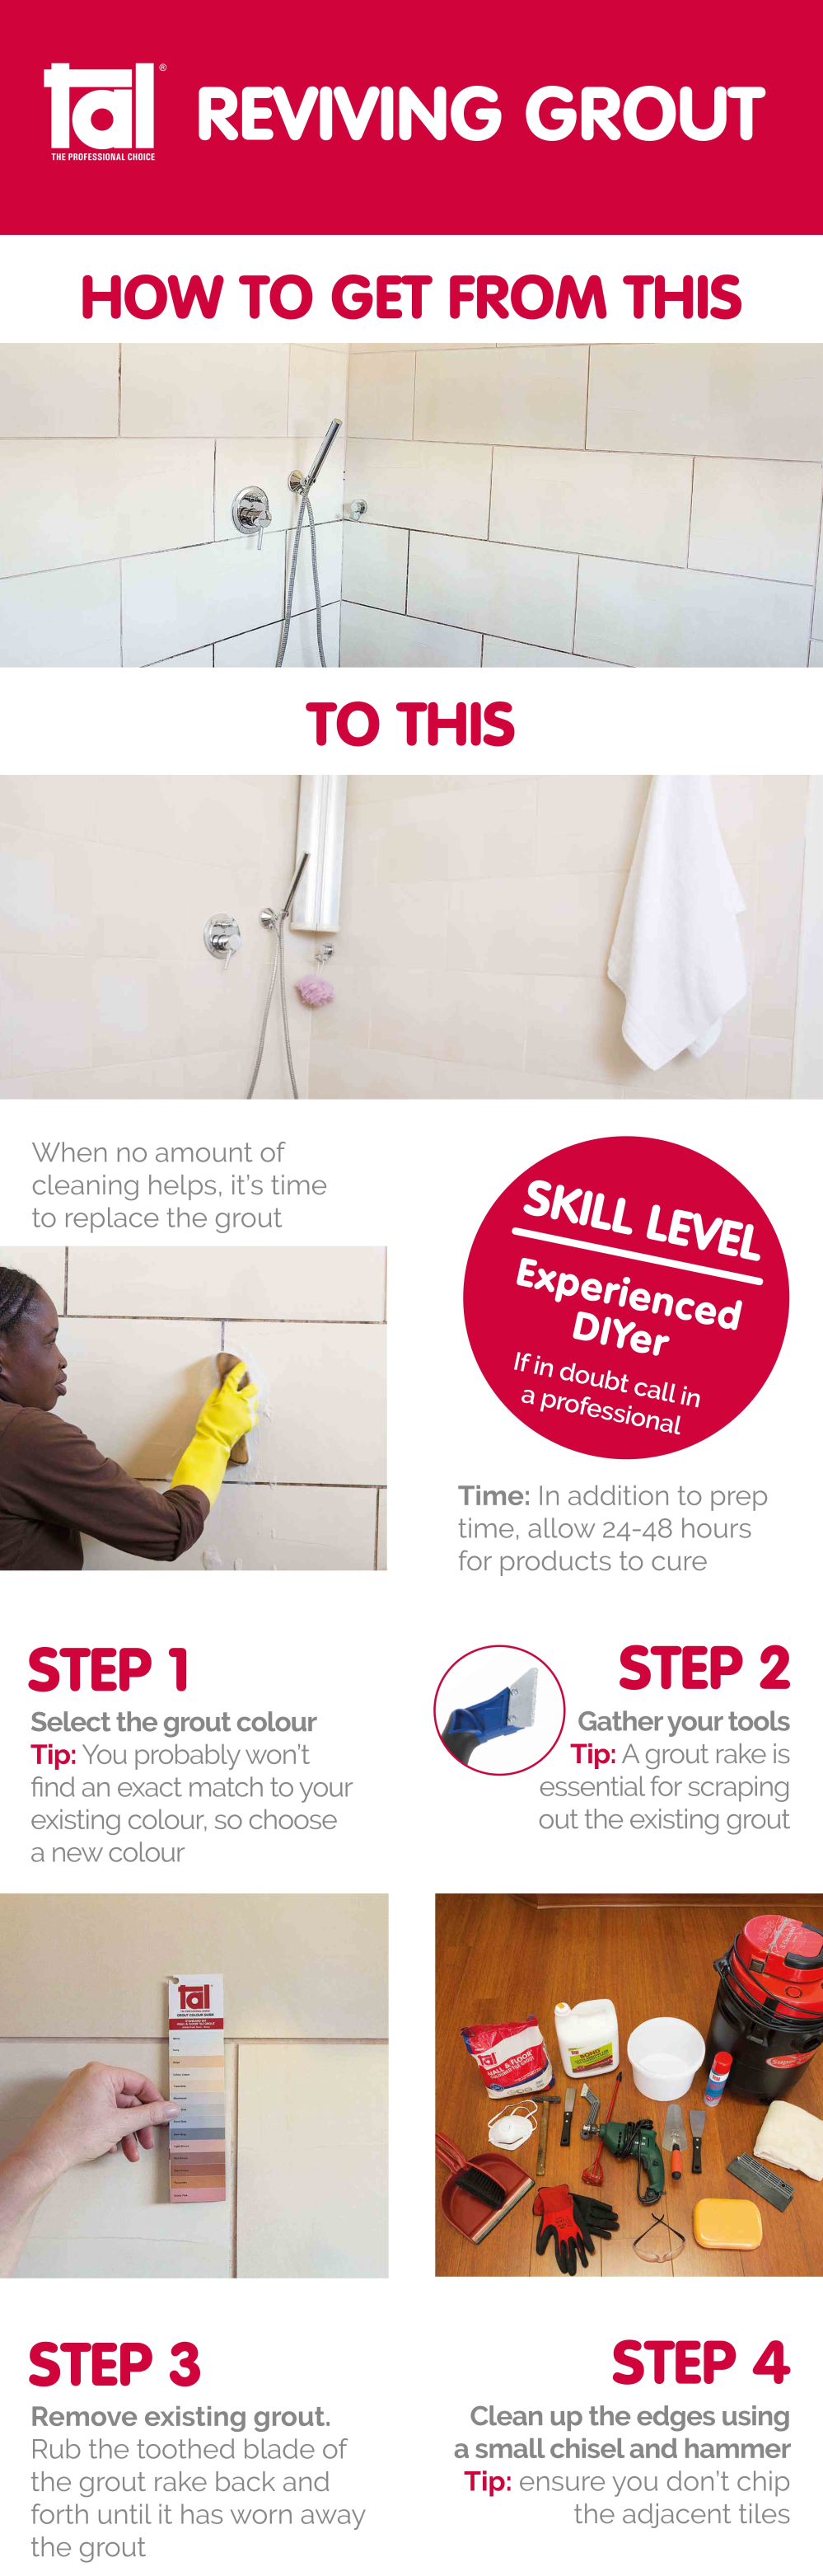
Step 1: Select the grout colour
You more than likely will not find a match to your existing colour, so rather choose a new grout colour and really give the room a facelift. This blog post will help guide you in the right direction: Tips on selecting the correct grout colour.
Step 2: Gather your tools
You will need an assortment of tiling tool for this project but a grout rake is essential for scraping out the existing grout. Click here to access TAL’s full range of essential tiling tools.
Step 3: Remove existing grout
Rub the toothed blade of the grout rake back and forth, along the tile joint, until it has worn away the existing grout. Take care not to damage the tiles.
Step 4: Clean up the edges using a small chisel and hammer
Gently chip out any remaining grout from around the tile. When carrying out this step, take care not to damage/chip the adjacent tiles.
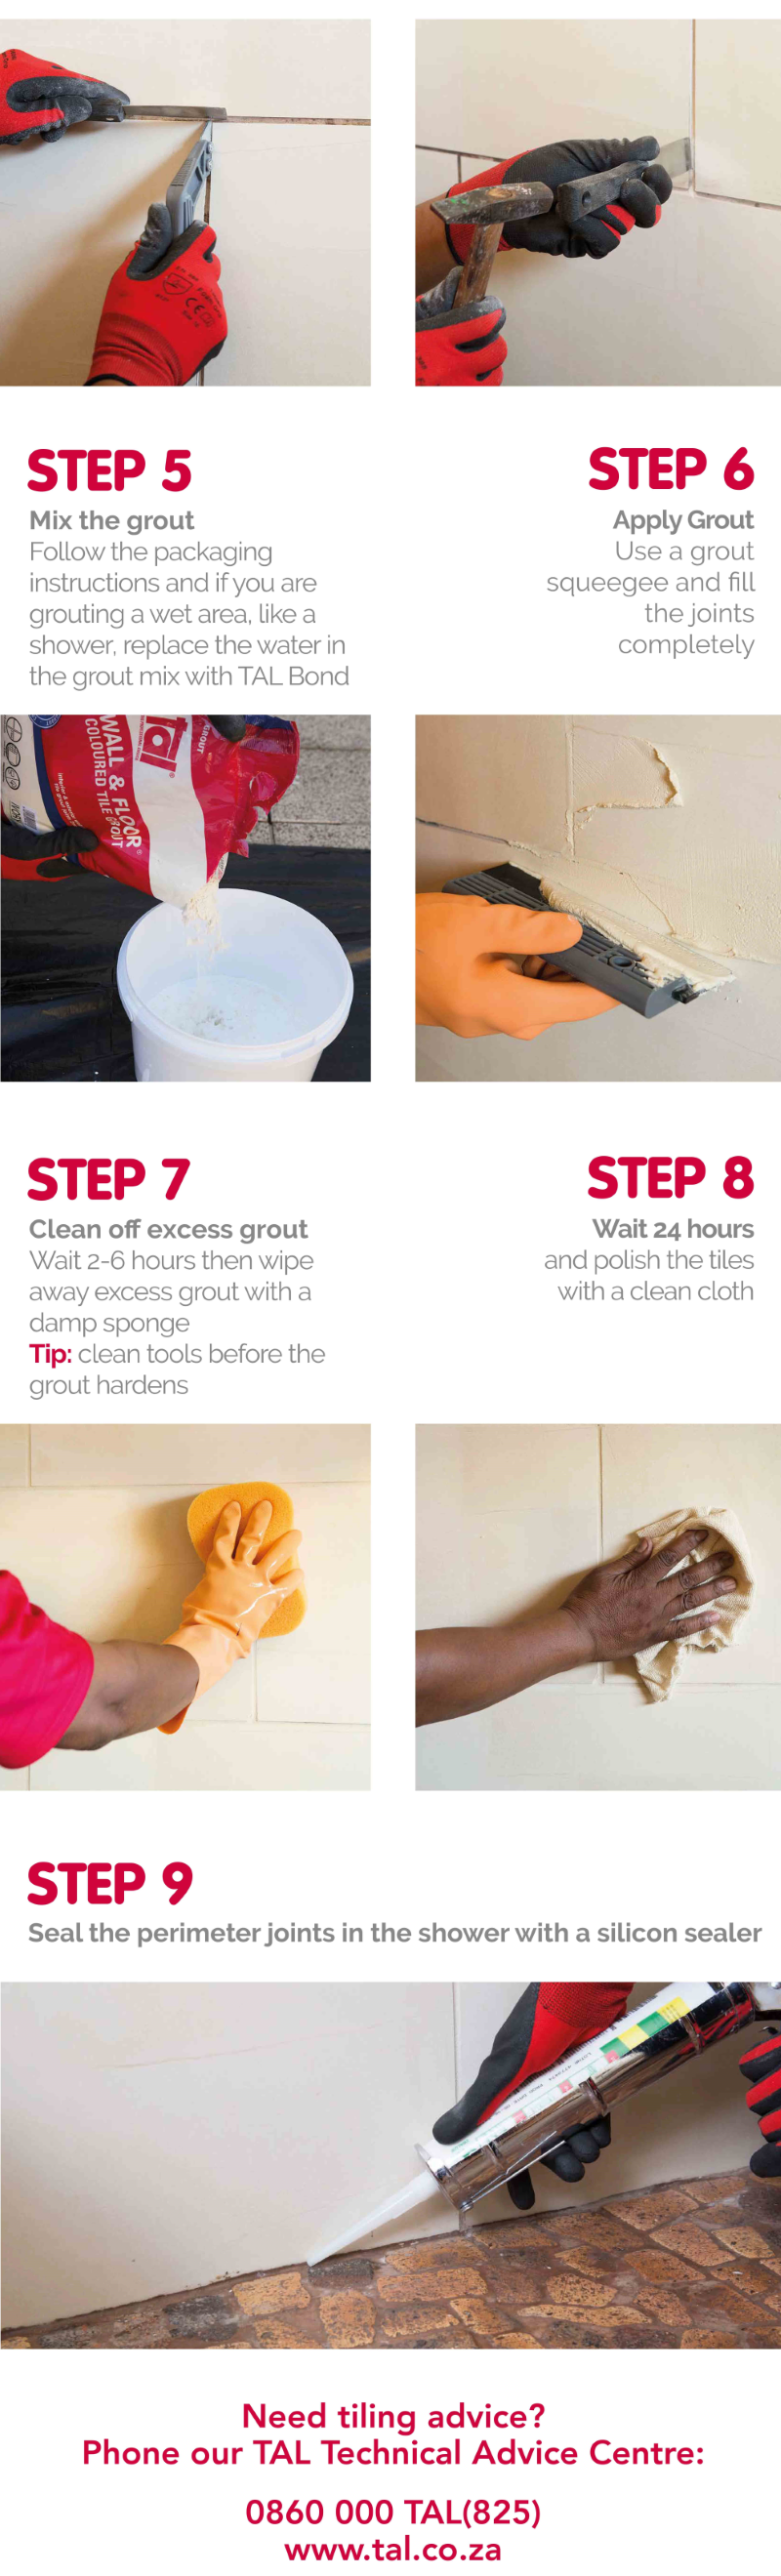
Step 5: Mix the grout
Follow the packaging instructions on the bag and if you are grouting a wet area (such as a shower or patio floor), replace the water in the grout mix with TAL Bond - a modified latex-based additive that enhances the bond strength, flexibility and water resistance of the grout.
Step 6: Apply grout
For this step, make use of a grout squeegee for easy application of the grout and be sure to fill the tile joints completely.
Step 7: Clean off excess grout
Wait for 2 – 6 hours, then use a damp (not wet) sponge with rounded corners to clean off the excess grout. The rounded corners prevent the grout from being removed from the tile joint while you clean. Remember to clean your tools before the grout hardens.
Step 8: Wait 24 hours before cleaning
After 24 hours, polish the tiles with a clean cloth to remove any grout haze and to restore their shine.
Step 9: Seal perimeter joints
If you are re-grouting a wet area, such as a shower, you would need to seal the perimeter joints of the shower using a silicon sealer.
This video, brought to you by TAL, will walk you through the step-by-step process of removing and replacing grout - specifically in a shower.
[Back]
blog comments powered by Disqus


