Tips for tiling tricky areas - part 2
By Tal | 2013-09-04
Tiling around a pipe can be simple. Follow these handy steps and the pipe will be surrounded by a professional tile installation in no time.
Steps to follow when the cut tile can be slid around the pipe:
- Position a tile to the left of the pipe and align it with the tile underneath it, leaving a gap below and to the side for tile spacers and grout.
- Mark the tile twice with two horizontal lines to indicate the top and bottom of the pipe.
- Place the tile below the bottom of the pipe. Leave room for a tile spacer below and between it and the neighbouring tile.
- Mark the tile with two vertical marks in line with the left and right of the pipe.
- Mark the top of the tile to indicate which way is the right way up.
- Use a set-square to join the lines to form a square which will be the diameter of the pipe.
- Draw a circle in the square which will indicate the circumference of the pipe. Use a cut-off piece of the pipe or a compass to draw the circle.
- Make the circle approximately 5mm bigger as this will leave a gap between the pipe and the tile that will be filled with joint sealant.
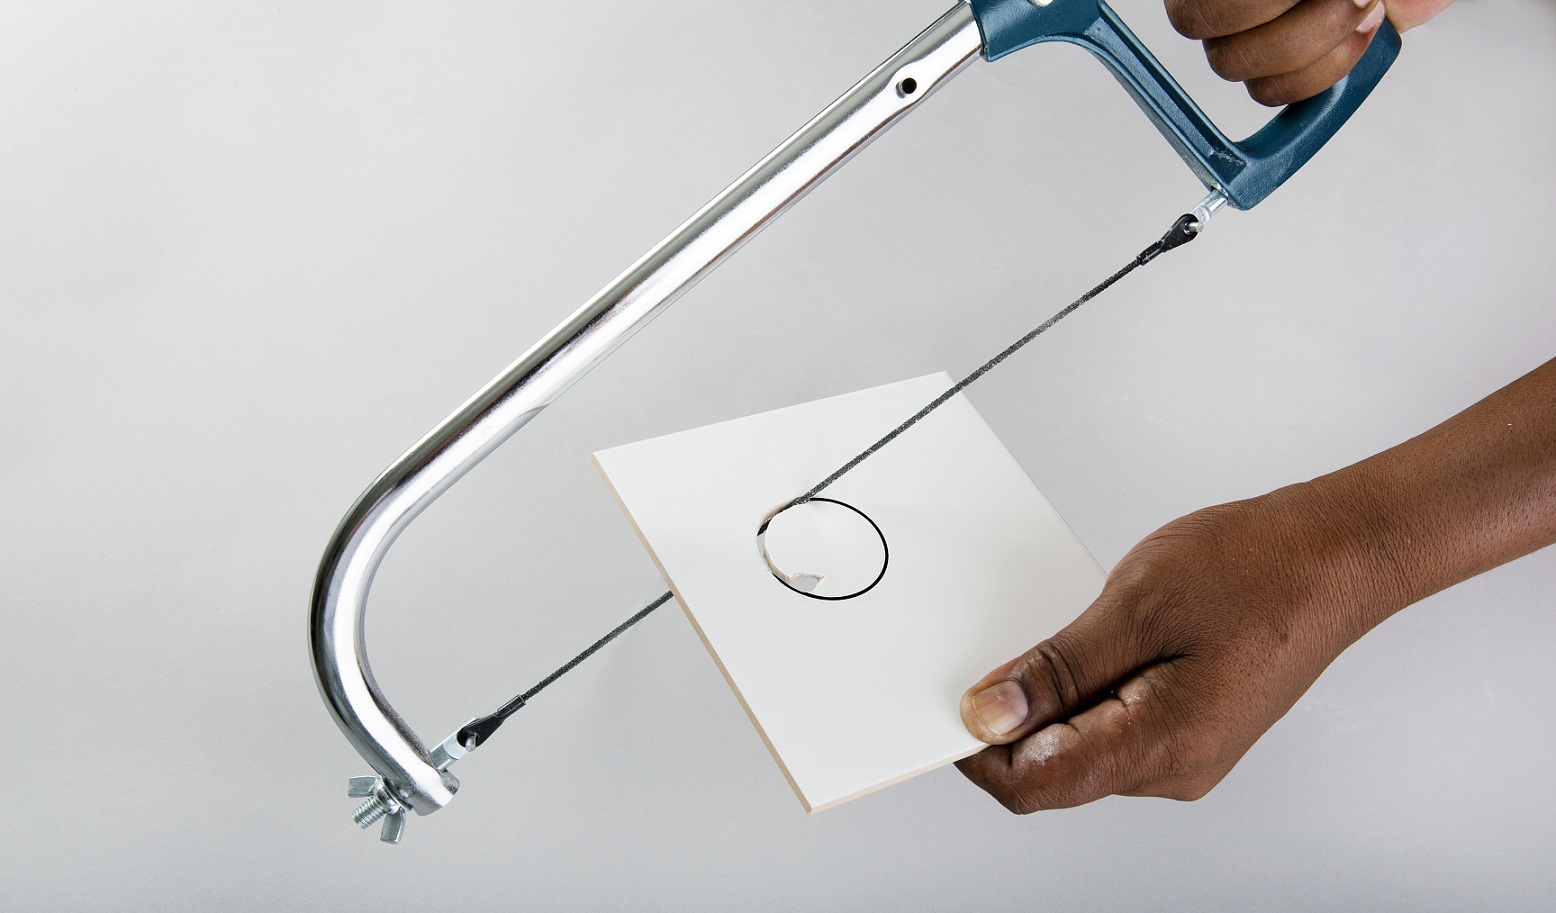
- Cut out the circle by drilling a hole through the tile. Insert a Tilemate rod saw blade through the circle. Attach the saw blade to the hacksaw and cut the required hole.

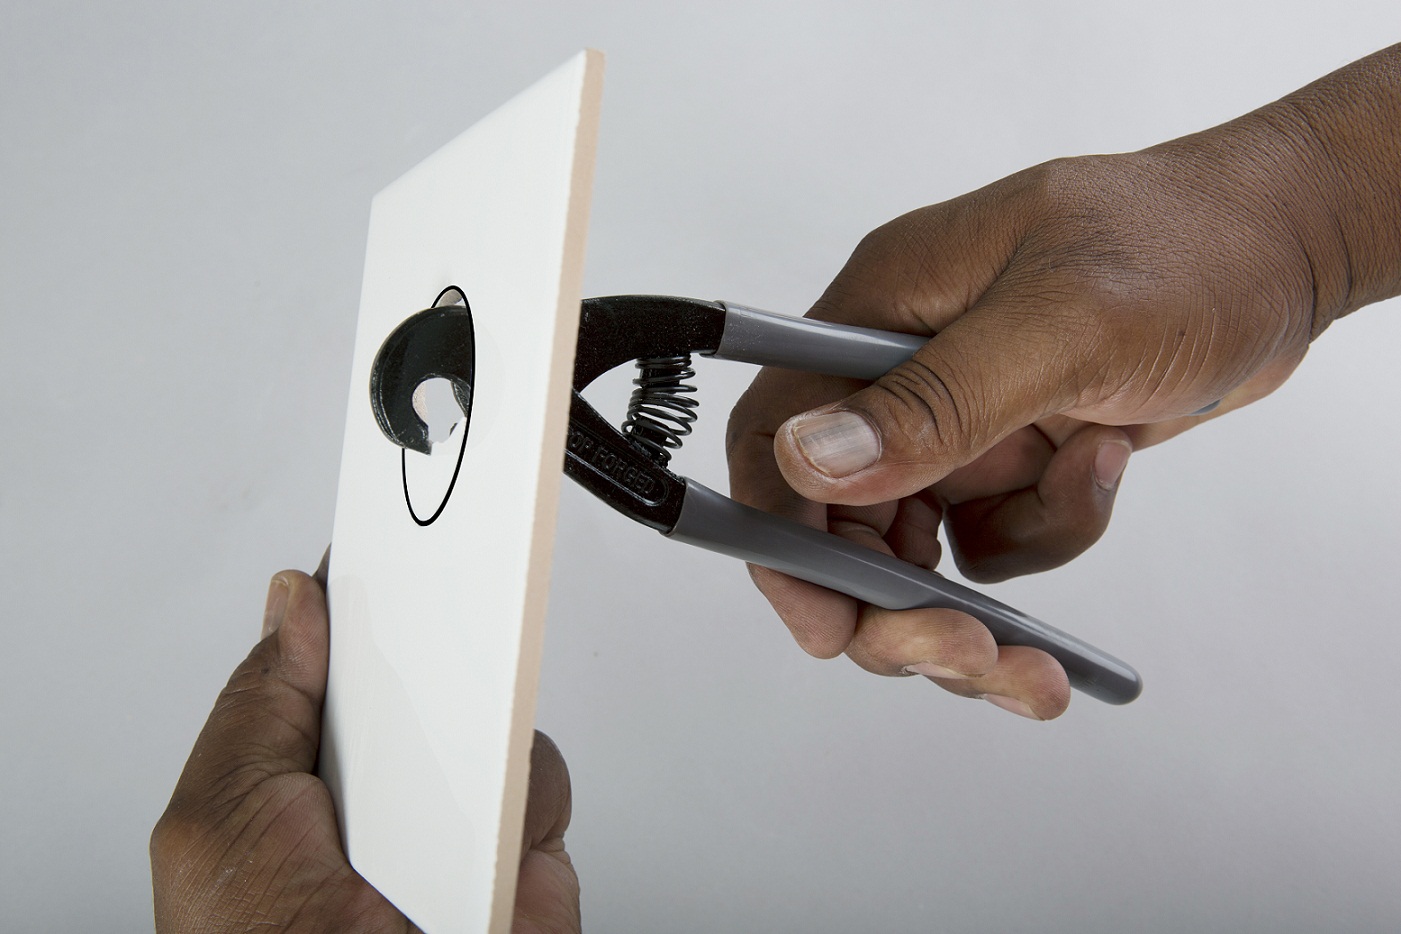
- Use a Tilemate parrot nipper and a Tilemate tile grate to trim and neaten the inside of the circle until you have the correct circumference. Note that this option is only suitable when the tile can be slid over the pipe.

- Use the correct adhesive for the tile selected and leave a 5mm joint between the tiles and the pipe.
- Fill this joint with a good quality flexible joint sealant, such as TAL Goldstar Sealmaster 1000 polyurethane joint sealant.
Steps to follow when the tile can’t be slipped over the pipe (for example, if the pipe is already installed and attached to the toilet):
- If the tile can’t be slipped over the pipe, cut the tile horizontally into two pieces, with the cut going straight through the centre of the circle. Use a Tilemate tile saw and a Tilemate parrot nipper to remove excess tile, and a Tilemate tile grate to perfect the circular cut.
- Use the correct adhesive for the tile selected and leave a 5mm joint between the tiles and the pipe.
- Fill this joint with a good quality flexible joint sealant, such as TAL Goldstar Sealmaster 1000 polyurethane joint sealant.
For more helpful tips visit the DIY tab on TAL’s website.
[Back]
blog comments powered by Disqus

