
How to tile a curved wall with mosaics
Tiling a curved wall with conventional or large format tiles can be labour intensive and time consuming. The solution is to use mosaics.
Curved walls are often found in the bathroom, entrance hall, stoep or braai area and inside the swimming pool. Tiling a curved wall with conventional or large format tiles will require the tiles to be cut numerous times, which is time consuming and impractical, and also results in a lot of wastage.
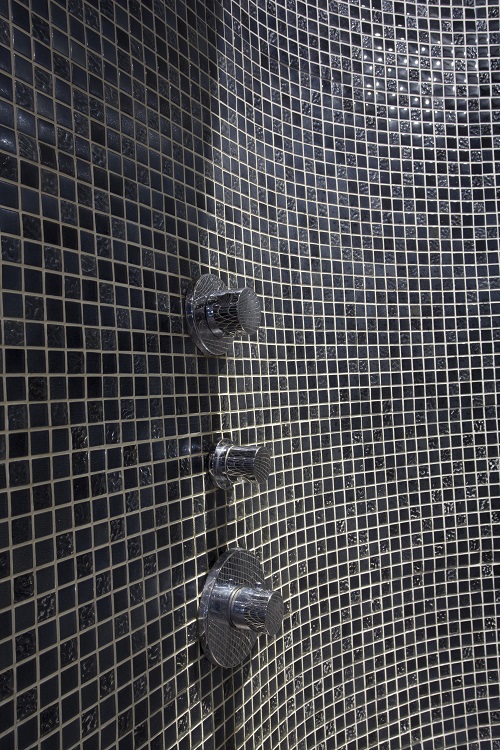
Mosaic sheets, which are made up of little tessera on a mesh-backing or paper face, can easily follow the curvature of the wall, making them the ideal solution to tile a curved wall efficiently. Use the same method of tiling, regardless of whether the wall curves inwards or outwards.
Step-by-step guide for fixing mesh-backed mosaics:
- Make sure the surface is free from dust, clean, dry and suitable for tiling.
- Inspect the ceramic mosaic sheets to make sure there aren’t any broken or damaged tiles and ensure that you have sufficient sheets to replace any broken pieces. Remove damaged tiles and replace them before installation.
- Tile from the bottom corner of the curved wall.
-
 Start in the corner section. Apply the adhesive, such as TAL Mosaicfix , with a Tilemate mosaic trowel to the surface in a solid bed of 3 - 6mm. TAL Mosaicfix is suitable for ceramic mosaic tiles only. Contact TAL for the recommended adhesive system for other types of mosaics.
 - Firmly bed the mosaic sheet into the adhesive and allow the adhesive to squeeze out through the joints between the mosaics to form the grout. The bonding and grouting of mosaics must be done in one operation to ensure a sound installation.
- Make sure the sheet is straight and aligns to the side of the adjacent wall or floor at the bottom. A wooden beating block or rubber grouting float can be used to create a flat surface. Use a straightedge ruler to make sure the grout lines within the mosaic sheet remain straight. Leave a ‘grout joint’ between the mosaic sheets, the same width as the joints between the mosaics on the sheets. Tilemate tile spacers will help to keep mosaics an equal distance apart from each other.
- Continue to tile around the bottom of the wall. Take your time to make sure that the mosaic lines are straight.
- If necessary, fill any voids or depressions in the joints with extra adhesive.
- Lay tiles in a row across the wall until you reach the other end. Cut the mosaic tiles to size to fit the edge of the wall.
- Measure the tiles to determine where they require cutting.
- Cut the mosaic tiles with a grinder.
- Place a strip of masking tape on the tiles and draw a line on the tape with a pencil and ruler. The tape will prevent you from marking the tile itself.
- Use a Tilemate grout float instead of your hand to hold the sheet steady.
- Place a sheet of cardboard beneath the sheet. Wear safety glasses.
- Make the first cut along the line with the grinder and maintain a consistent speed and pressure.
- The grinder will form a groove along the line. Continue cutting into the groove slowly to maintain consistency and precision, resulting in a smooth cut.
- The tiles will be hot from grinding, so allow them to cool down before laying them.
- Use the same method to cut the mosaics that will be laid at the top where the wall meets the ceiling.
-
 Provide movement joints in all horizontal and vertical corners and in large tiled areas approximately five metres apart. Rake out joints and leave ungrouted. Fill with a joint sealant such as TAL Goldstar Sealmaster 1000 polyurethane flexible joint sealant.
- Leave the adhesive to dry. Gently clean any excess adhesive off the face of the mosaics before it hardens. Remove the tile spacers before the adhesive is completely set.
TAL products and Tilemate tiling tools are available from major tile merchant and home improvement retailers.
[Back]
blog comments powered by Disqus


